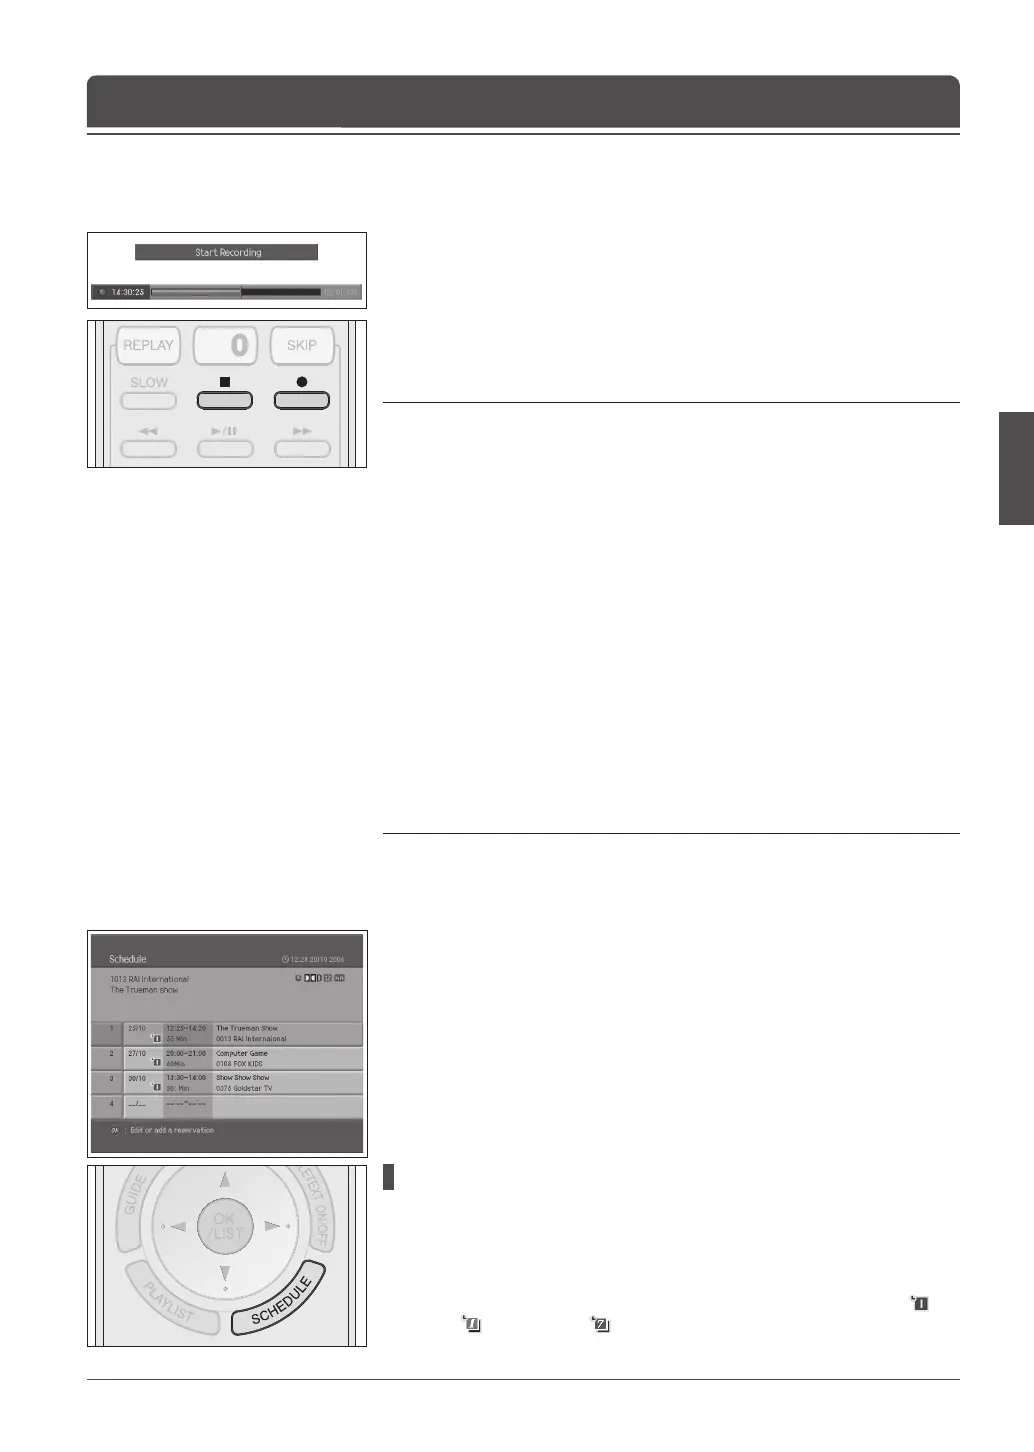
1 Press the RECORD (●) button on the remote control to record the current
programme instantly.
2 You can change the recording duration time by pressing the RECORD (●)
button repeatedly.
30 min > 1 hour > 2 hour > 3 hour > 3 hour+
3 Press the STOP (■) button to stop recording.
Notes:
1. You can record the digital TV or radio programmes only. The analog channels
and external A/V inputs can’t be recorded.
2. During recording, you can’t change channels or playback the recorded
programme.
3. During recording, the standby indicator on the front of your TV is blinking in
amber.
4. During recording or playing the recorded programmes, you can access only to
the Picture, Sound and a part of Feature in menus.
5. While TSR(Time Shifted Recording), you cannot perform the instant recording
or the scheduled recording.
6. You can reset the recording time while recording.
7. Ensure that there is enough free space before recording, because if the free
space on the hard disk drive is insuf cient, recording will stop. Recording 1
hour of programme may require up to 3GB of free space of hard disk space.
The space for recording 1 hour of programme may be different depending on
the programme recorded.
8. The default recording time is set to 2 hours.
9. If you press the STANDBY button during recording, the con rm message will
appear.
Instant Recording
Chapter 11 >> Recording
You can schedule to record the programmes on EPG information or scheduled
recording.
For detailed information on recording using the EPG, refer to chapter 5.
You can view the Schedule list by selecting Menu > Recording > Schedule or
pressing the SCHEDULE button.
1 Press the SCHEDULE button.
The Schedule appears.
Adding a Reservation
1 Select a blank space and press the OK button to add the new reservation
schedule.
2 Change Channel No. and Time using the NUMBER(0-9) buttons.
3 Change Repeat mode using the ◄/► button. The options are Once ( ),
Daily ( ) and Weekly ( ).
4 Change Lock mode using the ◄/► button.
Scheduled Recording
 Loading...