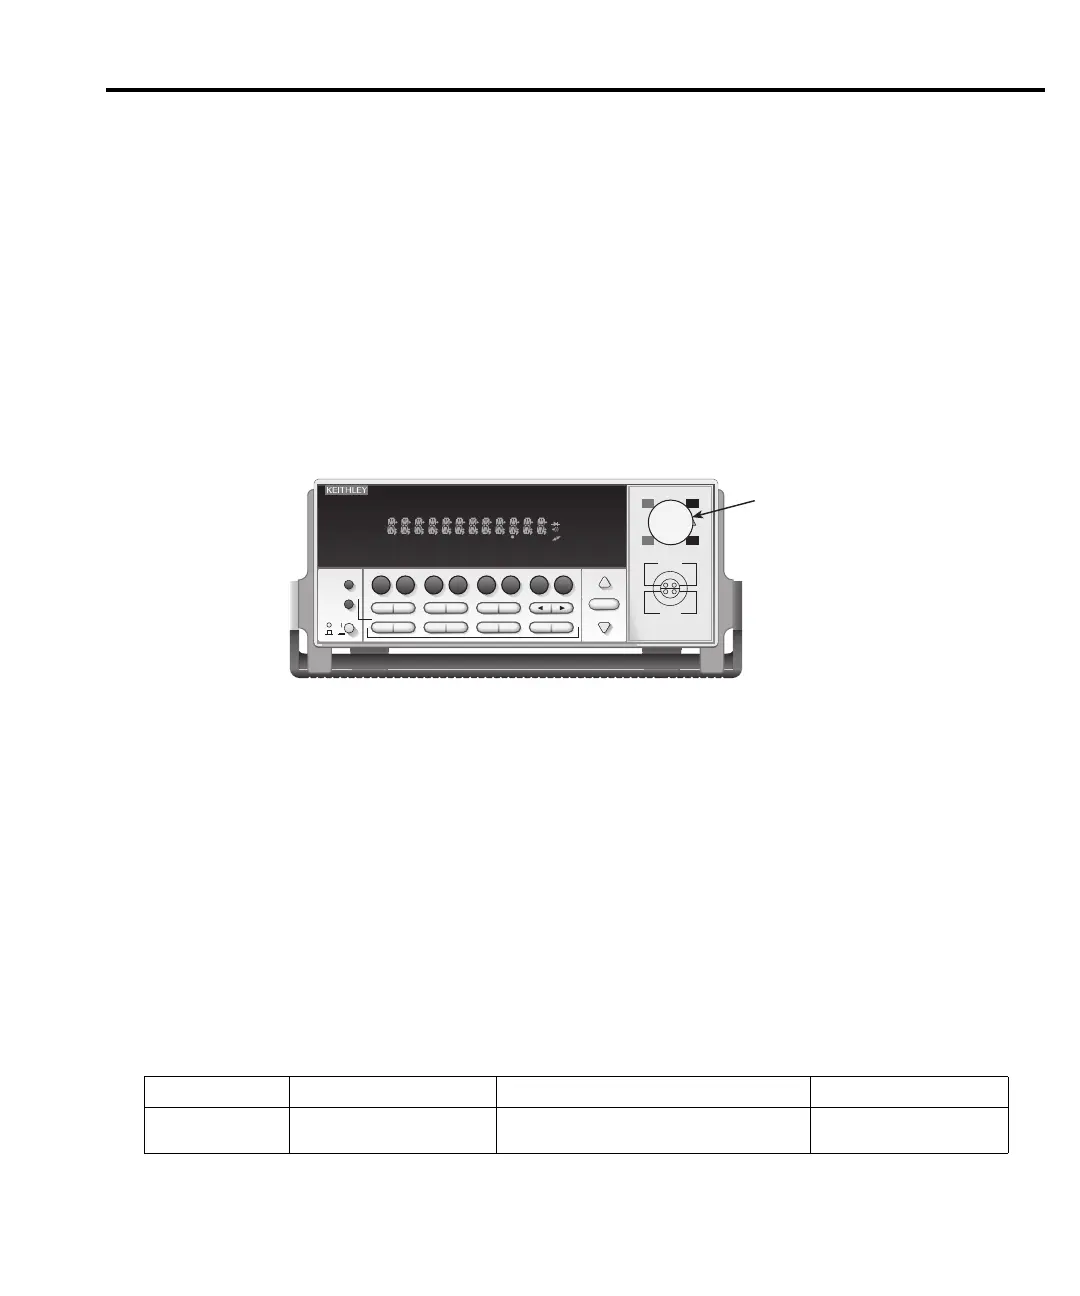
Short and open calibration
1. Connect the Model 2188 low-thermal shorting plug to the instrument input jack, as
shown in Figure 2-4. Wait at least three minutes before proceeding to allow for thermal
equilibrium.
2. Send the following command:
:CAL:PROT:DC:STEP1
3. After the Model 2182 completes this step, remove the low-thermal short, and send this
command:
:CAL:PROT:DC:STEP2
Figure 2-4
Low thermal short connections for factory calibration
DC volts calibration
After front panel short and open steps, do the following:
1. Connect the calibrator to the Model 2182 as shown in Figure 2-3. Allow two minutes for
thermal equilibrium.
2. Perform the calibration steps summarized in Table 2-8. For each step:
• Set the calibrator to the indicated voltage, and make sure the unit is in operate. (Use
the recommended voltage if possible.)
• Allow the signal voltage to settle.
• Send the indicated programming command. (Change the voltage parameter if you
are using a different calibration voltage.)
• Wait until the Model 2182 completes each step before continuing.
Table 2-8
DC voltage remote calibration programming steps
Calibration step Calibrator voltage Calibration command* Parameter range
+10V +10.000000V :CAL:PROT:DC:STEP3 10 9 to 11
-10V -10.000000V :CAL:PROT:DC:STEP4 –10 -9 to -11
* Change parameter accordingly if using a different calibrator voltage.
2182 NANOVOLTMETER
RANGE
!
CHANNEL 1
SHIFT
LOCAL
POWER
RANGE
SHIFT
CH1REM
TALK
LSTN
SRQ
STAT
REL FILT
4W
BUFFER
MATH
REAR
SCAN
TIMER
STEP CH2 CH3 CH4 CH5 CH6 CH7 CH8 CH9 CH10
HOLD TRIG FAST MED SLOW AUTO ERR
AUTO
HI
LO
CHANNEL 2
HI
LO
120V MAX
12V MAX
CAT I
350V PEAK ANY
TERMINAL TO CHASSIS
EXIT ENTER
DIGITS RATE
ON/OFFVALUE
TRIG
EX TRIG
STORE
RECALL
DCV1
V
1/V2
MX+B
%
V
1
-V
2
DCV2
ACAL
FILT REL
TEMP
1
TEMP
2
TYPE
A
OUT
TCOUPL
DELAY
HOLD
RS232
GPIB
STEP SCAN
CAL TEST
OUTPUT
SAVE RESTR
CONFIG HALT
BUFFER
SETUP
LIMITS
2188 Low
Thermal Short
L
SYNC
Calibration 2-15
 Loading...