2-16 Calibration
DC current calibration
After the 1MΩ resistance point has been calibrated, follow these steps for DC current
calibration:
1. Connect the calibrator to the AMPS and INPUT LO terminals of the Model 2700 as
shown in Figure 2-3.
2. Perform the calibration steps listed in Table 2-10. For each step:
• Set the calibrator to the indicated current, and make sure the unit is in operate.
(Use the recommended current if possible.)
• Send the indicated programming command. (Change the current parameter if you
are using a different calibration current.)
• Wait until the Model 2700 completes each step before continuing.
NOTE If you are performing DC-only calibration, proceed to “Programming calibration
dates.”
AC voltage calibration
Follow these steps for AC voltage calibration:
1. Connect the calibrator to the Model 2700 INPUT HI and LO terminals as shown in
Figure 2-4.
2. Perform the calibration steps summarized in Table 2-11. For each step:
• Set the calibrator to the indicated voltage and frequency, and make sure the unit is
in operate. (You must use the stated voltage and frequency.)
• Send the indicated programming command.
• Wait until the Model 2700 completes each step before continuing.
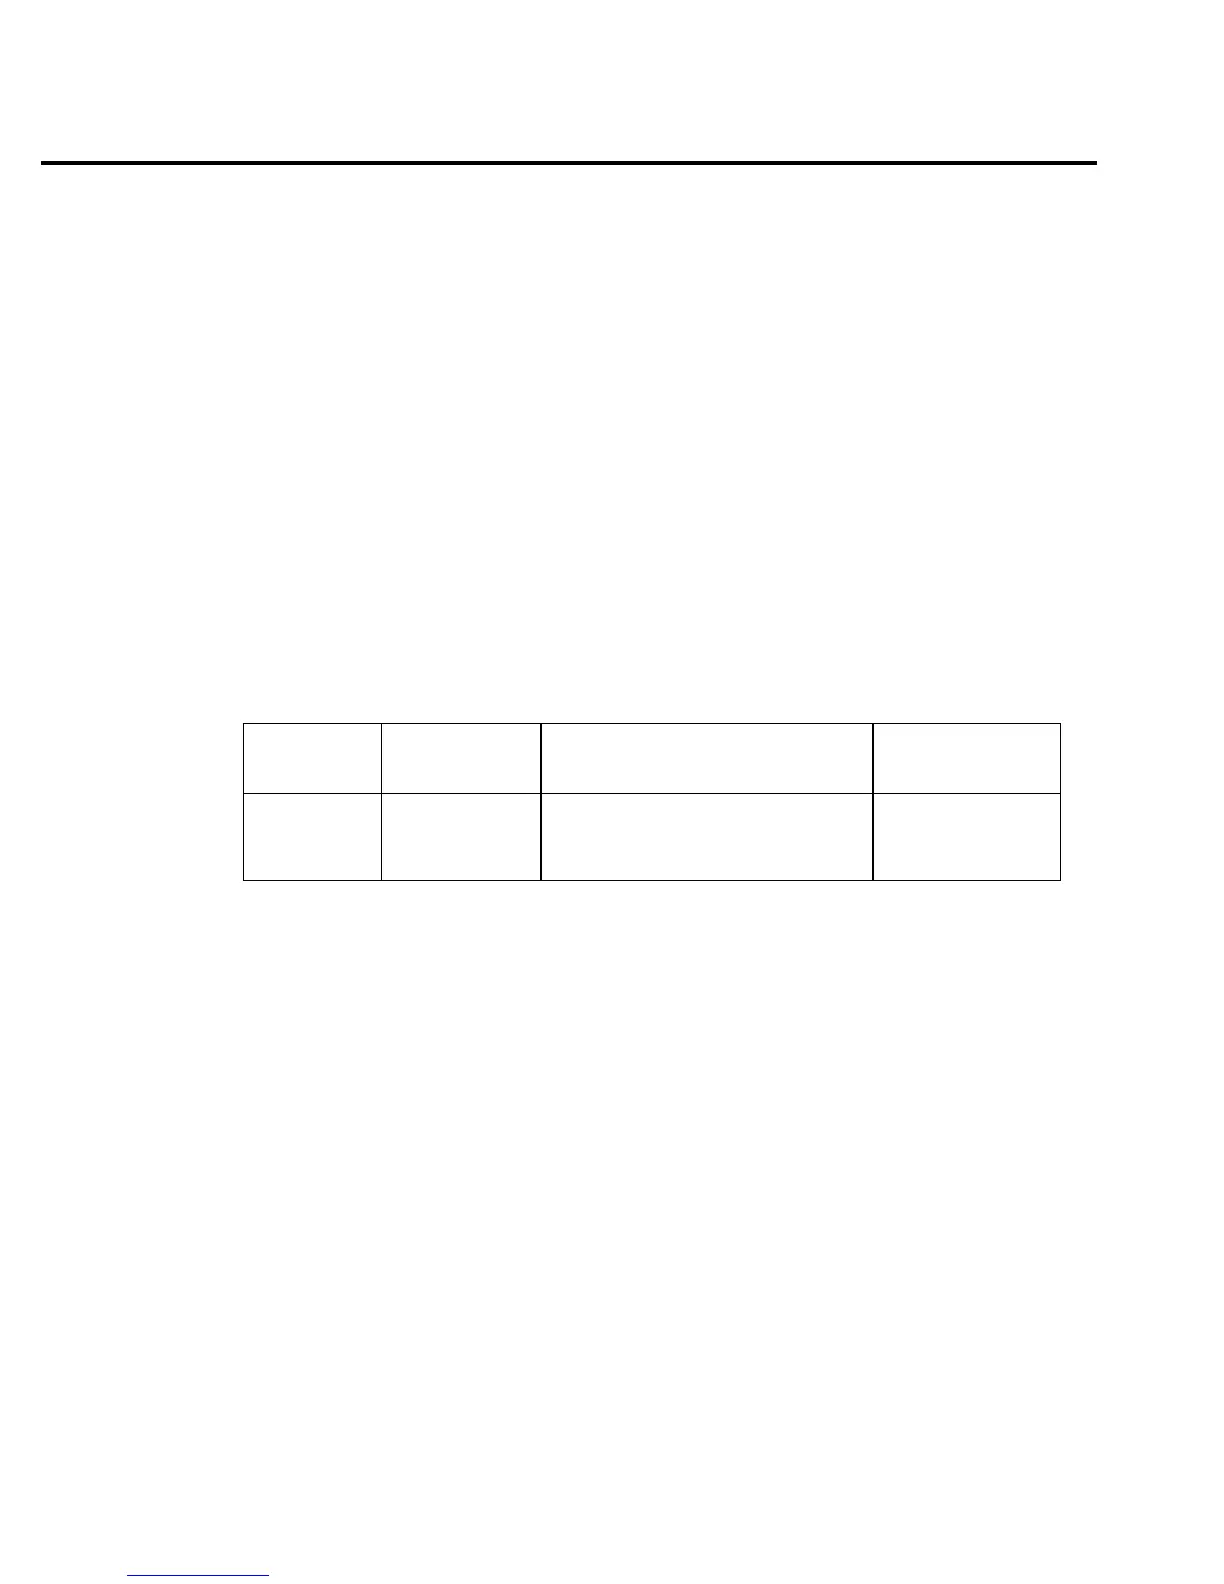
Table 2-10
DC current calibration programming steps
Calibration
step
Calibrator
current Calibration command* Parameter range
10mA
100mA
1A
10.00000mA
100.00000mA
1.000000A
:CAL:PROT:DC:STEP10 10E-3
:CAL:PROT:DC:STEP11 100E-3
:CAL:PROT:DC:STEP12 1
9E-3 to 11E-3
90E-3 to 110E-3
0.9 to 1.1
*Change parameter if using different current.

 Loading...


