ENGINE
L3560, L4060, L4760, L5060, L5460, L6060, WSM
1-S57
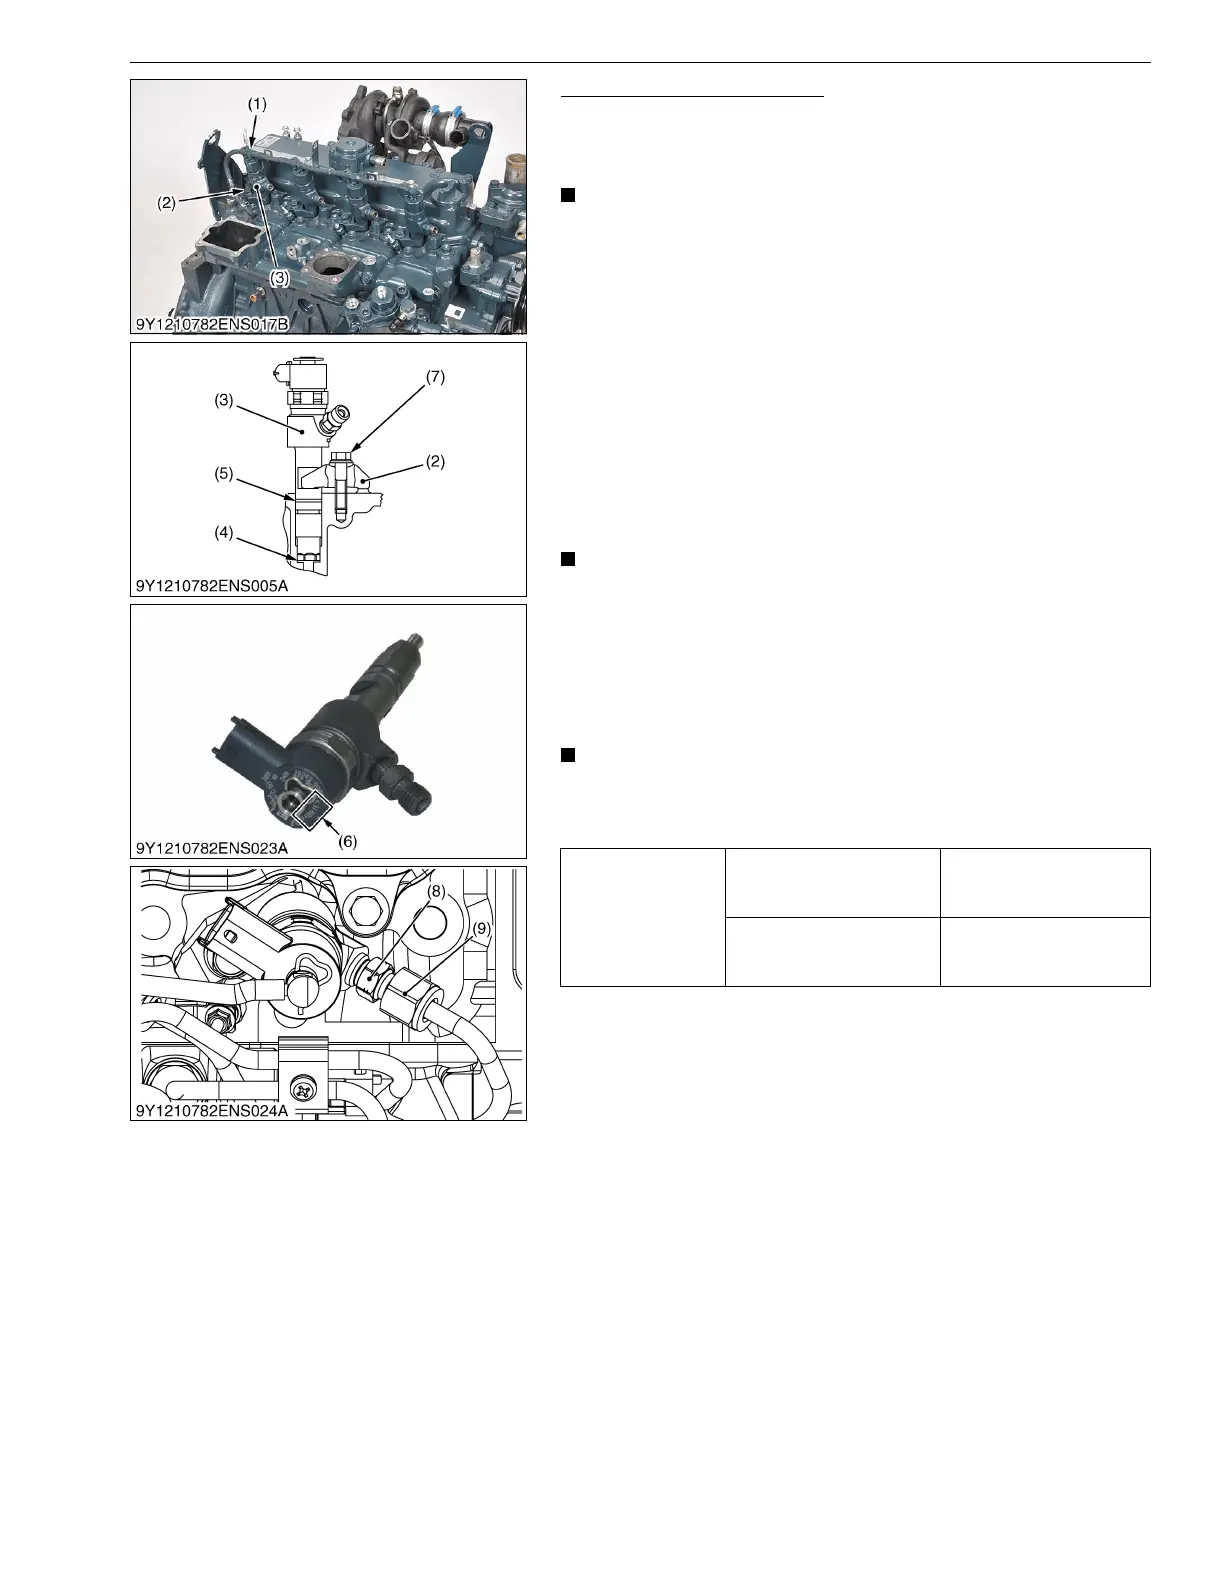
Overflow Pipe and Injectors
1. Remove the overflow pipe (1).
2. Remove the injector clamp (2).
3. Remove the injector (3) and its gasket (4).
• Do not disassemble the injector (3).
• Do not remove the injector QR code tag (6).
• Do not damage the injector QR code tag (6).
• Do not get the injectors out of order. If the injectors get out
of order, it is necessary to perform injector correction
(writing the injector ID codes (6) to the engine ECU).
• Store the injectors so they do not get any dust in them.
(When reassembling)
1. Attach the O-ring (5) to the correct position on the injector (3).
2. After attaching gasket (4) to the injector (3), attach the injector
(3) to the cylinder head.
3. Correctly set the clamp (2) as shown in the drawing.
4. Attach the injector with screws (7) as shown in the drawing.
5. Check that the injector (3) is attached securely.
• Do not remove the injector dust protection cap until
immediately before you attach the injection pipe.
• To prevent the injector inlet connector from turning when
removing the injection pipe cap nut (9), use a counter
wrench.
When the inlet connector (8) becomes loose, replace the
injector.
• If you replace the injectors, it is necessary to perform
injector correction (writing the injector ID codes (6) to the
engine ECU).
9Y1210824ENS0039US0
Tightening torque
Injector clamp screw
24 to 27 N·m
2.4 to 2.8 kgf·m
18 to 20 lbf·ft
Injection pipe cap nut
24.5 to 29.4 N·m
2.5 to 3.0 kgf·m
18.1 to 21.6 lbf·ft
(1) Overflow Pipe
(2) Injector Clamp
(3) Injector
(4) Gasket
(5) O-ring
(6) Injector ID Code
(7) Injector Clamp Screw
(8) Inlet Connector
(9) Injection Pipe Cap Nut

 Loading...