16 ENGLISH
Blade guard cleaning
When changing the circular saw blade, make sure to
alsocleanthebladeguardofaccumulatedsawdustas
discussedintheMaintenancesection.Sucheffortsdo
notreplacetheneedtocheckguardoperationbefore
each use.
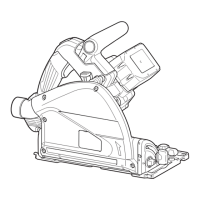
Connecting a vacuum cleaner
Optional accessory
Whenyouwishtoperformcleancuttingoperation,
connect a Makita vacuum cleaner to your tool. Connect
ahoseofthevacuumcleanertothedustnozzleusing
thefrontcuff24.
►Fig.25: 1.Hoseofthevacuumcleaner2.Frontcuff
24 3.Dustnozzle
OPERATION
CAUTION: Be sure to move the tool forward
in a straight line gently. Forcing or twisting the tool
will result in overheating the motor and dangerous
kickback,possiblycausingsevereinjury.
CAUTION: Never approach any part of your
body under the tool base when section cutting,
especially at starting. Doing so may cause seri-
ous personal injuries.Thebladeisexposedunder
the tool base.
NOTE: When the battery cartridge temperature is
low,thetoolmaynotworktoitsfullcapacity.Atthis
time,forexample,usethetoolforalight-dutycutfor
a while until the battery cartridge warms up as high
asroomtemperature.Then,thetoolcanworktoits
fullcapacity.
Section cutting (ordinary sawing)
►Fig.26
Holdthetoolrmly.Thetoolisprovidedwithbothafront
grip and rear handle. Use both to best grasp the tool.
Ifbothhandsareholdingsaw,theycannotbecutby
the circular saw blade. Set the base on the workpiece
to be cut without the circular saw blade making any
contact.Thenpushinthelock-offbuttonandpullthe
switch trigger. Wait until the circular saw blade attains
fullspeed.Nowpressdownthesawheadslowlytothe
presetdepthofcutandsimplymovethetoolforward
overtheworkpiecesurface,keepingitatandadvanc-
ing smoothly until the sawing is completed.
Togetcleancuts,keepyoursawinglinestraightand
yourspeedofadvanceuniform.Ifthecutfailstoprop-
erlyfollowyourintendedcutline,donotattempttoturn
orforcethetoolbacktothecutline.Doingsomaybind
the circular saw blade and lead to dangerous kickback
andpossibleseriousinjury.Releasetheswitch,wait
forthecircularsawbladetostopandthenwithdraw
the tool. Realign the tool on new cut line, and start
cutagain.Attempttoavoidpositioningwhichexposes
operatortochipsandwooddustbeingejectedfromthe
saw.Useeyeprotectiontohelpavoidinjury.
Guide rail
Optional accessory
Placethetoolontherearendofguiderail.Turntwo
adjustingscrewsonthetoolbasesothatthetoolslides
smoothlywithoutaclatter.Holdboththefrontgripand
rearhandleofthetoolrmly.Turnonthetool,pressdown
the tool to the preset cutting depth and cut the splinter-
guardalongthefulllengthwithastroke.Nowtheedgeof
the splinterguard corresponds to the cutting edge.
►Fig.27: 1.Adjustingscrews
When bevel cutting with the guide rail, use the slide
levertopreventthetoolfromfallingover.
Movetheslideleveronthetoolbaseinthedirectionofarrow
so that it engages the undercut groove in the guide rail.
►Fig.28: 1. Slide lever
Sub base (Guide rule)
Optional accessory
Byusingthesubbaseasaguiderule,youcanperform
extra-accurate straight cuts. Loosen the clamping
screwsandslidethesubbaseoutfromthetoolthen
insert it upside down.
►Fig.29: 1. Clamping screw 2. Sub base
Simplyslidethefenceofthesubbasesnuglyagainst
thesideoftheworkpieceandsecureitinpositionwith
theclampingscrews.Italsomakesrepeatedcutsof
uniformwidthpossible.
►Fig.30: 1. Clamping screw 2. Sub base
Plunge cutting (Cutting-out)
WARNING: To avoid a kickback, be sure to
observe the following instructions.
►Fig.31: 1.Rearedgeoftoolbase2. Fixed stop
When using the tool without guide rail, place the tool on
theworkpiecewiththerearedgeoftoolbaseagainsta
xedstoporequivalentwhichisdevisedbyanoperator.
When using the tool with guide rail, place the tool on the
guiderailwiththerearedgeoftoolbaseagainstaxed
stoporequivalentwhichisclampedontheguiderail.
Holdthetoolrmlywithonehandonthefrontgripand
theotheronthetoolhandle.Thenpushinthelock-off
button and turn the tool on and wait until the blade
attainsfullspeed.Nowpressdownthesawheadslowly
tothepresetdepthofcutandsimplymovethetool
forwardtothedesiredplungeposition.
NOTE:
Themarkingsonthesideofthebladeguard
showthefrontandrearcuttingpointsofthesawblade
at the maximum cutting depth when using the guide rail.
►Fig.32: 1. Front cutting point 2. Rear cutting point
Guide device
Optional accessory
Useofthebevelguideallowsexactmitercutswith
anglesandttingworks.
Useoftheclampensuresrmholdofworkpieceonthe
table.
 Loading...