OM 780-2 Page 23
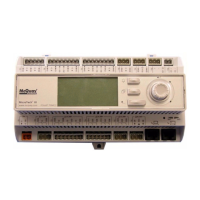
Table 4 describes the variables displayed in Figure 8 that are used to manage the devices on the CSM’s
L
ONWORKS network.
Table 4. Device Addressing (Main > Configuration > Device Addressing)
Name Description
Unit Name The Unit Name input may be used to input a unique identity for the chillers on a job. Since chillers are referred to as their
chiller number throughout this document, it may be convenient to leave the Unit Names at their default values
Neuron ID The Neuron ID is a LONWORKS communication networking term to describe the network address of the “Neuron” chip on the
L
ONWORKS device. The Neuron ID is used by the CSM to assign a physical chiller as “Chiller 1”, “Chiller 2”, etc. The CSM
is the network administrator in this L
ONWORKS network of chillers and remote I/O devices.
Hardware
Selection
The Hardware Selection needs to be set to the type of chiller you are connecting to. If you are connecting to a Hardwired
chiller, select Hardwired. If you are connecting to a MicroTech II chiller you have 2 options. If your chiller has a LONW
ORKS
Communication Modulewith chchla22 XIF file loaded, then select MicroTech II – Version 22. If your chiller has a
LONW
ORKS Communication Module with chchla24 XIF file loaded, then select MicroTech II – Version 24. If you are unsure,
look at the lot number on the LONW
ORKS Communication Module. A lot number less than 301807 shipped from the factory
with the chchla22 profile. All others shipped from the factory with the chcla24 profile.
Lon Status This read only status field indicates the LONWORKS node state of the LONWORKS Device (e.g. chiller). The Lon Status of a
device that has not been commissioned will be “unknown”. The Lon Status of a properly commissioned device will be
“config_online”.
Device Status This read only status field indicates the “status flags” of the LONWORKS Device (e.g. chiller). The Device Status of a device
that has not been commissioned will be “outOfService”. The Device Status of a properly operating device will be “OK”. The
Device Status of a commissioned device that is currently not communicating will be “Down”.
Service Pin This button is used to prompt a Service Pin input from a LONWORKS Device. After clicking on the SERVICE PIN button, you
will be given five minutes to push the service pin on the L
ONWORKS device (e.g. chiller) you wish to commission to this Unit
Name (e.g. Chiller 1).
Commissioning a Chiller to a CSM Chiller Number
The chiller number that a chiller is assigned too should be determined based on job site terminology. Typically, there will
be a chiller on the job which is considered to be “chiller number 1” and a chiller considered to be “chiller number 2”, etc.
Chiller assignment to the CSM should follow this job-site terminology.
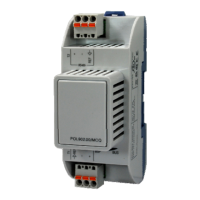
To commission a chiller the Neuron ID of the chiller’s L
ONWORKS communication module must be entered into the CSM’s
Device Addressing screen at the desired location. The Neuron ID is automatically passed from the chiller to the CSM when
the CSM is prompted for the chiller’s Service Pin and the chiller’s service pin is pressed (it could also be written in).
To commission chillers to the CSM follow this procedure
3. Install the chiller's L
ONWORKS communication module per IM 735.
4. Wire the chiller to the CSM’s L
ONWORKS communication network per IM 781.
5. At the CSM’s user interface’s Device Addressing screen, click on the SERVICE PIN button of the Chiller # you wish
to assign this chiller too. A Service Pin Timer window will pop up with a 5-minute count down timer.
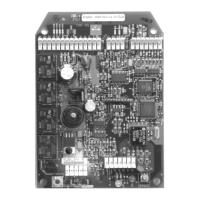
6. Before the 5-minute timer expires, go to the chiller and press the service pin on the chiller’s L
ONWORKS
communication module. The act of pressing the service pin on the LONWORKS communication module consists of
shorting the two metal pins together with a small metal object (see Figure 9). A green LED just behind the service pin
will light to indicate that you have successfully pressed the service pin. This will send the Neuron ID through the
network to the CSM.
7. Verify that the Neuron ID of the desired chiller has automatically been entered into the correct Neuron ID location of
the Device Addressing screen.
8. Press “SAVE CHANGES” on the Device Addressing screen.
The above procedure performs the L
ONWORKS network administration tasks of commissioning and binding a LONWORKS
device.
 Loading...