Technical Information
46
MasterChef Ovens
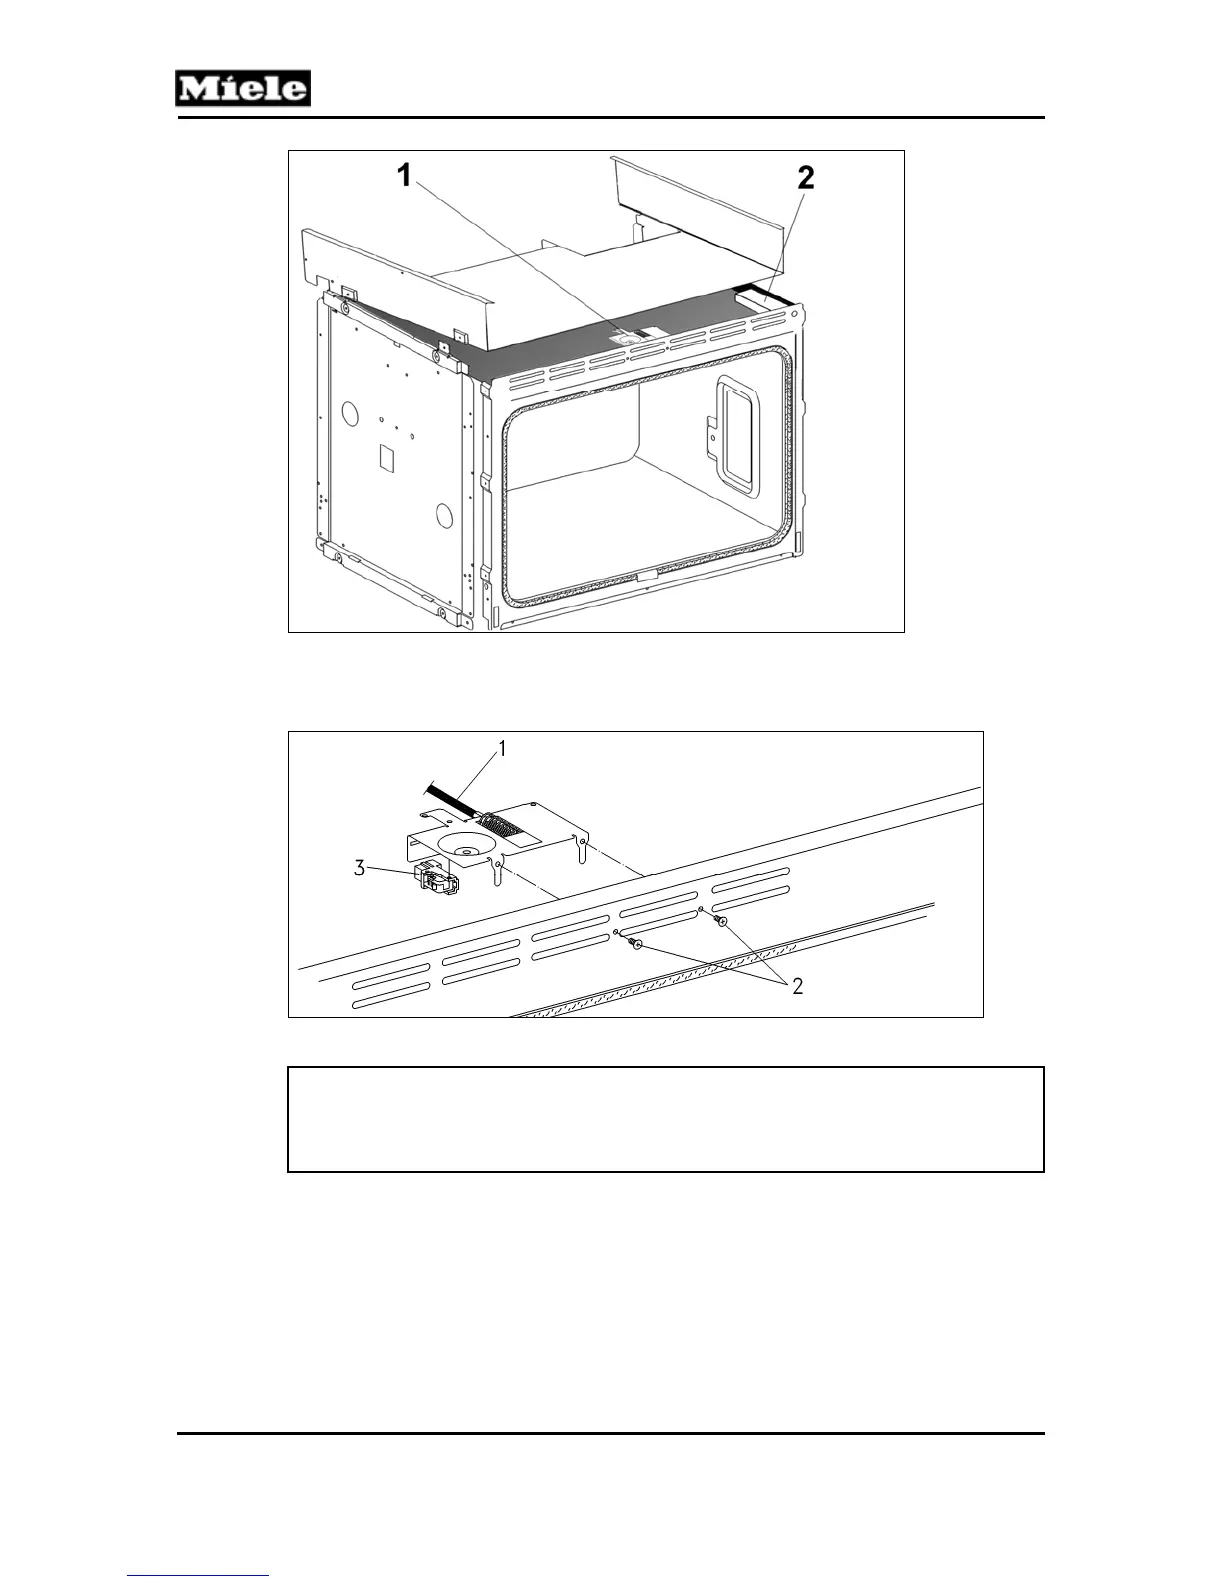
Figure 5-22: Accessing the Door Latch Assembly and Door Closed Switch
6. Remove the two Phillips screws securing the latch assembly to the cavity
assembly (Figure 5-23, Item 2).
Figure 5-23: Door Latch Assembly
Note:
To simplify access to the door closed switch retaining tabs, the right side
cover can be removed, which will allow direct access to the underside of
the locking tabs.
5.21 Lower Door Latch, Door Lock Switch and Door Closed
Switch Access (P-Model Double Ovens Only)
1. Remove the oven for service (Section 5.5).
2. Remove the upper rear panel (Section 5.11).
3. Remove the lower rear panel (Section 5.12).
4. Remove the air shield panel (Section 5.15)
 Loading...