VS 8/VS 8A Vital Signs Monitor Operator’s Manual 6 - 5
6.4 SpO
2
Display
• PI is displayed for Masimo SpO
2
.
6.5 Preparing for SpO
2
Monitoring
To prepare to monitor SpO
2
, follow this procedure:
1. Select an appropriate sensor according to the module type, patient category,
weight, and measurement site.
2. Clean the contact surface of the reusable sensor.
3. Remove colored nail polish from the application site.
4. Apply the sensor to the patient according to the instruction for use of the sensor.
5. Select an appropriate extension cable according to the connector type and plug
the cable into the SpO
2
connector.
6. Connect the sensor to the extension cable.
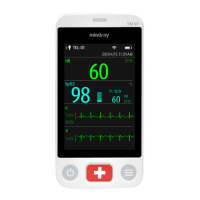
( 3 )
( 5 )
( 1 )
( 4 )
( 2 )
(1) Oxygen saturation of arterial blood (SpO
2
): percentage of oxygenated hemoglobin
in relation to the sum of oxyhemoglobin and deoxyhemoglobin.
(2) Perfusion indicator: the pulsatile portion of the measured signal caused by arterial
pulsation.
(3) Perfusion index (PI): gives the numerical value for the pulsatile portion of the
measured signal caused by arterial pulsation. PI is an indicator of the pulsatile
strength. You can also use it to assess the SpO
2
signal strength.
(4) Pulse rate (derived from the pleth wave): detected pulsations per minute.
(5) Pleth waveform (Pleth): visual indication of patient’s pulse. The waveform is not
normalized.
6 - 6 VS 8/VS 8A Vital Signs Monitor Operator’s Manual
• Do not apply sensor too tightly as this results in venous pulsation which may
severely obstruct circulation and lead to inaccurate measurements.
• At elevated ambient temperatures, be careful with measurement sites that
are not well perfused, because this can cause burns after prolonged
application.
• Avoid placing the sensor on extremities with an arterial catheter, an NBP cuff
or an intravascular venous infusion line.
• For neonatal patients, make sure that all sensor connectors and adapter
cable connectors are outside the incubator. The humid atmosphere inside
can cause inaccurate measurements.
6.6 Changing the SpO
2
Settings
• Alarm related settings are available only when the monitoring is in
Continuous Monitoring mode.
6.6.1 Changing the SpO
2
Alarm Settings
In Continuous Monitoring mode, you can change the SpO
2
alarm settings. Follow this
procedure:
1. Select the SpO
2
numeric area or waveform area to enter the SpO2 dialog.
2. Select the Alarm tab.
3. Enter the password if required. For more information, refer to 16.3.3 Selecting
Password for Changing Alarm settings.
4. Set the alarm properties as desired.
• The desat alarm is a high level alarm notifying you of potentially life
threatening drops in oxygen saturation. When the SpO
2
value is below the
desat alarm limit and desat alarm switch is set on, the message “SpO2 Desat”
is displayed.
• You can switch off the SpO
2
Desat alarm only when SPO2 Desat Alarm Off is
enabled. For more information, see section 16.5.5.4 Setting the Switch of the
SpO
2
Desat Alarm Off.
 Loading...
