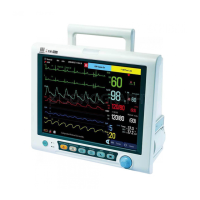
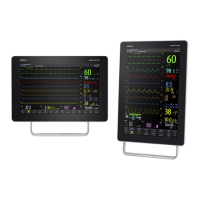
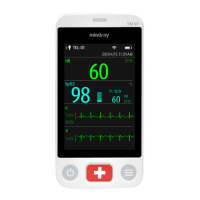
VS 8/VS 8A Vital Signs Monitor Operator’s Manual 16 - 17
2. Select the Module tab → Te mp tab.
3. Select the Temp module based on the configuration of the monitor.
16.8.3 Setting Temp Measurement Sites
You can set the measurement sites based on the Temp type of the monitor. To do so,
follow this procedure:
1. Select the Main Menu quick key → from the System column select Maintenance
→ input the required password → select .
2. Select the Module tab → Te mp tab.
3. Select the measurement sites as needed.
16.8.4 Adding a New Manual Parameter
If you need to add custom manual parameters to the Manual Input list, follow this
procedure:
1. Select the Main Menu quick key → from the System column select Maintenance
→ input the required password → select .
2. Select Module → Manual Input tab, and then select Add.
3. Select Name and input the name of the new parameter with the on-screen key-
board.
4. Set Type to Numeric or Te xt.
◆ The type of a parameter cannot be changed after saving.
5. For Numeric type, continue to set the Unit and Resolution of the parameter. For
Text type, you need to set the options to be selected. At least 2 options need to be
set. If needed, you can select Add to set more options.
6. Select Save.
After saving the setting, you can follow the procedure in 11.4 Changing the Display of
Manual Parameters to add the new parameter to the Manual Input list displayed on the
screen.
16.8.5 Managing Pain Score
16.8.5.1 Enabling Pain Scales
You can enable or disable a provided pain score. To do so, follow this procedure:
1. Select the Main Menu quick key → from the System column select Maintenance
→ input the required password → select .
2. Select Module → Pain Score tab.
3. From the Pain Score Method area, switch on the pain scales as needed.
16 - 18 VS 8/VS 8A Vital Signs Monitor Operator’s Manual
16.8.5.2 Adding a Custom Pain Scale
You can set up to 2 custom pain scales on the monitor. To do so, follow this procedure:
1. Select the Main Menu quick key → from the System column select Maintenance
→ input the required password → select .
2. Select Module → Pain Score tab.
3. Under Custom Pain Score Method, select corresponding area to edit the name of
your scale, and change the upper limit of scoring value.
4. Enable Display on the right of the pain score for it to be displayed on the Pain
Score screen.
16.8.5.3 Adding a Pain Description
You can add up to 15 descriptions on the monitor. To do so, follow this procedure:
1. Select the Main Menu quick key → from the System column select Maintenance
→ input the required password → select .
2. Select Module → Pain Score tab, and then select Add Description.
3. Select Name and input the name of the description with the on-screen keyboard.
4. Set Type to Numeric or Te xt.
◆ The type of a description cannot be changed after saving.
5. For Numeric type, continue to set the Unit and Resolution of the parameter. For
Text type, you need to set the options to be selected. At least 2 options need to be
set. If needed, you can select Add to set more options.
6. Select Save.
16.8.6 Setting Parameter Measurement Timeout
NIBP and Temp measurements become outline fonts after a preset time. This feature
prevents older values being misinterpreted as current measurements. To adjust the
timeout period for NIBP and Temp, follow this procedure:
1. Select the Main Menu quick key → from the System column select Maintenance
→ input the required password → select .
2. Select Module → Other tab.
3. Set the timeout period for NIBP and Temp.
16.8.7 Enabling Outline Font for Suspected Values
You can set the monitor to display unreliable SpO
2
measurements in outline font. This
prevents unreliable measurements from being misinterpreted as normal measurements.
To do so, follow this procedure:
1. Select the Main Menu quick key → from the System column select Maintenance
→ input the required password → select .
2. Select Module → Other tab.
 Loading...
