α
2 Simple Application Controllers
AL2-ASI-BD (AL2-14MR-*, AL2-24MR-* ) 9
ENG-46
9.3 Wiring & Installation
9.3.1 Installation
Caution
Disconnect all terminals from the power supply before removing the cover.
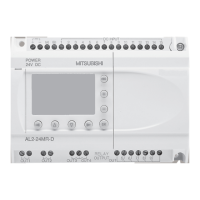
Figure 9.3: Installation
1) Release screw ‘A’ and keep.
2) Carefully remove the factory fitted
expansion port cover.
3) Cut away section ‘B’ from the
α2 series
controller main unit.
4) Attach the expansion module to the main
unit.
5) Tighten screw ‘A’ to a torque of 0.4 N·m.
OUT1
OK
-
+
ESC
OUT3
9
RELAY
OUTPUT
65
OUT
8
OUT2 OUT4
7
DC INPUT
151413121110987654321(B)(A)
+-
24V DC
POWER
AL2-24MR-D
A
AL2-24MR-D
POWER
24V DC
-+
(A)(B) 1 2 3 4 5 6 7 8 9101112131415
DC INPUT
7
OUT4OUT2
8
OUT
56
OUTPUT
RELAY
9
OUT3
ESC
+
-
OK
OUT1
OUT1
OK
-
+
ESC
OUT3
9
RELAY
OUTPUT
65
OUT
8
OUT2 OUT4
7
DC INPUT
151413121110987654321(B)(A)
+-
24V DC
POWER
AL2-24MR-D
A
1)
2)
3)
4)
5)
AL2-24MR-D
POWER
24V DC
-+
(A) (B) 1 2 3 4 5 6 7 8 9 10 11 12 13 14 15
DC INPUT
7
OUT4OUT 2
8
OUT
5
OUTPUT
RELAY
9
OUT3
ESC
+
-
OK
OUT1
AL2-24MR- D
POWER
24V DC
-+
(A) (B) 1 2 3 4 5 6 7 8 9 10 11 12 13 14 15
DC INPUT
7
OUT4OUT2
8
OUT
5
OUTPUT
RELAY
9
OUT3
ESC
+
-
OK
OUT1
6
B
ASI
-
ASI
+
ASI
-
ASI
+
ASI
-
ASI
+
ASI
-
ASI
+
 Loading...
