DISASSEMBLY PROCEDURE
PHOTOS
95
Nut
(G3/4")
Water
coil W
cover
Screw
Screw
Photo 17-1
Photo 17-2
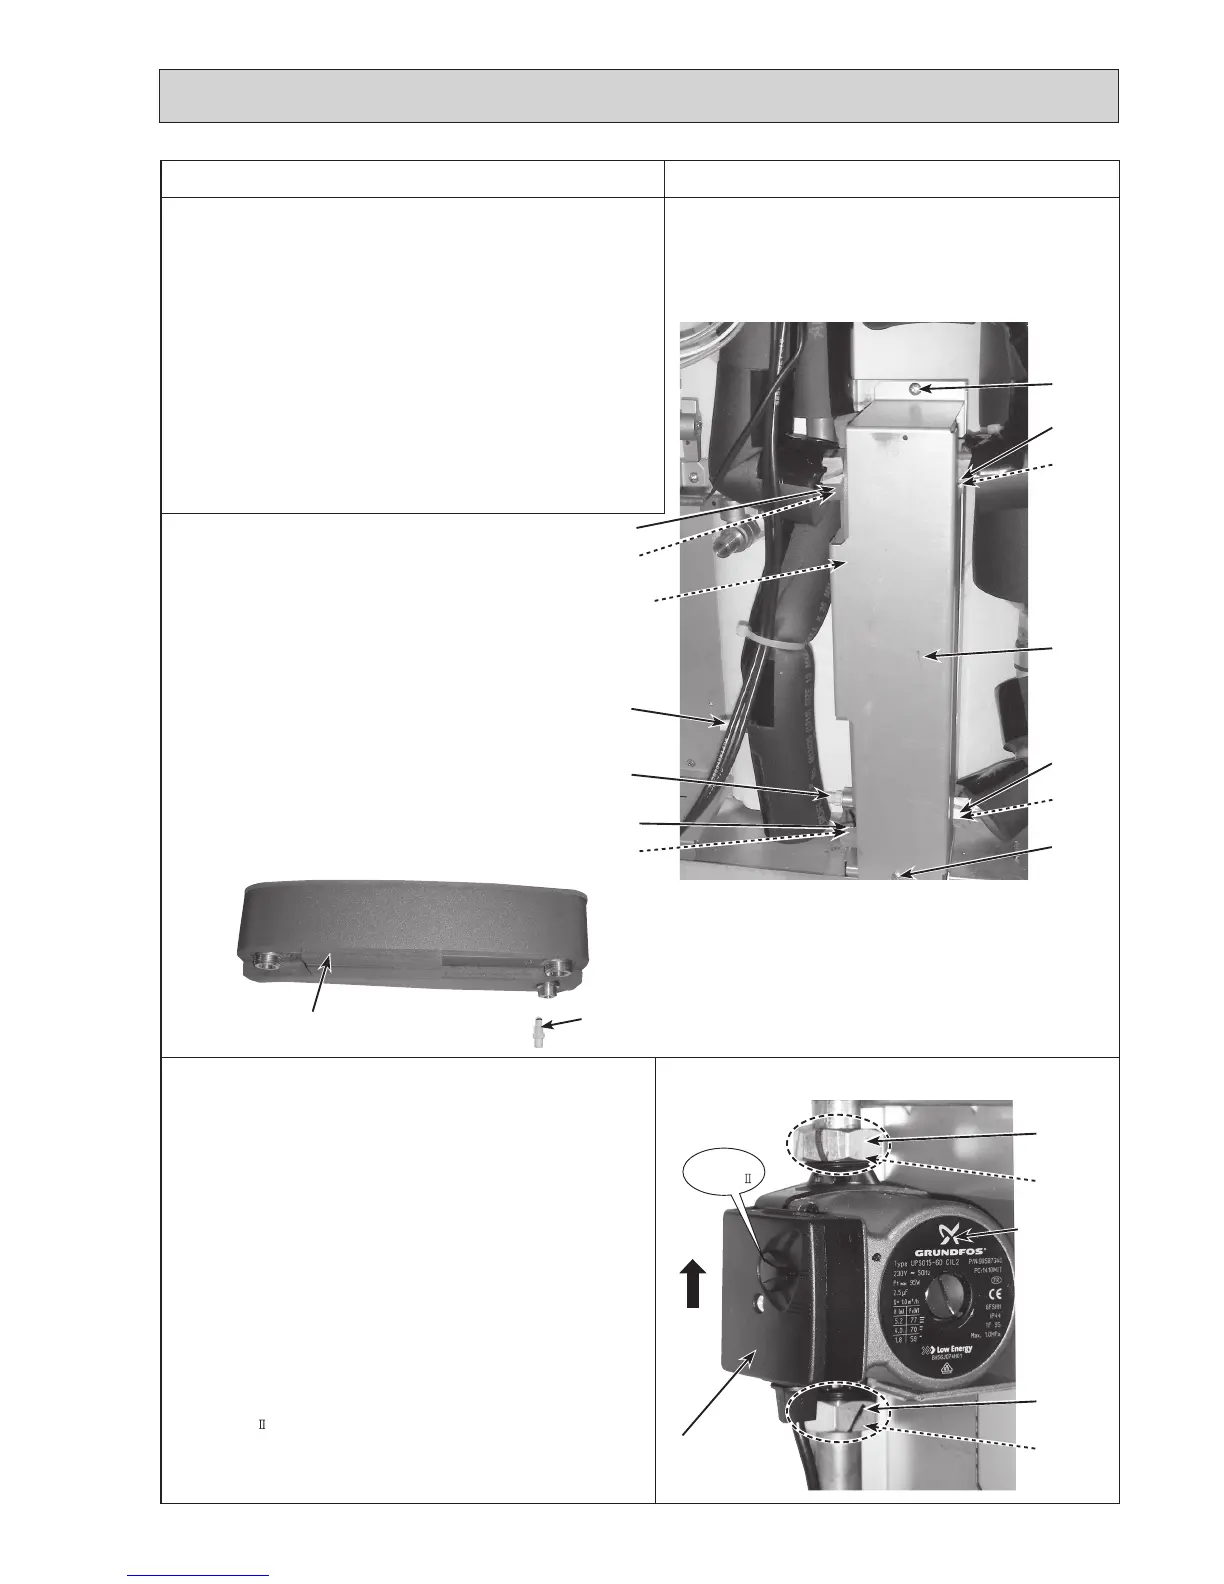
17.
How to remove the plate heat exchanger (P-HEX)
<Water - Water>
(1) Remove the front panel (Refer to Procedure 1).
(2)DrainwaterintheP-HEX(Water-Water)usingthedrain
cock (Primary circuit) and the drain cock (Sanitary
circuit). (Photo 17-1)
(3)Removethe2screwstoremovethewatercoilWcover.
(Photo 17-1)
•
ReusethewatercoilWcoverandthefixingscrews.
(4)Removethe4G3/4"nuts.
•
Whenreinstallingthe
nuts
,usenew
G3/4"gaskets
.
(5) Remove the P-HEX (Water-Water) and drain cock
(Sanitary circuit). (Photo 17-2)
•
Whenreinstallingthe
drain cock (sanitary circuit)
, use a
new
one
.
Gasket
(G3/4")
Nut(G3/4")
Gasket(G3/4")
Drain cock
(Sanitary circuit)
Drain cock
(Primary circuit)
Nut(G3/4")
Gasket(G3/4")
P-HEX (Water-Water)
Drain cock
(Sanitary circuit)
Nut
(G3/4")
Gasket
(G3/4")
18. How to remove the water pump (sanitary circuit)
(1) Remove the front panel (Refer to Procedure 1).
(2) Disconnect the CNP4 connector and the earth cable in
thecontrolbox.(Photo4-2)
(3)Releasethewaterpumpleadwirefromthe2cable
clampsandthecablestrapinthecontrolbox,the2
cablestrapsandthe3bandsbelowthecontrolbox.
(Photos 4-1 and 10-1)
(4)Removethewaterpump(sanitarycircuit)byremoving
thetwoG1"nutsusingthe2spanners,onetoholdthe
G1"nutandtheothertoturntheothersideofG1"nut.
(Photo 18)
•
WhenreinstallingtheG1"nuts,useanewG1"gaskets.
•
Setthewaterpumpintheorientationofthearrow
printedonthewaterpumpandinthewaythatthe
terminalboxfacestotheleft.(Photo18)
•
Setthepumpspeedofthenewlyinstalledwaterpump
to"
".(Photo18)
Photo 18
Nut(G1")
Gasket(G1")
Water pump
(Sanitary circuit)
Nut(G1")
Gasket(G1")
Terminalbox
Flow
direction
Pump
speed:
P-HEX (Water-Water)
(inside)

 Loading...
