16 – English
05. Wait for the control unit to complete the acquisition phase: closing, opening and closing again of the door
06. Press and release the Open key to perform a complete opening manoeuvre
07. Press and release the Close key to perform a complete closing manoeuvre
• During these manoeuvres, the control unit memorises the force required to open and close the door.
• If LEDs L2 and L3 ash at the end of the acquisition process, it means that an error has occurred (see Chapters 9 and 10).
• It is important that these initial manoeuvres are not interrupted, for example by a STOP command. Should this occur, the
acquisition process must be repeated from step 01.
• The acquisition phase of the positions and of the STOP and PHOTO input conguration can be repeated at any time, even after the
installation (for example, if one of the mechanical stops is shifted); simply repeat the procedure from step 01.
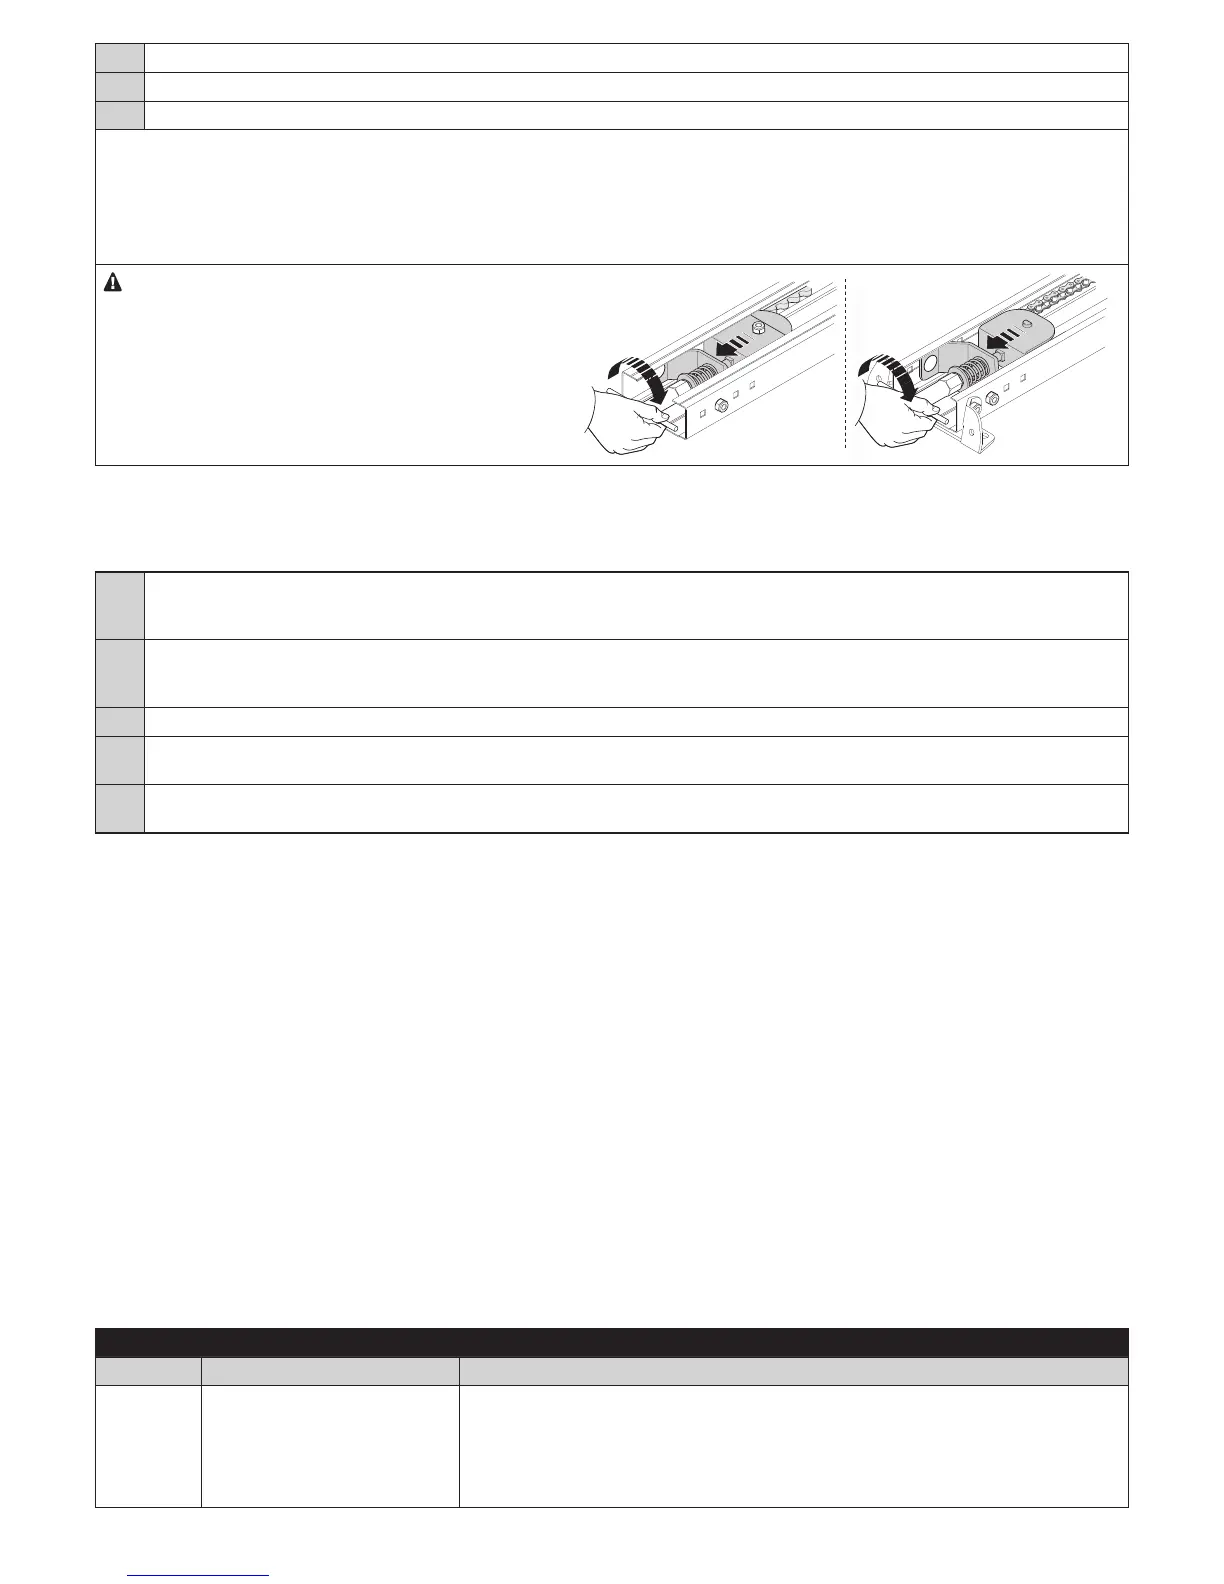
If, during the position acquisition procedure, the belt/
chain is not sufciently taut, the belt/chain may slip on
the pinion. Should this occur, stop the acquisition using
the Stop key; tension the belt/chain by screwing nut H
(M8) then repeat the acquisition procedure from step
01.
SNA30
SNA30C
H
H
H
H
7.4 - Checking the door movement
Once the opening and closing positions have been acquired, a series of manoeuvres should be carried out to check whether the door moves
properly.
01. Press and release the Open key to command an opening manoeuvre: check that this occurs smoothly and without any changes
in speed. Important - The door must slow down when it lies between 30 cm and 20 cm from the mechanical opening stop, and
stop against the latter. A brief closing manoeuvre is then performed to release the belt/chain tension.
02. Press and release the Close key to close the door: check that this happens smoothly and without any changes in speed. Impor-
tant - The door must slow down when it lies between 30 cm and 20 cm from the mechanical closing stop, and stop against the
latter. A brief opening manoeuvre is then performed to release the belt/chain tension.
03. During the manoeuvre, check that the ashing light (if any) ashes at a speed of 0.5 seconds on and 0.5 seconds off.
04. Open and close the door several times to make sure that there are no defects in its assembly and adjustment or other anomalies
(e.g. points with excessive friction).
05. Check that the gearmotor, guide and mechanical stops are fastened in a solid, stable and suitably resistant manner, even during
sudden door acceleration or slowdown movements.
7.5 - Integrated radio receiver
The control unit has an incorporated radio receiver for remote control, which operates at a frequency of 433.92 MHz and is compatible with
the following types of transmitters (due to the fact that the type of encoding system differs, the rst transmitter inserted also determines the type
of those memorised subsequently – up to 100 transmitters can be memorised):
FLO, FLOR, O-CODE, SMILO
7.6 - Programming the functions
There are two groups of programming processes:
- Programming upon start-up: this programming mode can be carried out only after powering SPIN from the mains; while switching on the
control unit, the programming mode can be activated by pressing and holding the Set key.
- Standard programming: this programming mode can be used at any time and is activated by pressing and holding the Set key for roughly
3 seconds.
For both modes, the programming and programmable functions available are divided into 2 levels:
Level 1 (Paragraphs 7.6.1 and 7.6.2): functions settable in ON-OFF mode (enabled or disabled); in this case, each LED L1, L2 and L3 indi-
cates a function: if lit, the function is enabled; if off, the function is disabled. See Tables 8 and 9.
- Level 2 (Paragraphs 7.6.3 and 7.6.4): functions settable on a scale of values from 1 to 3; in this case each LED L1, L2 and L3 indicates a
set value from the possible 3. See Tables 14 and 15.
7.6.1 - Level 1 functions (ON-OFF)
Table 8 - Functions of the programming upon start-up
LED Function Description
L1 Variable sensitivity (obstacle
detection)
This function allows the user to enable or disable the sensitivity with which obstacles are
detected.
The sensitivity default setting is variable (LED L1 off): greater sensitivity in the case of low
motor force, and less sensitivity where the motor force increases. The aim is to ensure the
utmost detection precision. Variable sensitivity can be disabled, and 3 “xed” motor force
levels (LED L1 lit).

 Loading...