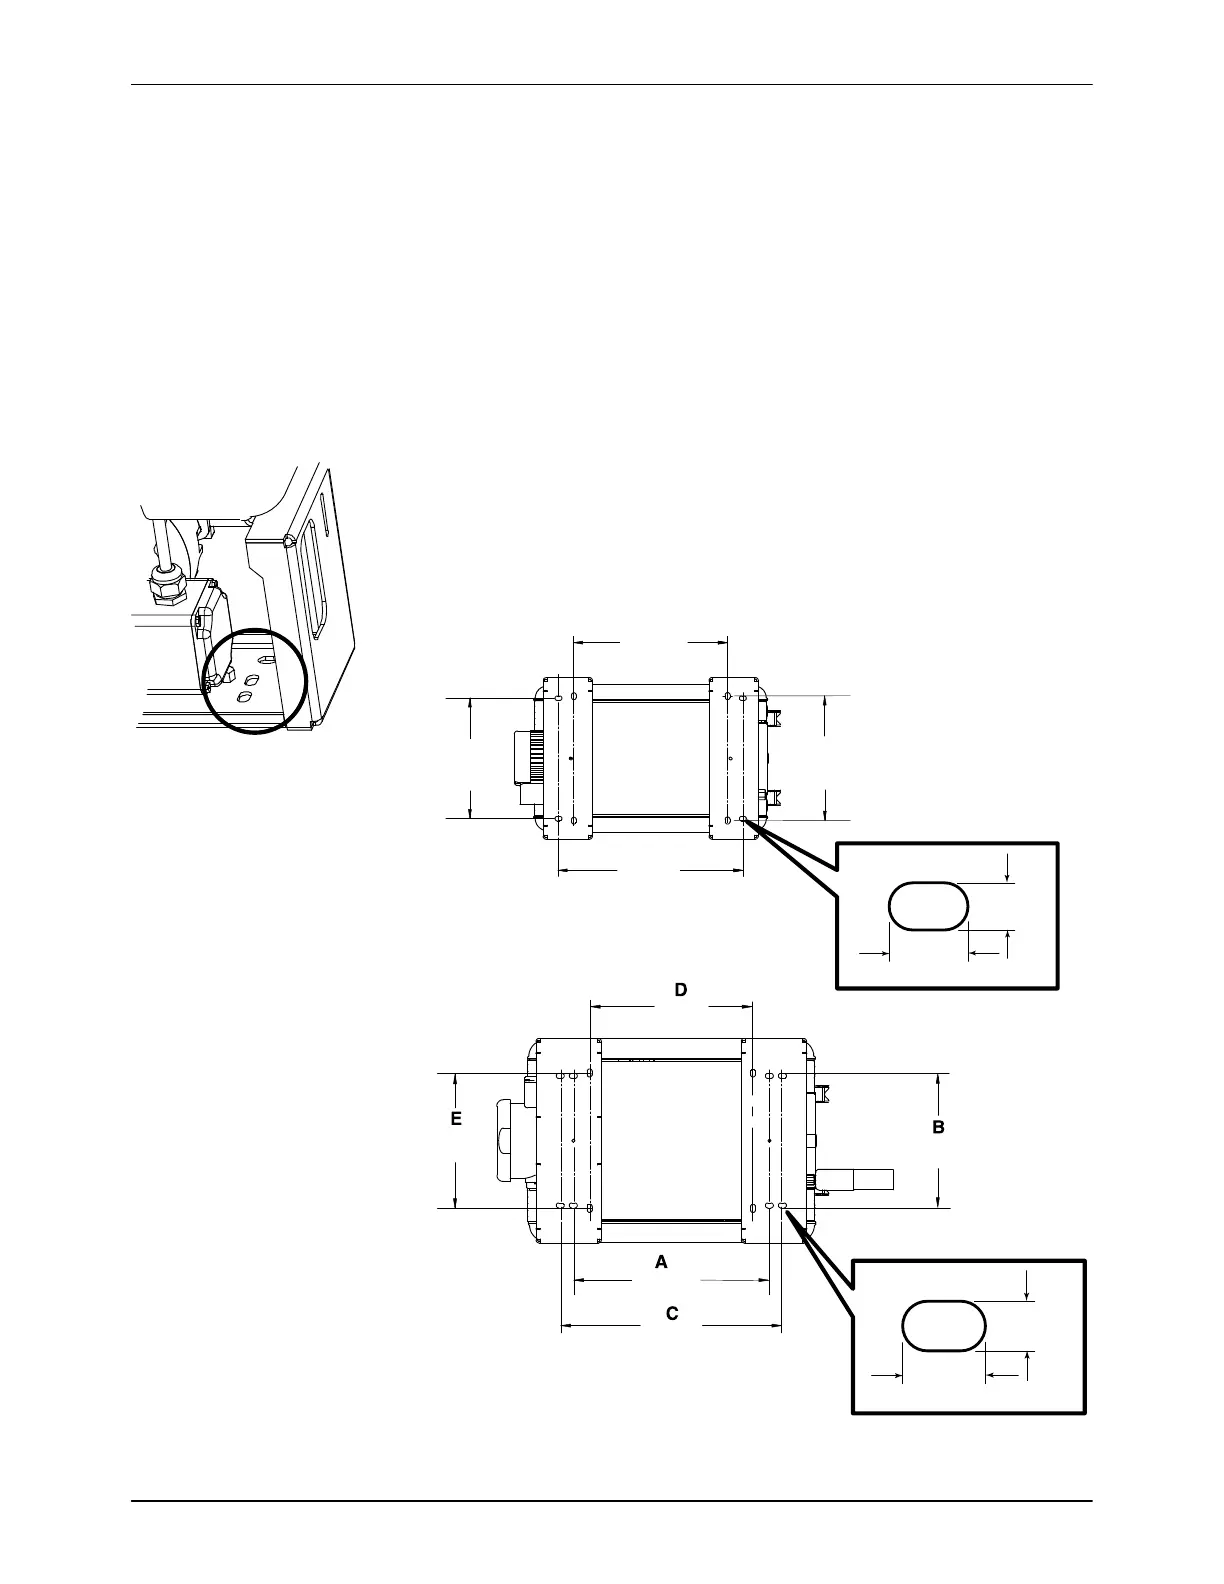
Mounting holes
Installation
3-6
Part 1073401_07
E 2021 Nordson Corporation
Mounting the Melter
Before mounting the melter, ensure that the parent machine or support
structure is level with respect to the floor, provides an even mounting surface,
is not subject to extreme vibration, and is capable of supporting the weight of
the melter, a full tank of hot melt, and the hoses and applicators.
Refer to Section 8, Technical Data, for the weight of the melter. Refer to the
technical data provided by the hot melt manufacturer for information about
the volumetric weight of the hot melt.
To mount the melter
See Figure 3‐3. Use 8 mm (
5
/
16
in.) machine bolts and locking hardware to
secure the melter mounting brackets to the mounting surface.
NOTE: The bolt mounting pattern of DuraBlue melters can be adapted to
that of many other Nordson melters. Refer to Table 3‐2.
F
B
D
A
D4
D10/D16
10 mm
(0.38 in.)
16 mm
(0.63 in.)
432 mm
(17.00 in.)
381 mm
(15.00 in.)
249 mm
(9.80 in.)
318 mm
(12.50 in.)
260 mm
(10.25 in.)
381 mm
(15.00 in.)
318 mm
(12.50 in.)
249 mm
(9.80 in.)
257 mm
(10.12 in.)
14 mm
(0.56 in.)
10 mm
(0.38 in.)
Figure 3-3 Bolt mounting patterns (refer to Table 3-2)
 Loading...