10-2. Installing the Power Supply Unit (VL-PS240)
109
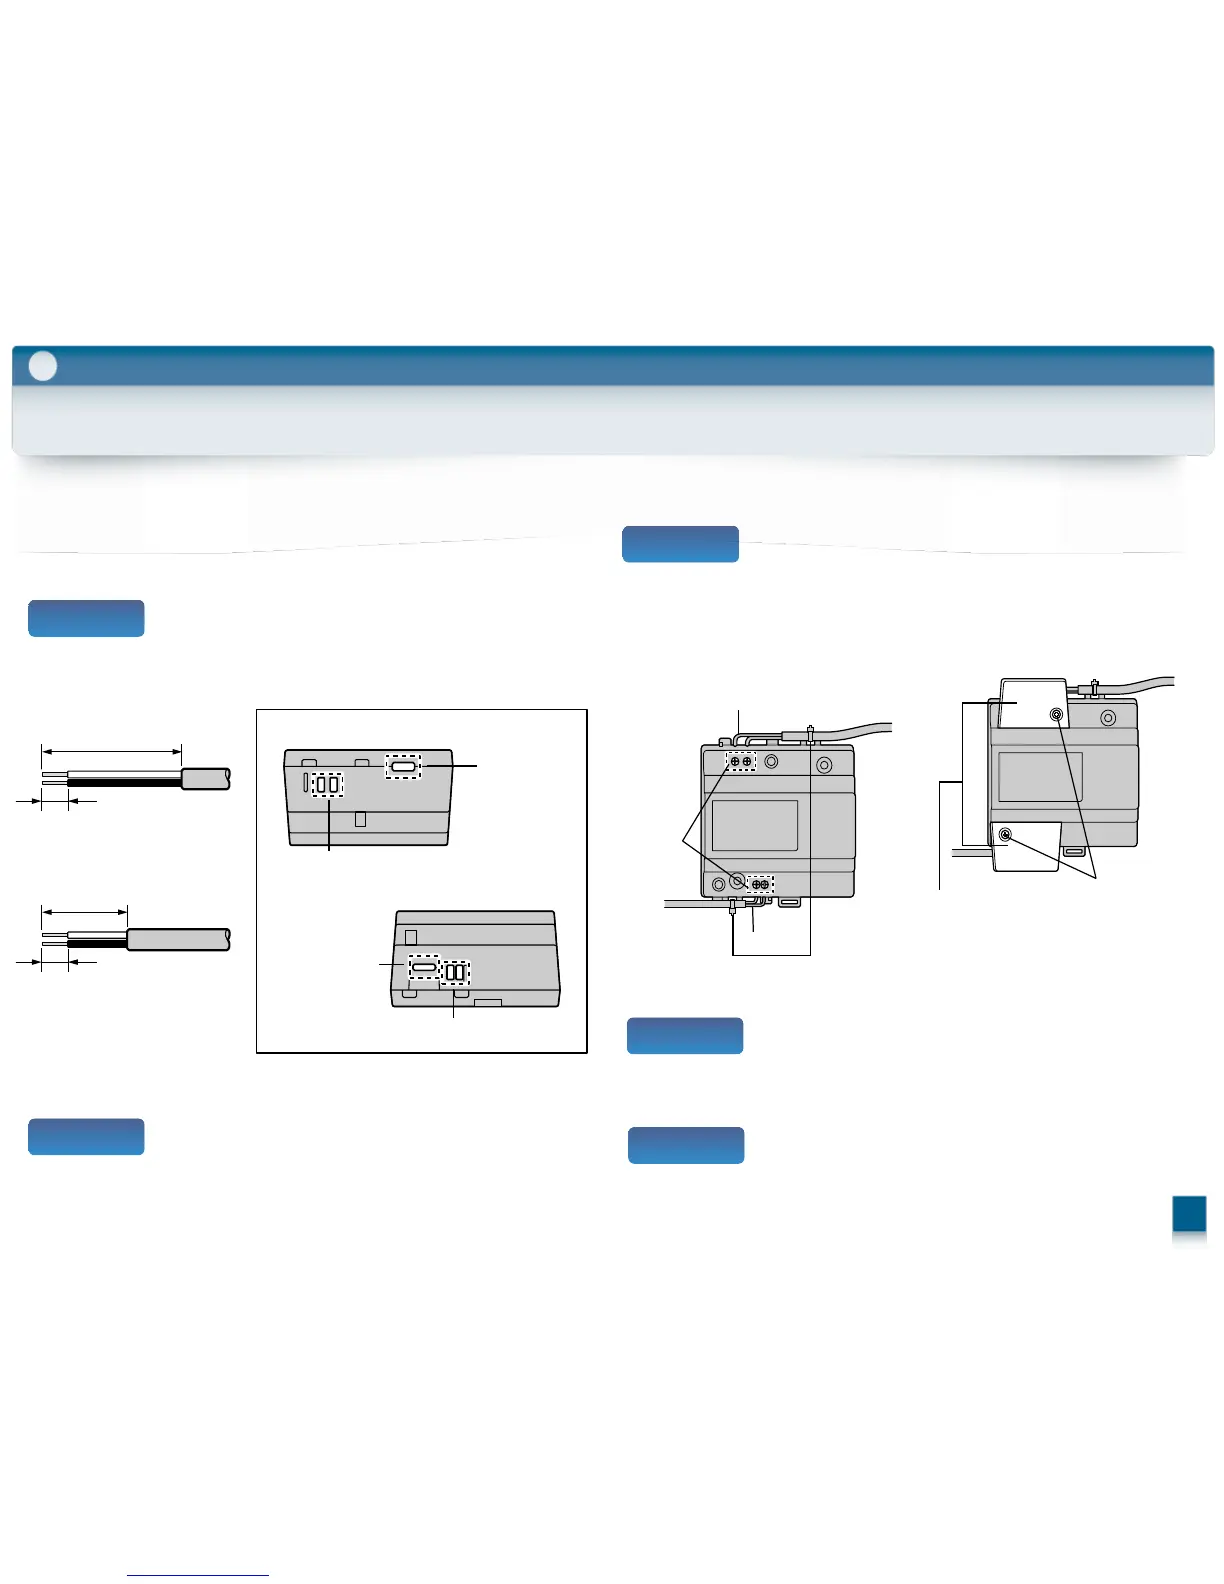
How to connect the power cable (AC/DC)
Connect the power supply unit and AC/DC cables.
Strip the AC/DC cables as follows:
9
Appendix
Step 1
Power supply unit
(with cable covers
removed)
〈AC
cable〉
〈DC
cable〉
45 mm
25 mm
7 mm
7 mm
〈Bottom
view〉
〈Top view〉
AC cable
AC IN terminal
DC cable
binder hole
DC OUT
terminal
Remove the screws (1) and then remove
the cable covers (2).
Connect the AC/DC cable to the AC IN
terminal/DC OUT terminal on the top and
bottom of the power supply unit, and then
securely fasten the screws(3).
AC cable
binder hole
DC cable
Screws
(3)
*1
*1
Cable
binders
*1 Make sure that there are no bare
wires exposed outside the product.
Cable covers
(2)
Screws (1)
Use the cable binders to secure the AC/DC
cables (double-coated area) to the power
supply unit.
Step 2
Step 3
Step 4
Make sure to replace the cable covers (2)
and then securely fasten the screws (1).
Step 5
Recommended torque:
– AC terminal: 0.4 N·m {4.1 kgf·cm}
– DC terminal: 0.45 N·m {4.6 kgf·cm}
 Loading...