33
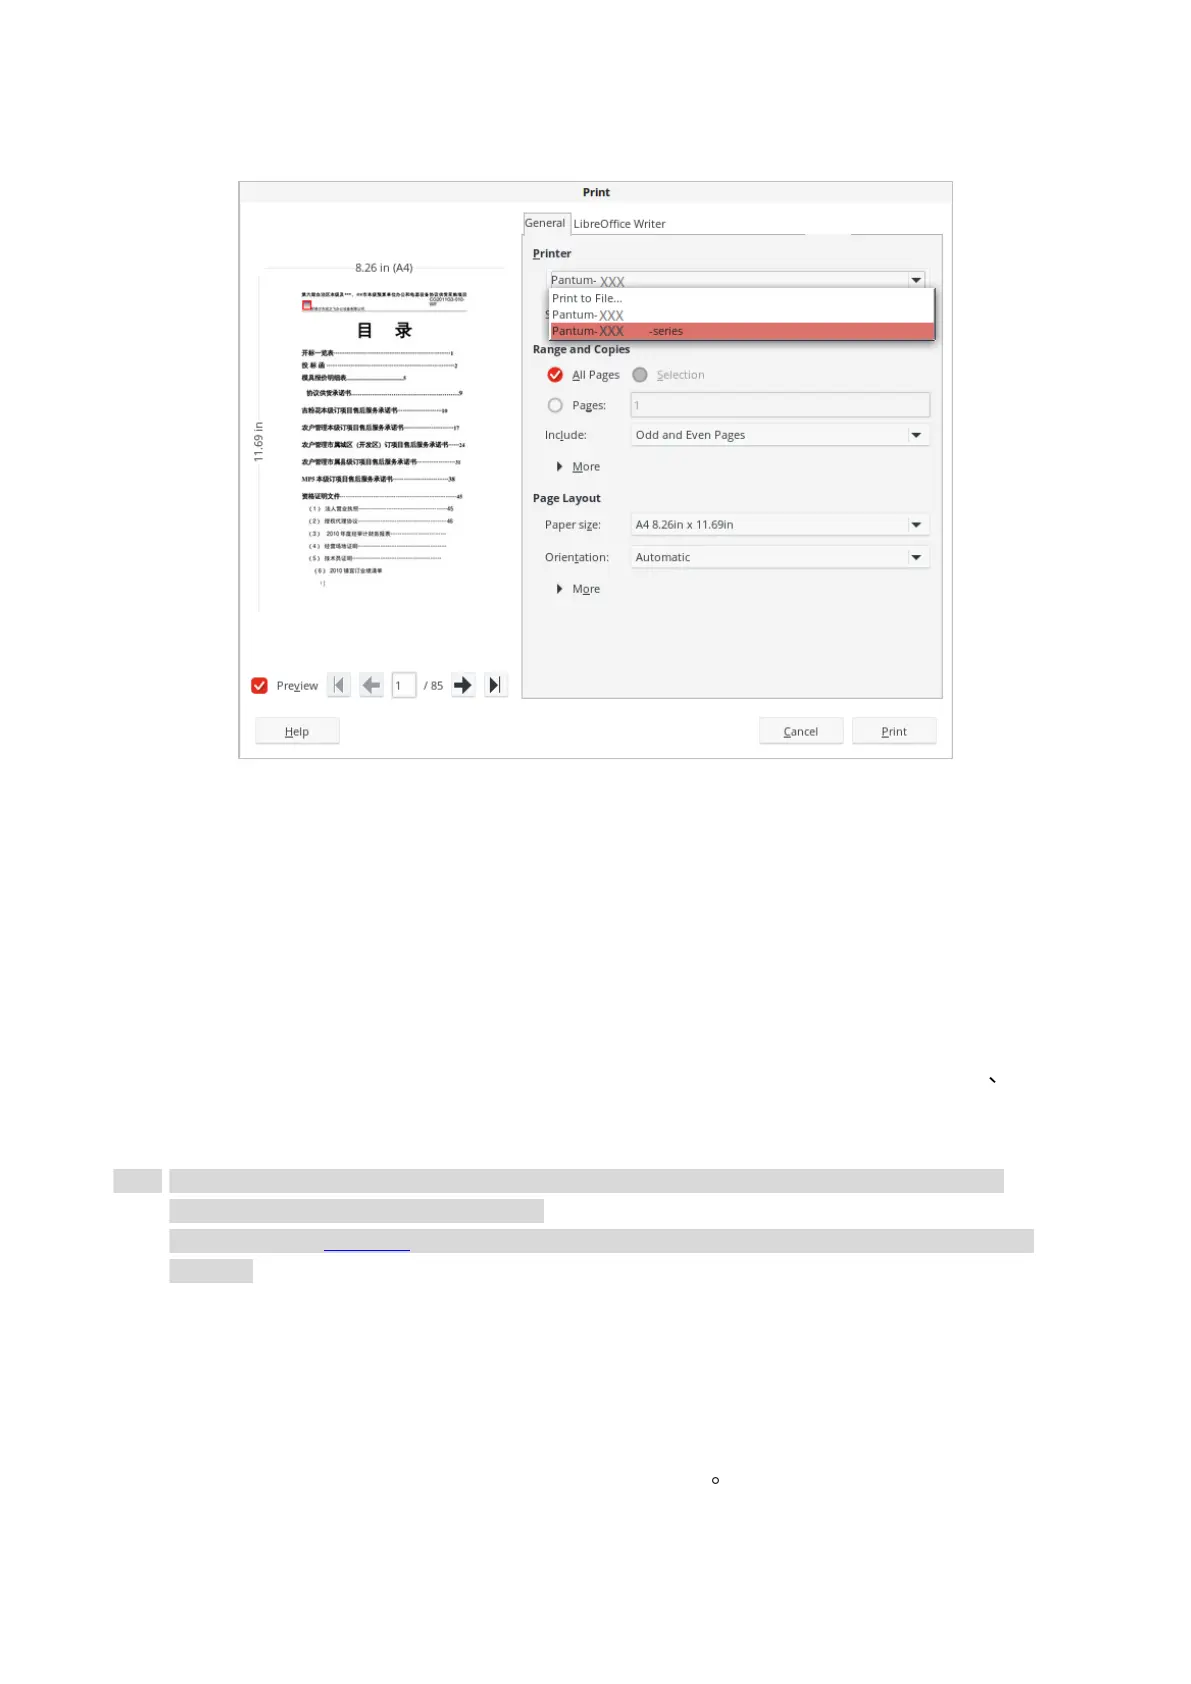
2. Select printer of the corresponding model.
3. Make the print settings according to your needs under the respective tabs such as “General”,
“Page Setup”, “Page Processing”, “Tasks”, “Color” and “Advanced”.
4. Single click “OK” to finish printing setup.
Automatic Two-Sided Printing
his machine supports automatic duplex printing of plain paper, thick paper 1, thick paper 2, thick
paper 3 and thick paper 4. Paper sizes supported for automatic duplex printing are as follows: A3,
A4short side, A4-Long Side, A5-SHORT SIDE, A5-Long Side, A6 short side, JIS B5short side JIS
B5-Long Side, Executiveshort side, Executive-Long Side, Legal.
• Trying the automatic two-sided printing may damage the printer if some paper media are not
suitable for automatic two-sided printing.
• Please refer to Section 2 for paper loading and type of mediums that can be printed via auto
feed tray.
1. Open the file to be printed, click the “File” menu in the upper left corner, and select “Print” to
enable the print driver.
2. Select printer of the corresponding model.
3. Click the printer’s “Properties” and select “Duplex”.
4. Check the box to select the desired print effect as required.
5. Single click “OK” to finish printing setup. Click “Print” to realize auto duplex printing.
 Loading...