tigh~en
both set screws on the
arm
shaft
bevel
gear,
hold the
needle
vibrating
eccentric
bevel
gear
in
proper
engagement,
and
secure the transverse shaft
in
its position by tightening
the
grub
<screw.
To
check
the
above
setting, note the following:
The
needle
vibrating eccentric is set correctly
if,
with
dial
A (Fig. 51) set on
"0"
and
the
needle
bar
at
its highest position,
the
latter makes no
percept
ible
sideways motion when finger-tip control F is
depressed
. For this
purpose,
the
needle
position lever must
be
put
in
the
central notch.
The Driving Eccentric
for
the Automatic Mechanism
This
eccentric performs a dual function.
On
the
one
hand
, it serves
as
a set
collar
which
bears
against
the arm shaft front bushing,
and
on
the
other, it
serves
to
drive the automatic em-
broidery
mechanism.
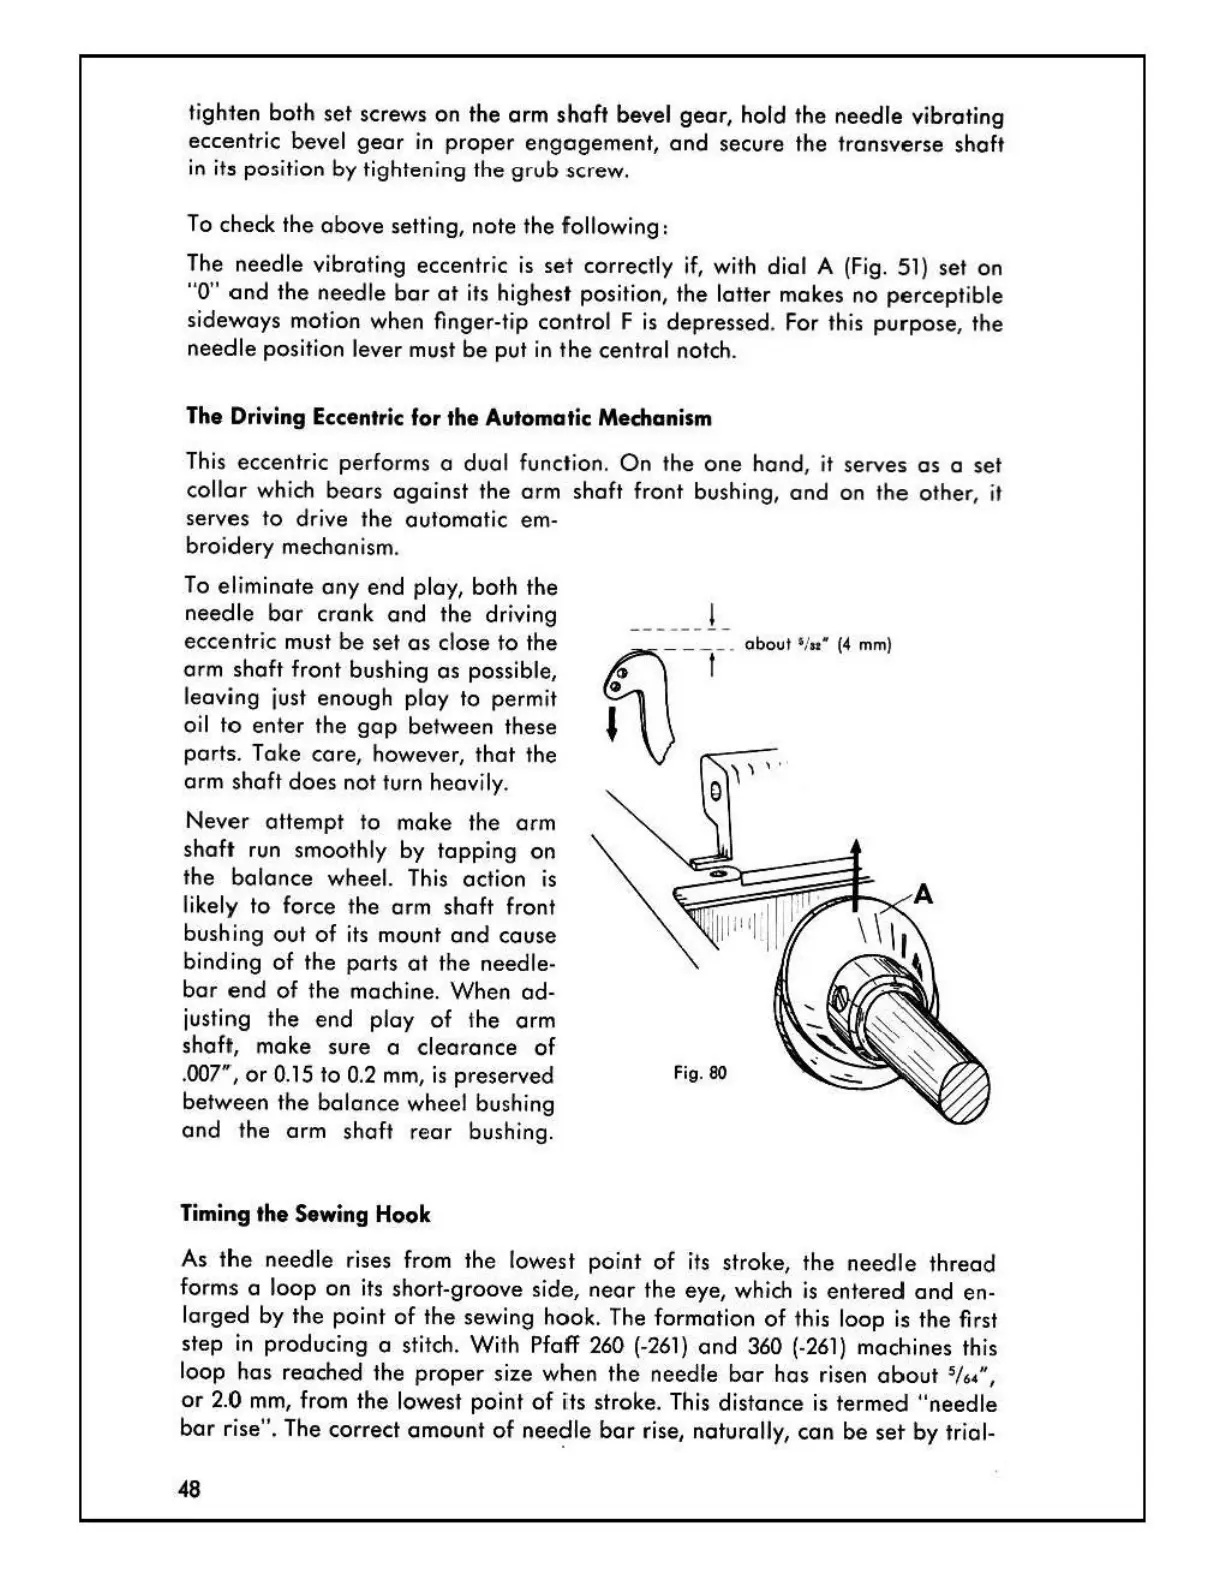
To
eliminate
any
end
ploy, both
the
needle
bar
crank
and
the driving ______ L
eccentric must
be
set
as
close
to
the
~--
__
_
1
_.
about
•1..-
(4
mm)
arm
shaft
front bushing
as
possible,
-~
leaving just
enough
play to permit
oil
to
enter
the
gap
between these
parts. Take
care,
however,
that
the
arm
shaft
does
not
turn heavily.
Never
attempt
to make
the
arm
shaft
run smoothly by
tapping
on
the
balance
wheeL This action is
likely to force the arm shaft front
bushing
out
of
its mount
and
cause
binding
of
the
parts
at
the
needle
-
bar
end
of
the machine. When
ad-
justing
the
end
play
of
the
arm
shaft, make
sure
a
clearance
of
.007",
or
0.15 to 0.2 mm,
is
preserved
between
the
balance
wheel bushing
and
the
arm
shaft
rear
bushing.
Timing the Sewing
Hook
Fig. 80
As t
he
needle
rises from the lowest
point
of
its stroke, the
needle
t
hread
forms a loop on its short-groove side,
near
the
eye, which
is
entered
and
en-
larged
by the
point
of
the
sewing
hook
. The formation
of
this loop is
the
first
step
in
producing a stitch. With Pfaff 260
(-261)
and
360
(-261)
machines this
loop
has
reached the
proper
size when
the
needle
bar
has
risen
about
5
/6•",
or
2.0 mm, from
the
lowest
point
of
i:ts
stroke. This
distance
is
termed
"needle
bar
rise". The correct
amount
of
nee~le
bar
rise, naturally,
can
be
set
by trial-
48

 Loading...