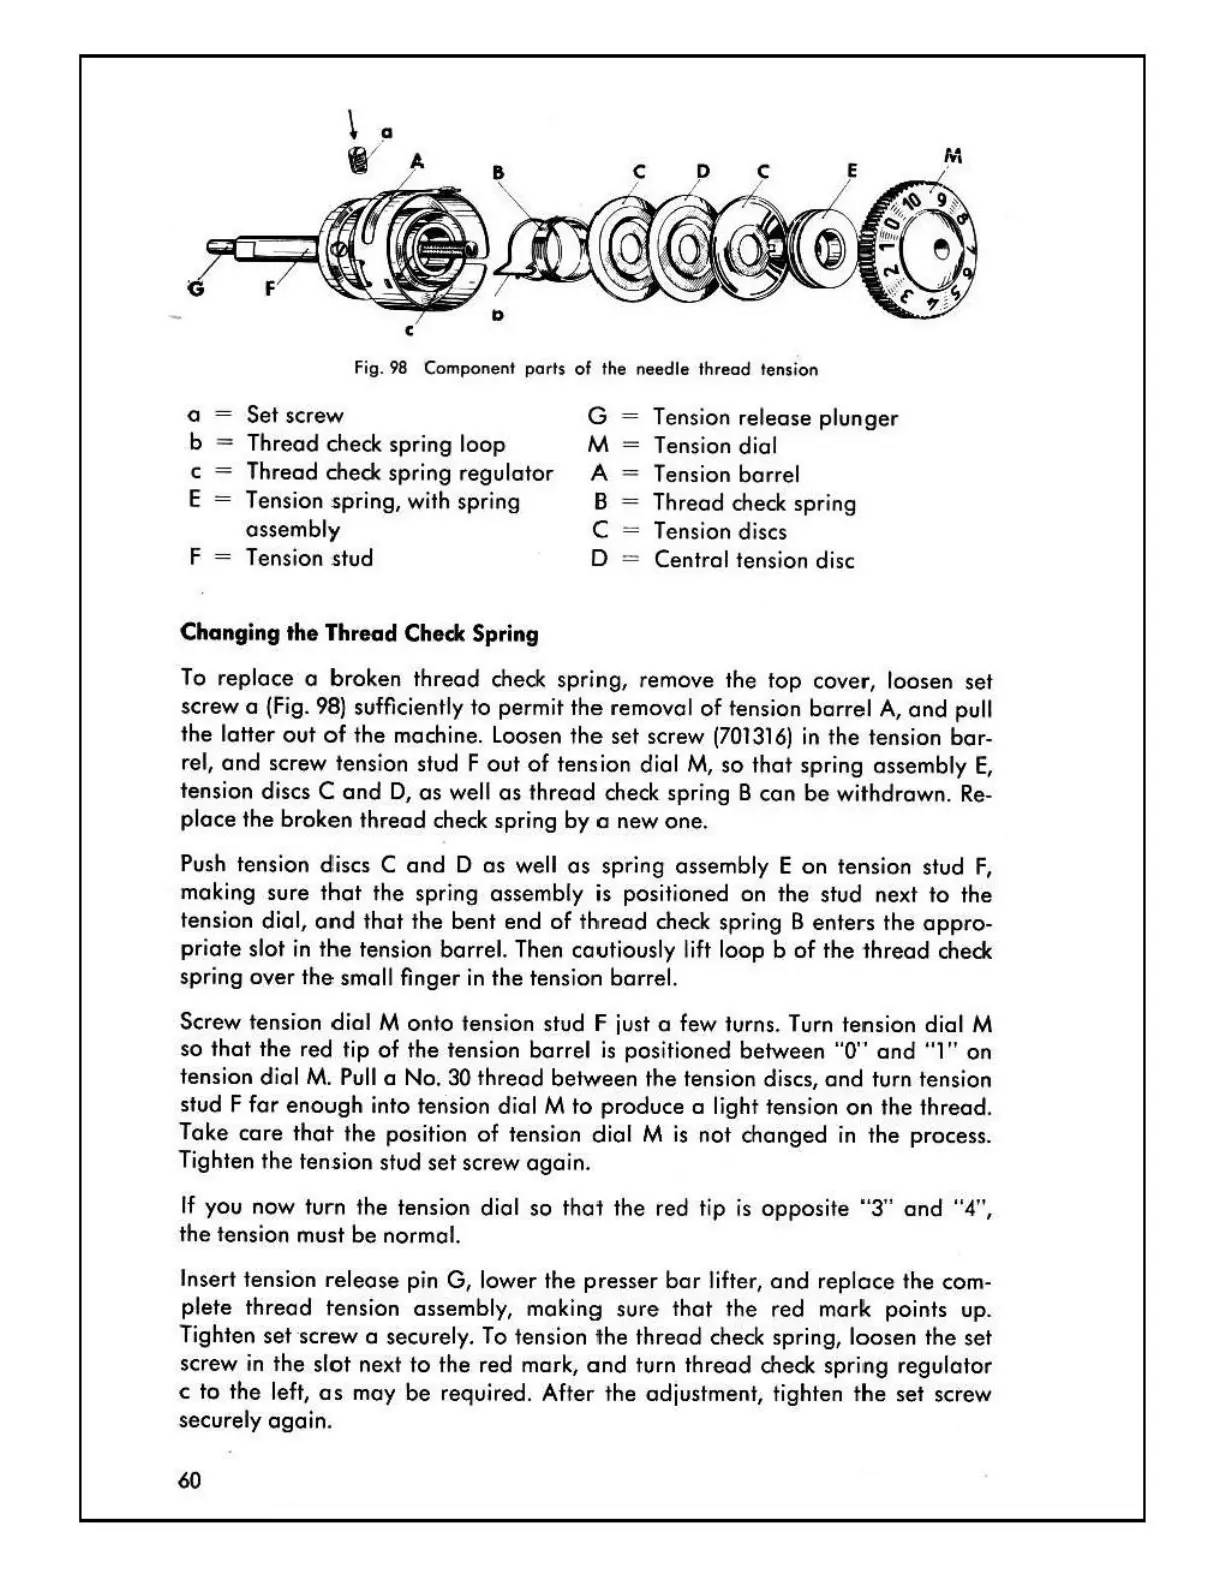
Fig. 98
Component ports of the needle
thread
tension
0
Set
screw
G Tension
re
lease
plunger
b -
Thread check spring
loop
M
-
Tension dial
c
=
Thread check spring
regulator
A
-
Tens ion
barrel
E Tens ion spring, with spring
B Thread check spring
assembly
c
-
Tension discs
F Tension stud
0
-
Central tensi
on
disc
Changing
the
Thread
Check
Spring
To
replace
a broken
thread
check spring, remove the
top
cover, loosen set
screw a (Fig. 98) sufficiently
to
permit
the
remova
l
of
tension
barrel
A,
and
pull
the
latter
out
of
the
machine. Loosen
the
set
screw
(701316)
in
the tension
bar-
rel,
and
screw tension stud F
out
of
tension dial
M,
so
that
spring assembly
E,
tension discs C
and
D,
as
well
as
thread
check spring 8
can
be
withdrawn.
Re-
place
the
broken
thread
check spring
by
a new
one.
Push tension
d!iscs
C
and
D
as
well
as
spring assembly E
on
tens
i
on
stud
F,
making sure
that
the spring assembly is positioned
on
the stud next
to
the
tension dial,
and
tha
t the
bent
end
of
t
hread
check spring 8
enters
the
appro-
priate
slot
in
t
he
tension barrel. Then cautiously lift
loop
b
of
the
thread
check
spring
aver
the
small finger
in
the
tensi
on
barrel.
Screw tension
dial
M
onto
tension stud F just a few turns. Turn tension dial M
so
that
the
red tip
of
the tension
barrel
is
positioned
between
"0''
and
"1"
on
tension dial
M.
Pull a No. 30
thread
between
the
tension discs,
and
turn tension
stud F
far
enough
into terision dial M
to
produce
a light tension
on
the
thread.
Toke
care
that
the
position
of
tension
dial
M
is
not
changed
in
the
process.
Tighten the tension stud
set
screw
again.
If
you
now turn the tension dial so
that
the
red tip is
opposite
"3"
and
"4",
the
tension must
be
normal.
Insert tension
release
pin
G,
lower
the
presser
bar
lifter,
and
replace
the com-
plete
thread
tension assembly, making
sure
that
the
red
mark
points up.
Tighten
set
screw
a securely. To tension
the
thread
check spring, loosen
the
set
screw
in
the
slot
next
to
the
red
mark,
and
turn
thread
check
spring
regulator
c
to
the
left,
as
may
be
required. After
the
adjustment, tighten
the
set screw
securely
again
.
60

 Loading...