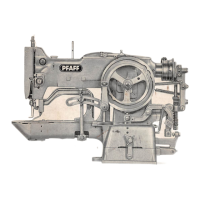
Converting a Pfaff
260
(360)
into a Pfaff
260-261
(360·261)
Both the Pfaff 260
and
the
Pfaff 360
ore
so
designed
that
an
automatic
em-
broidery
mechanism
can
be
installed
at
any
time. The following hints
are
in-
tended
to
facilitate
the
conversion job
and
should
be
strictly
adhered
to
in
order
to
eliminate, right from
the
beginning,
all
sewing troubles which
may
be
caused
by
errors in installing
and
adjusting this unit.
The
various
assemblies
of
the
automatic
embroidery
mechanism
are
shown
in
a
drawing
on
page
72.
All
essential
parts
are
identified
by
numbers
and,
hence
,
con
be
located
easily. Adjustments which
were
covered in
greater
detail
earlier
in this manual will
in
the following
be
dealt
with but brief
ly
.
Installing
the
Automatic
Mechanism
Remove the
top
cover
and
check
the
position
of
the driving eccentric
on
the
arm
shaft. The driving eccentric
is
positioned
correc
tly
if
its timing mark
is
in
line
with.
the
timing mark
on
the
arm
shaft. It should
be
noted
that
this driving
eccentric performs a
dual
function
as
on
eccentric
and
a
set
collar.
In
its Iotter
capacity
·, it serves
to
fix
the position
of
the
arm
shaft
lengthwise
of
the
machine
arm. Therefore,
if
you hove
to
adjust the position
of
the driving eccentric,
take
care
that
the
arm
shaft
does
not hove
any
end
ploy
and
that
the machine
does
not work
heav
ily,
Driving eccentrics
that
hove no timing marks
ore
set
as
follows:
Turn the
balance
wheel
in
sewing direction until the
ta
ke-up lever
has
passed
the
highest
point
of
its stroke
and
descended
5
/32N,
or
4
mm.
With the
arm
shaft
in this position, the
lobe
of
the driving eccentric should point upward (Fig. 80).
Tighten
both
set
screws securely.
Mounting
the
Engaging
Levers
Begin
by
mounting
the
front
engaging
lever.
To
do
this, turn stitch width dial
A
to
"0",
and
insert the eccentric stud into
the
lower
ho~
of
cam
tl'nger 34
(Fig.
110) from the front. Turn the stud so
that
its
lobe
is
at
the top,
and
tighten
the
set
screw. This
engaging
lever controls the full stitch width.
To insert the central
engaging
lever,
set
stitch width dial A
on
"0". Insert the
eccentric stud into the
upper
hole
of
cam finger
34
(Fig. 110) from
the
back.
Turn
the
stud
so
that
its
lobe
is
at
the top,
and
tighten the screw. This
engaging
lever controls
half
the
stitch width.
To insert the
rear
engaging
lever, turn stitch width dial A
to
"4"
and
flick
needle
position lever 8
to
the
left notch. Insert
the
eccentric stud into the hole
at
the
top
of
zigzag
regulator
arm
32 (Fig.
11
0),
and
turn it so
that
its
lobe
points
upward.
Tighten
the
set
screw securely.
71

 Loading...