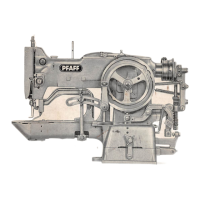
Testing
the
Performance of
the
Automatic
Mechanism
Engage
the automatic embroidery mechanism,
set
pattern
length lever
Eon
"3"
and
stitch width dial A
on
"0",
and
put
needle
position lever B
in
the left notch.
To check the
operation
of
the automatic embroidery mechanism, run
the
ma-
chine very slowly, switch com selector dial D
to
each
of
its eight positions
in
succession,
and
sew
the
eight basic embroidery designs
that
can
be
produced
in
this way. The
automatic
embroidery mechanism works satisfactorily if the
machine, while sewing
on
embroidery design, switches from wide zigzag
to
straight stitching without
any
difficulty.
Checking
the
Operation of
the
Engaging
levers
Turn
engaging
lever
dial
C
to
the positions given below,
and
check
whether
the
engaging
lever
or
levers indicated
ore
properly
engaged
in
the
respective
clutch studs:
1 - central
engaging
lever
2 - central
and
rear
engaging
levers
4 - front
engaging
lever
5 - front
and
rear
engaging
levers
Eliminating
Troubles
in Automatic
Sewing
Type
of
Trouble
Patterns which, for example,
ore
sewn with D
at
7, C
at
3,
E
at
1,
and
lever B
in
the left notch lode uniformity.
Cause
1. The pressure springs exert excessive pressure
on
the
engaging
levers
and
thereby
retard
the
return
of
the
controls
to
their respective starting posi-
tions.
2. The zigzag
regulator
stud
or
the
zigzag regulator
arm
turns heavily be-
cause it
does
not
have
sufficient ploy.
3. The
automatic
embroidery mechanism locks oil.
Remedy
1. Adjust the pressure exerted by the springs
as
instructed
in
"Mo
·unting the
Pressure Spring
Assembly"
on
page
75.
2. Adjust
the
position
of
the
zigzag
regulator
stud
or
t~e
zigzag
regulator
arm
to
ensure
sufficient ploy.
3.
Oil the automatic mechanism.
Type
of
Trouble
Patterns which
ore
sewn with C
at
"4"
and
lever B
in
the
central notch lock
symmetry.
Couse
This condition may
be
attributed
to
maladjustment, improper handling
or
other
causes which hove disturbed the correct stitch width setting.
n

 Loading...