feed row will rise
as
close
to
the
near
end of the feed slot
as
possible. Also
make sure
that
the feed
dog
will strike neither end
of
the feed slots when set
for the longest forward
or
backward stitch
(Fig.
89-2).
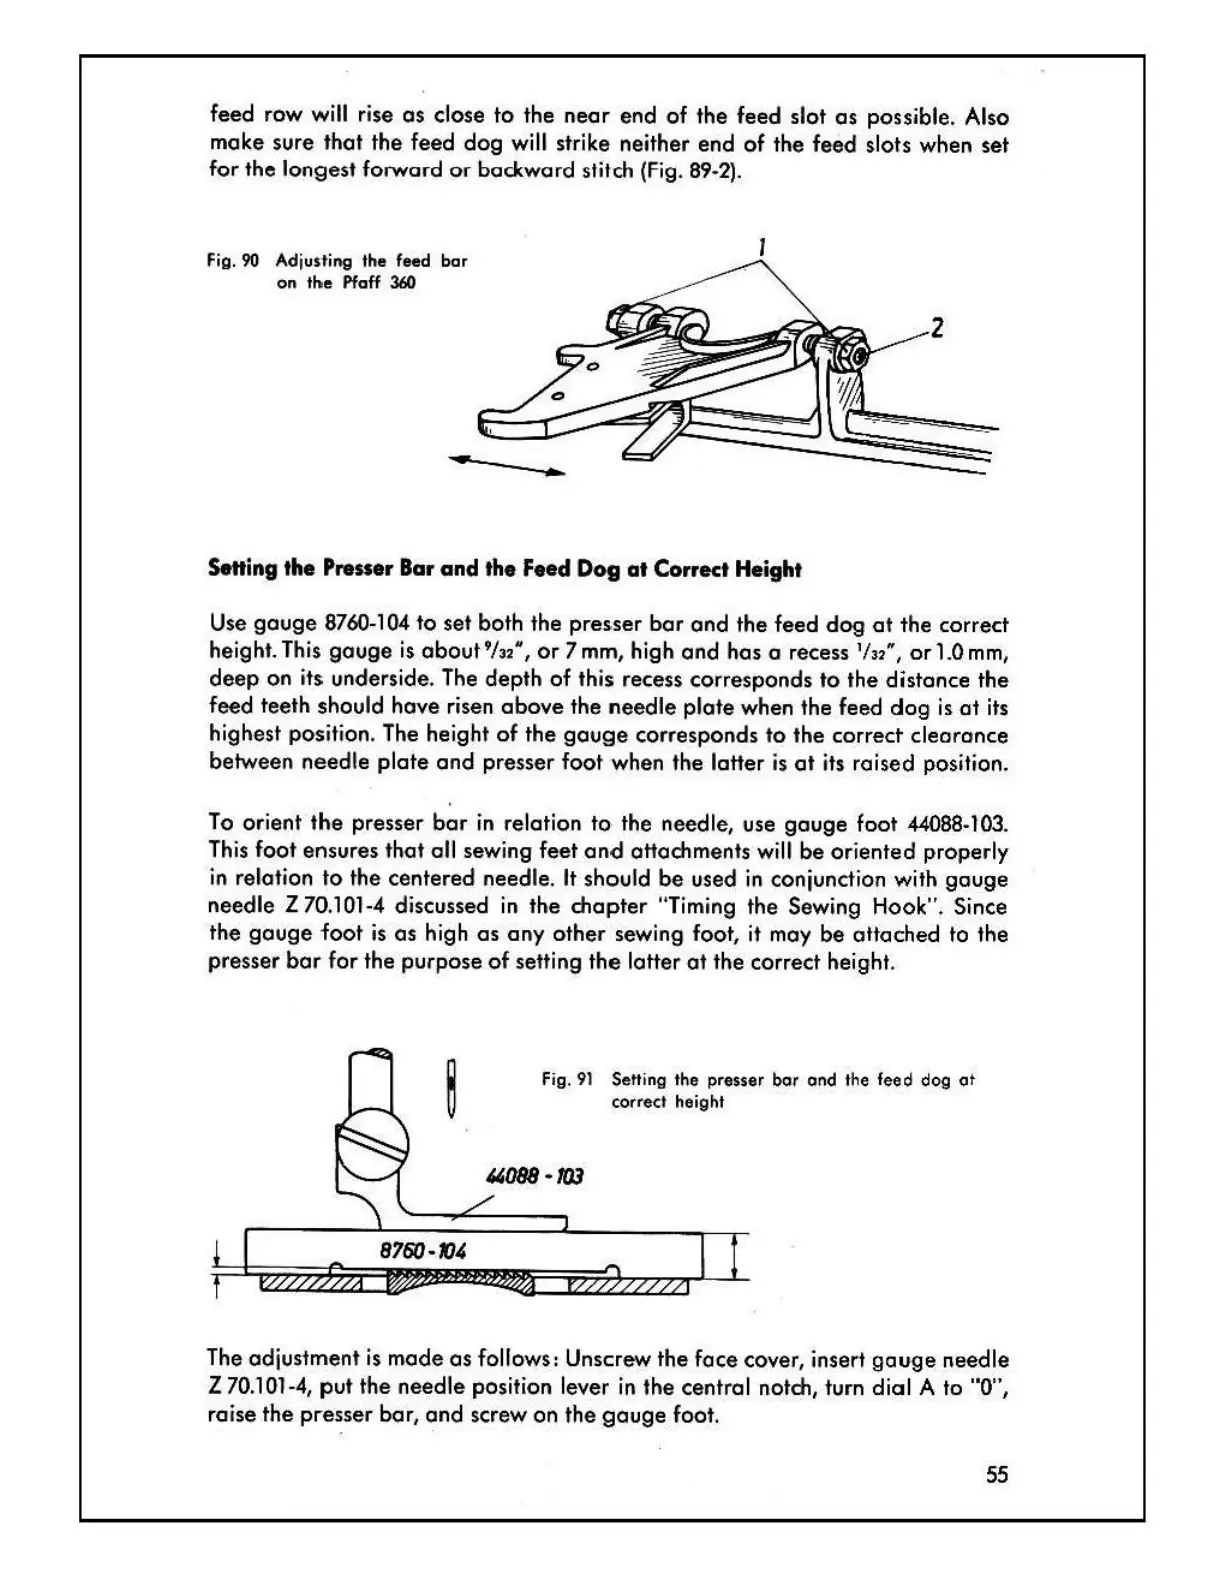
Fig.
90
Ad
justing the feed
bar
on
tne
Pfaff
360
Setting
the
Presser
Bar
and
the
Feed
Dog at Correct Height
2
Use
gouge
8760-104
to set both the presser
bar
and
the feed
dog
at
the correct
height.
This
gauge
is
about
9
/32-,
or
7mm, high
and
has a recess
1
/32~,
orl.Omm,
deep
on
its.
underside.
The
depth of this recess corresponds to the distance the
feed teeth should have risen
above
the needle plate when the feed
dog
is
at
its
highest position. The height
of
the
gouge
corresponds
to
the correct clearance
between needle plate
and
presser foot when the Iotter
is
at
its raised position.
To
orient the presser
bar
in
relation to· the needle, use
gauge
foot
44088-103.
This
foot ensures
that
all sewing feet
and
attachments
will
be
oriented properly
in
relation to the centered needle.
It
should
be
used
in
conjunction with gouge
needle
Z 70.101-4 discussed
in
the chapter "Timing the Sewing Hook". Since
the
gouge
foot
is
as
high
as
any
other sewing foot, it may
be
attached to the
presser
bar
for the purpose
of
setting
the
Iotter
at
the correct height.
Setting the presser
bar
and the feed dog
at
correct height
The
adjustment
is
mode
as
follows: Unscrew the face cover, insert
gouge
needle
Z
70.101-4,
put the needle position lever
in
the central notch, turn dial A to "0",
raise the presser bar,
and
screw on the
gouge
foot.
. .
55

 Loading...