9.28
BRAKES
9923412 - 2012 Sportsman 400/500 and EFI Tractor Service Manual
© Copyright 2011 Polaris Sales Inc.
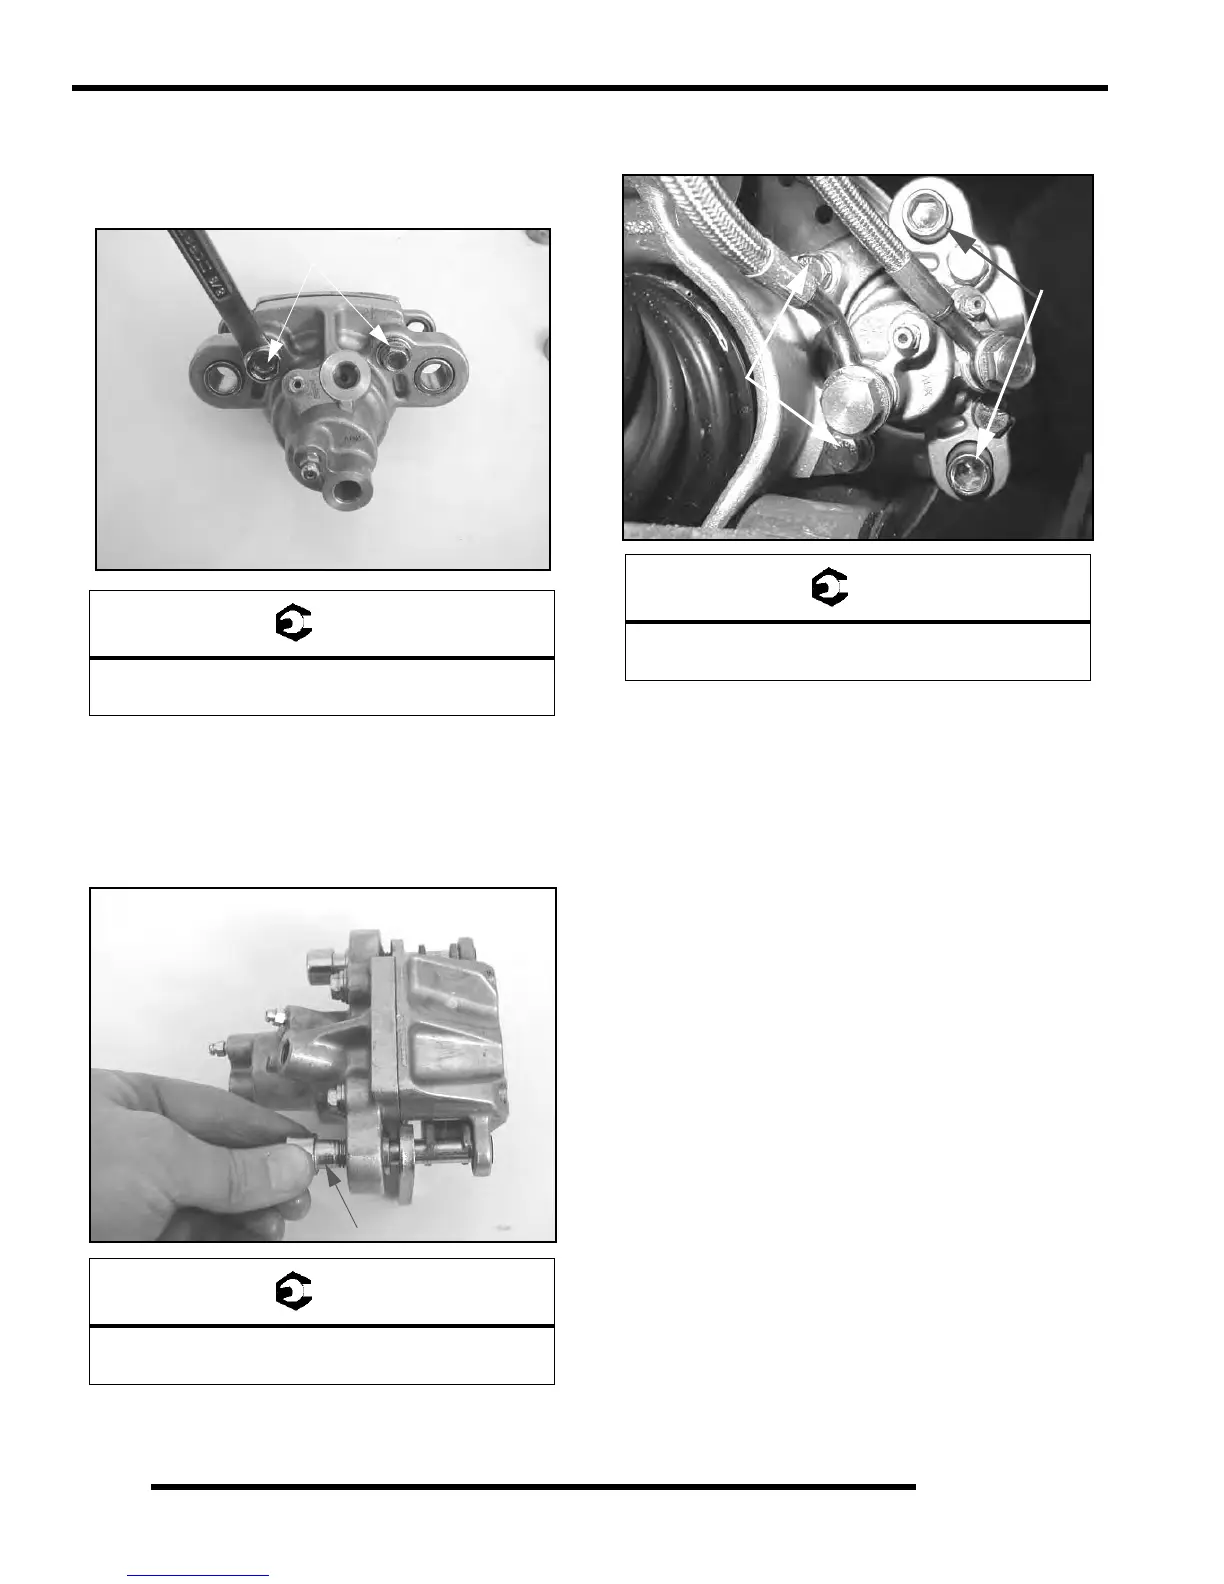
2. Carefully assemble caliper body, making sure O-rings
are properly positioned in groove. Tighten the caliper
anvil bolts and then torque the anvil bolts evenly to
specification.
3. Install brake pads in caliper body with friction material
facing
each other. Install the slide pins and the slide
pin retaining rings. Torque the slide pins to
specification.
NOTE: The slide pins should be torqued when
ins
talled on caliper mount.
4. Install caliper and torque mounting bolts to
s
pecification.
5. Install brake line and tighten securely with a line
wr
ench. Torque the brake lines to the proper torque
specification.
6. Follow bleeding procedure outlined in the
“BLEEDING PROCEDURE” in this
chapter.
7. Field test unit for proper braking action before putting
into
service. Inspect for fluid leaks and firm brakes.
Make sure the brake is not dragging when lever is
released. If the brake drags, re-check assembly and
installation.
Caliper Anvil Bolt Torque:
16-18 ft.lbs. (22-24 Nm
)
Slide Pin Torque:
30-35 ft.lbs. (41-48 Nm
)
Caliper Mounting Bolt Torque:
16-18 ft.lbs. (22-24 Nm
)
18 ft.lbs.
(24 Nm)
30-35 ft.lbs.
(41-48 Nm)

 Loading...