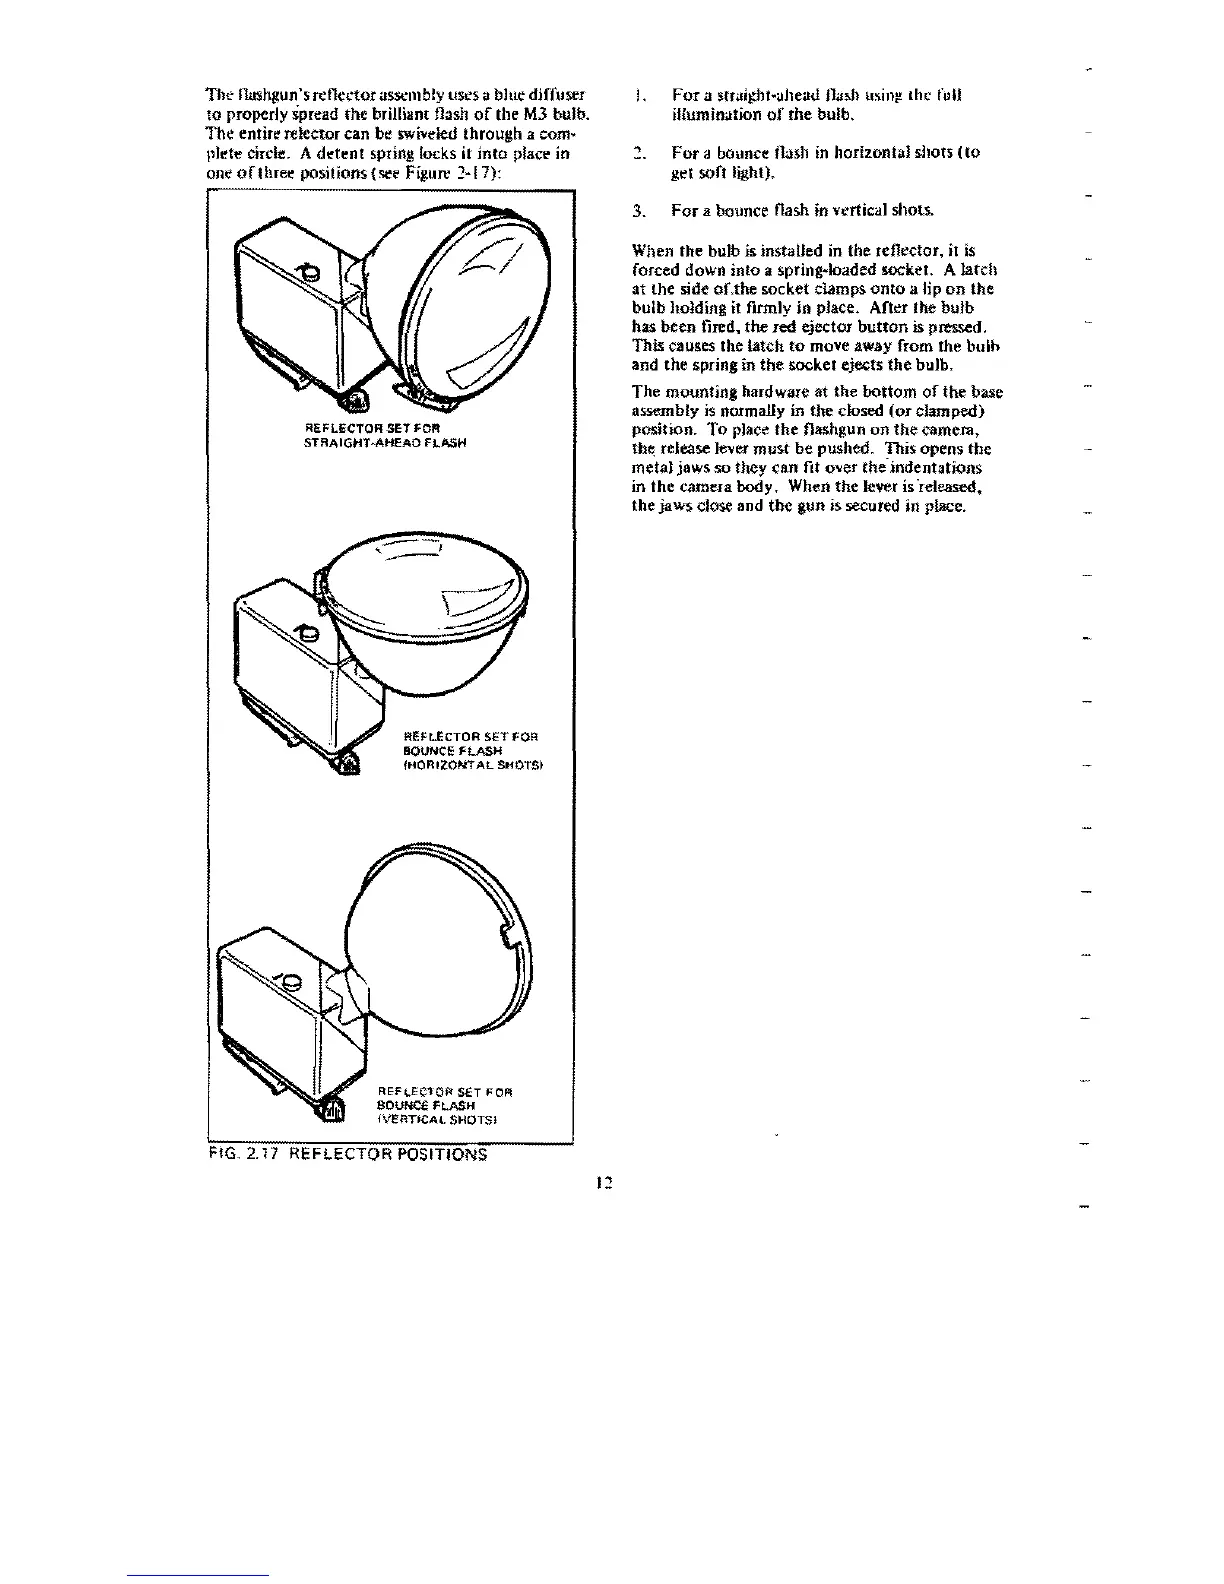
Tht"
rlashg:un's reflector
as~mbly
lISl?S
a blue diffuser
I,
For
a
$truit:ht~aheaJ
l1uJ>h
u~in!!
(hL'
full
to
properly spread the brilliant flash
of
the
M3
bulb. iUumination
of
the bulb.
The entire relettor can be swiveied through. a
com~
pJete
circle_
A detent spring locks it
into
place in
.,
For
a bounce flash
in
horizontal shots
(to
one
oflhree
positions
{see
Figure
2~17):
get
sofllighl).
REFI.,EC10R
SfT
FOF!
SOUNCE
FlASH
IVERTiCAl
SHOTS)
3.
For
a bounce flash in vl?rtical shots.
When the
bu1b
1S
instaUed in the reflector, it
is
forced down into a
spring~loaded
socket. A latch
at the side
oUhe
socket clamps
onto
a lip
on
the
bulb hoMing
it
firmly in pJace. After the bulb
has been fired. the red ejector
button
is pressed.
This causes the latch
to
mO'Ye
away from the bul;,
and the spring in
the
socket ejects
the
bulb.
The mounting hardware at the bottom
of
the
base
assembly
is
normally in the closed
(or
clamped)
REFl.ECTOR
SET
FOR
position. To place the flashgun
on
the
camera,
STRAIGHT·AHEAO FLASH
th~
release
lenr
must
be
pushed. This opens the
metal jaws
so
they can fit over the-indentations
in the camera body. When
the
lever
is
"released.
the jaws close and tbe
gun is secured in place.
REFLECTOR
SET
FOR
BQUNCE
FlASH
iriORIZONTAL SHOTS)
FIG. 2.17 REFLECTOR POSITIONS
12

 Loading...