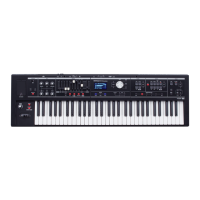
6
Panel Descriptions
Front Panel
1
2 3 4
5
6
7
8
9 10
11
12
13 14
15
Number
Name Explanation Page
1
USB MEMORY port
Connect a USB ash drive (sold separately) here.
You can save or play back songs you’ve recorded, and save or load registration sets.
If you connect a wireless USB adapter (WNA1100-RL; sold separately), you’ll be able to use
applications that support wireless.
* When opening/closing the USB ash drive cover, please be careful not to get your ngers
pinched between the movable part and the panel. In places where small children are
present, make sure that an adult provides supervision and guidance.
* Never insert or remove a USB ash drives while this unit is turned on. Doing so may corrupt
the unit’s data or the data on the USB ash drives.
* Carefully insert the USB ash drives all the way in—until it is rmly in place.
* Use USB Flash Memory sold by Roland. We cannot guarantee operation if other products
are used.
p. 33
p. 39
p. 52
2
D-BEAM controller
You can apply various eects to the sound by positioning your hand above the D-BEAM controller.
[PITCH] button If this is on, the D-BEAM controller will control the pitch.
p. 24[SFX] button If this is on, the D-BEAM controller will control the sound eects.
[CONTROLLER] button If this is on, the D-BEAM controller will control the eect you’ve assigned.
3
Eect section
Here you can apply eects to the sound.
[OVERDRIVE] knob Applies a distortion eect.
p. 23
[TONE] knob Adjusts the tonal character.
[COMPRESSOR] knob Makes the sound more consistent.
[MFX] knob Applies a multi-eect (multiple eects).
[DELAY] knob Delays the sound to create an echo-like eect.
[REVERB] knob Applies reverberation to the sound.
4
Organ section
Here you can select organ sounds. You can also create your own organ sounds, and adjust the volume.
Harmonic bars
Use these to shape the organ sound.
You can modify the sound in real time as you play.
p. 16
[LEVEL] bar Adjusts the volume of the organ section. —
[TYPE] button Selects the variation of organ sounds. p. 12
ORGAN [SPLIT] button Divides the organ into two keyboard regions. p. 28
[UPPER/LOWER] button Selects the part when using the harmonic bars to shape the sound. p. 28
[PERCUSSION] button Turns the percussion eect of the organ sound on/o. p. 20
[VIBRATO/CHORUS] button Turns the vibrato or chorus eect of the organ sound on/o. p. 21
5
Display/Other
Display Sound names and other settings are shown here. —
6
MODE [ORGAN] button Allows you to play organ sounds. p. 12
MODE [PIANO] button Allows you to play piano sounds. p. 13
MODE [SYNTH] button Allows you to play synthesizer sounds. p. 13

 Loading...