24
FA ROTEX HPSU compact (V5) •
4 x Set-up and installation
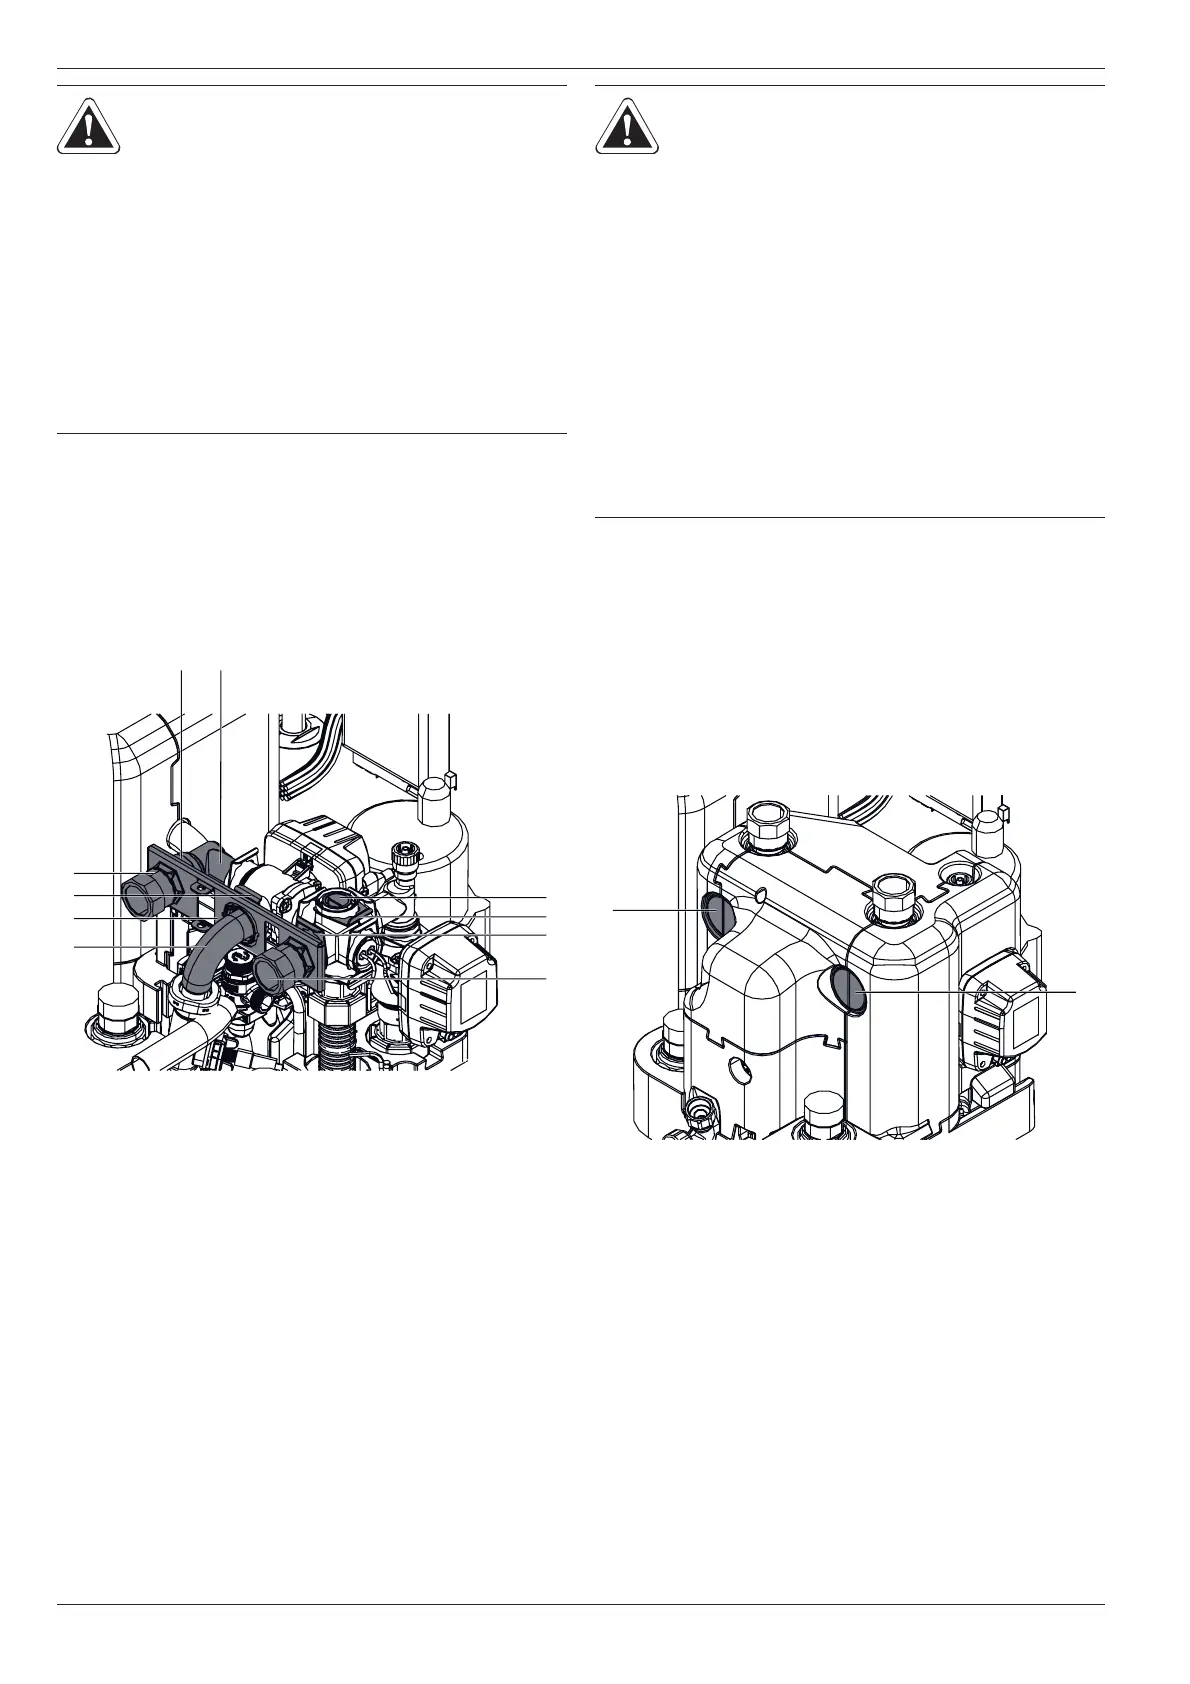
Ɣ Remove retainer plate (fig. 4-10, item A).
Ɣ Pull off the plug bracket on the closing plug (fig. 4-10, item D).
Ɣ Pull out the closing plug (fig. 4-10, item E).
Ɣ R
otate the angular piece (fig. 4-10, item H) by 90° to the back.
Ɣ Pull off the plug bracket on the elbow (fig. 4-10, item G).
Ɣ Pull the elbow (fig. 4-10, item F) carefully to the rear out of its
horizontal mount so that the retainer plate (fig. 4-11, item A)
can be inserted in the gap vertically.
Ɣ Sl
ide the retainer plate between the elbow and its horizontal
mount and insert the elbow (fig. 4-11, item F) back in its
mount through the central hole in the retainer plate.
Ɣ Secure the elb
ow back into its mount with plug bracket
(fig. 4-11, item G).
Ɣ Insert both connection couplings (fig. 4-11, item B) through
the retainer plate in the side mounts.
Ɣ Secure bo
th connection couplings in their mounts with the
plug brackets (fig. 4-11, item C).
Ɣ In
sert the closing plug (fig. 4-11, item E) in the top mount.
Ɣ Secure the closing plug with the plug bracket (fig. 4-11,
item D).
Ɣ Cut out
the side transit points in the thermal insulation
(fig. 4-12, item A) using a suitable tool.
4.4.2 Connecting hydraulic lines
Requirement: Optional accessories (e.g. Solar, backup heater)
mounted on the ROTEX HPSU compact according to the specifi-
cations of the instructions included.
Ɣ Check cold water pressure (maximum 6 bar).
– At higher pressure in the drinking water line, a pressure
reducer must be installed.
CAUTION!
When working on the hydraulics you
must take care of the mounting position
of the O-rings to prevent damage to the
O-rings and consequent leaks.
Ɣ Always place the O-rings in the mount
after removing or installing a coupling
and a mount.
Ɣ Make sure that the O-ring is fully in the
mount before inserting a coupling in
the mount.
Fig. 4-11 Heating feed and return flow connections aligned to the rear
CAUTION!
If the plug brackets are not inserted
properly, the couplings can come loose
in their mounts which may result in high
levels of fluid escape and continuous
fluid escape.
Ɣ Before plugging in a plug bracket,
make sure that the plug bracket
engages in the groove in the coupling.
To do this, insert the coupling into the
mount until the groove becomes
visible through the plug bracket
mount.
Ɣ Insert the plug bracket up to the stop.
Fig. 4-12 Thermal insulation cut-out
 Loading...