4 x Set-up and installation
FA ROTEX HPSU compact (V5) •
25
Ɣ Establish hydraulic connections at the ROTEX HPSU
compact.
– Position and dimensions of the h
eating connections to be
taken from fig. 4-1 / fig. 4-2 and from tab. 3-1.
–
Pay attention to the stipulated tightening torque
(see chapter 10.3 "Tightening torque").
– Design the lines as such that the sound attenuation cowl
can be applied without any problem following assembly.
– Connect the water for filling or refil
ling the heating system
as specified by EN 1717 to avoid contamination of drink-
ing water by backwash.
Ɣ Conn
ect a drain line to the safety overpressure valve and
connect a diaphragm drain container in accordance with
EN 12828.
– Check the seating of the drai
n hose on the overpressure
valve.
– If required, attach your own hose and route accordingly.
Ɣ Carefull
y insulate pipe lines against heat loss and so as to
avoid the formation of condensation (insulation thickness at
least 20 mm).
– W
ater shortage protection: The pressure and temperature
monitoring of the control unit safely switches off the ROTEX
HPSU compact in the event of a water shortage. No addi-
tional water shortage protection is needed in the construction.
– Av
oid damages caused by deposits and corrosion:
Observe the relevant regulations of technology to prevent
creation of corrosion products and deposits.
Minimum requirements regarding the quality of filling and sup-
plementary water:
– Water hardness (calcium and magnesium, calculated as
calciu
m carbonate): 3 mmol/l
– Conductivity: 150
0 (ideal 100) ȝS/cm
– Chloride: 250 mg/l
– Sulphate: 250 mg/l
– pH value (heating water): 6,5 - 8,5
In the case of filling and top-up wa
ter with a high overall hardness
or other properties that deviatte from the minimum requirements,
measures for the desalination, softening, hardness stabilisation
or other suitable conditioning measures are required to maintain
the required water quality.
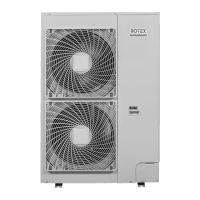
Ɣ Conn
ect the drain hose to the connection piece for the safety
overflow (fig. 3-2 to fig. 3-5, item 23).
– Use transparent drain hose (draining water must be visi-
ble).
– Connect the drain hose to an adequately dimensioned
waste water install
ation.
– Drain should not be lockable.
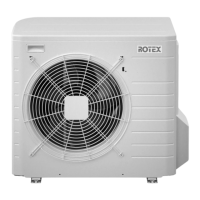
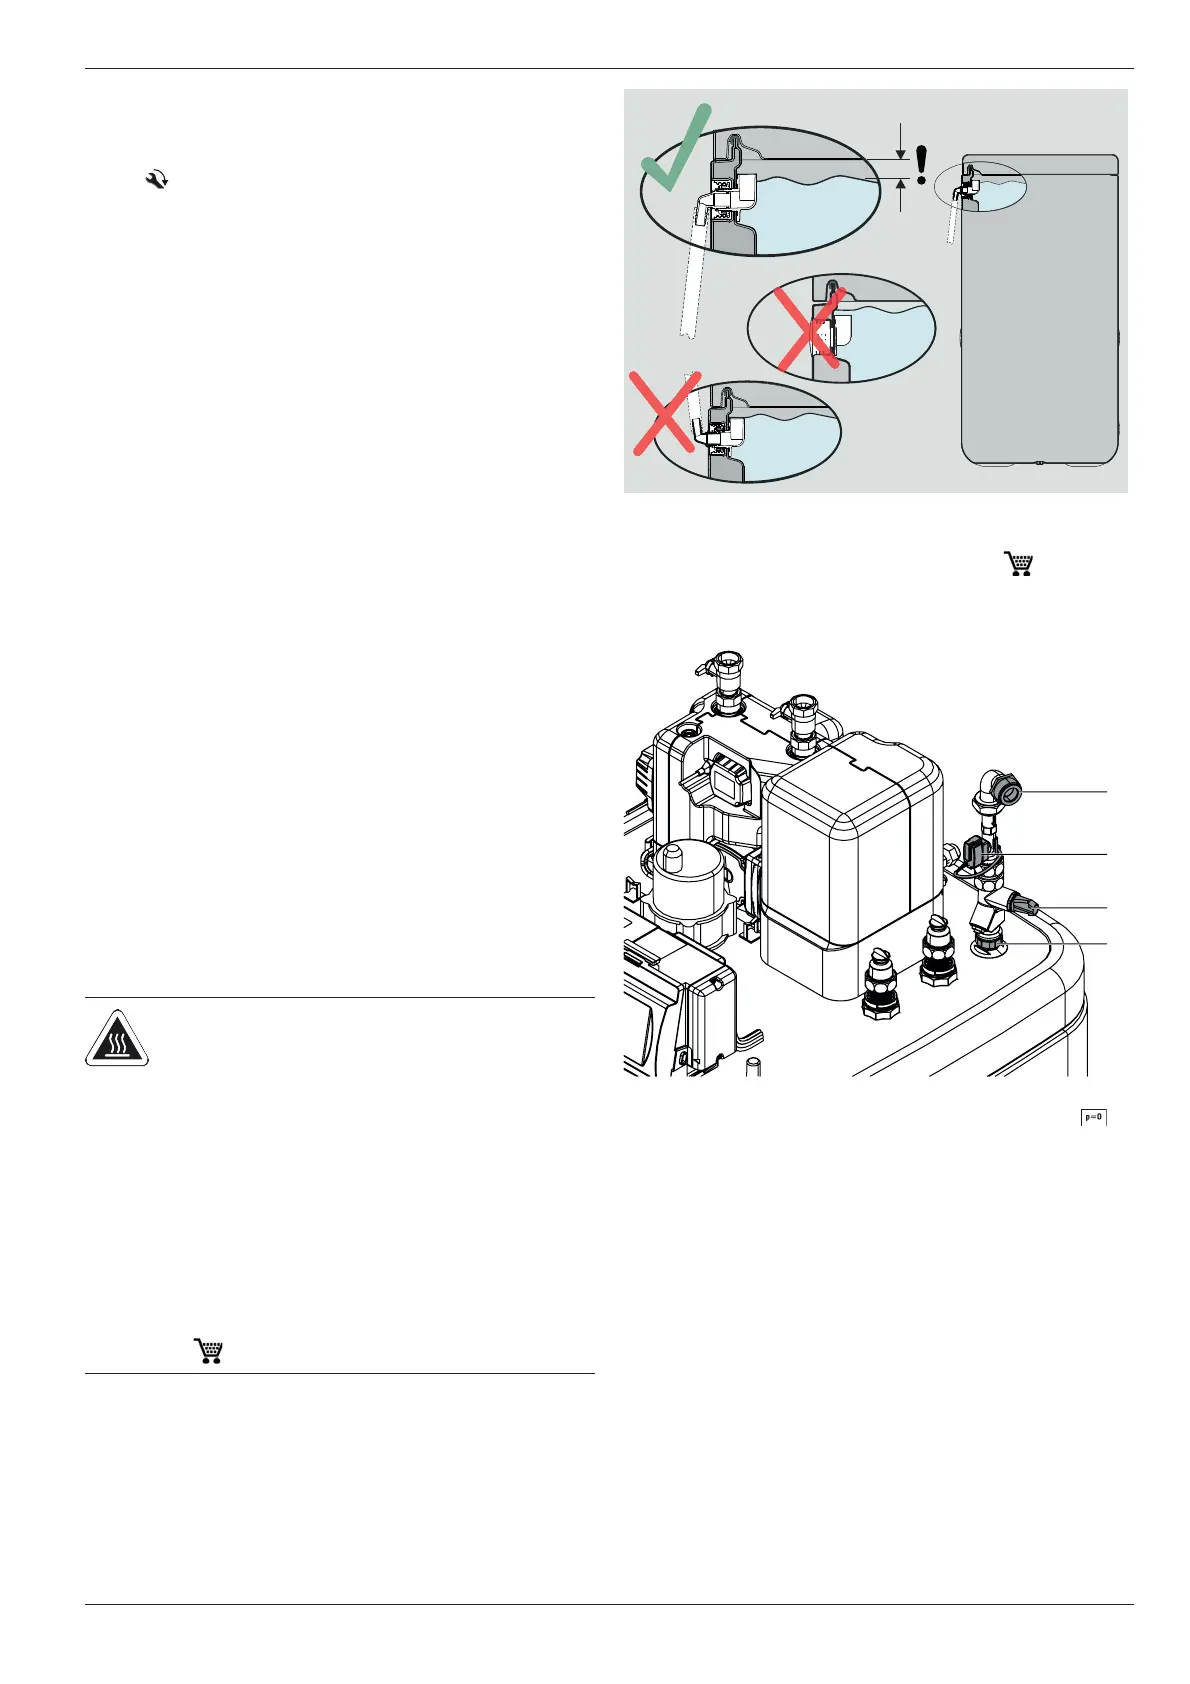
4.4.3 Installation of DB connection kit ( 141590)
The optional DB connection kit provides improved accessibility
for connecting the DrainBack line (solar feed).
WARNING!
There is a danger of scalding at hot
water temperatures over 60 °C. This is
possible, when solar energy is used, with
a connected external heating device,
when the Legionella protection is acti-
vated or when the domestic hot water
target temperature is set higher than
60 °C.
Ɣ Install a scald protection (domestic
hot water mixing unit (e.g. VTA32
15 60 15).
Fig. 4-13 Installation of drain hose at safety overflow
A DB line connection (solar
feed)
B FlowSensor (not included in
the DB connection kit, but in-
cluded in RPS4)
C Flow limiter (FlowGuard)
D Solar feed connection
on
the storage tank
Fig. 4-14 DB connection kit
A
D
B
C
 Loading...