30
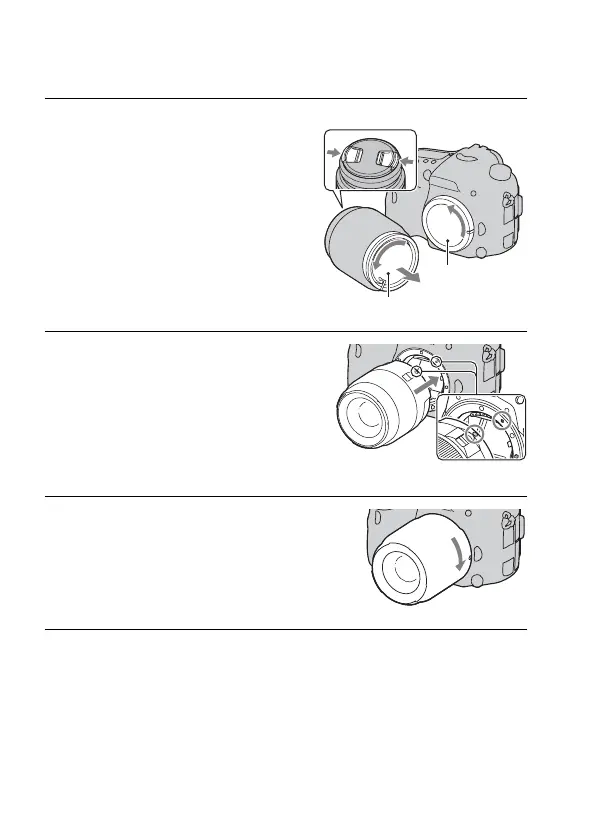
Attaching a lens
Notes
• When attaching a lens, do not press the lens release button.
• Do not use force when attaching a lens.
• E-mount lenses are not compatible with this camera.
• When you use a lens for which a tripod socket is provided, attach the lens onto the
tripod using the tripod socket provided to help balance the weight of the lens.
• When carrying the camera with a lens attached, hold both the camera and the lens
firmly.
1
Remove the body cap from
the camera and the rear lens
cap from the rear of the lens.
• When changing the lens, quickly
change the lens away from dusty
locations so as to keep dust or debris
from getting inside the camera.
• When shooting, remove the front lens
cap from the front of the lens.
Front lens cap
Rear lens cap
2
Mount the lens by aligning
the orange index marks
(mounting indexes) on the
lens and camera.
Orange index marks
3
Turn the lens clockwise until
it clicks into the locked
position.
• Be sure to put the lens on straight.
Body cap
 Loading...