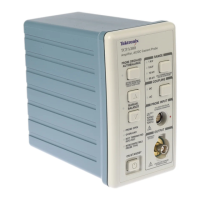
TCP303 and TCP404XL Adjustments
6-16
TCPA300/400 Amplifiers and TCP300/400 Series Current Probes Instruction Manual
1. Remove the access plugs that cover the DC gain, 10 s, and 1 s adjust-
ments on the probe.
2. Preset the probe adjustments: Refer to Figure 6-- 5 on page 6--12 for
adjustment locations. Do this only at the beginning of the probe adjustment
process.
a. Set the 1 s adjustment fully clockwise.
b. Set the 10 s adjustment fully counter-clockwise.
3. Do not clamp the current probe around any conductor, but make sure the
jaws are locked shut.
4. Press the amplifier PROBE DEGAUSS AUTOBALANCE button. Wait for
the degauss/autobalance routine to complete before proceeding. The routine
is complete when the indicator light turns green.
5. Connect the probe to the 1-turn current loop.
6. Enable the output of the generator.
NOTE. The DC gain, 10 s, and 1 s adjustments on the TCP303 interact.
Adjusting them can be a repetitive process. You may need to balance between
transient response and gain to meet both specifications at once.
7. Repeat steps 7 and 8 as necessary to achieve optimum response:
a. Adjust the DC gain and 10 s adjustments to achieve an amplitude of six
divisions and a flat waveform (optimum response).
b. Adjust the 1 s adjustment to achieve a flat waveform (optimum
response).
c. Repeat step a.
8. Verify the DC gain accuracy of the probe using the procedure on page 5--31.
You may have to make some minor adjustments to the DC gain adjustment
to achieve the highest accuracy possible.
TCP303 Procedure

