Removal and Replacement
TDS 340A, TDS 360 & TDS 380 Technical Reference
6–13
Disk Drive
Required tools: a screwdriver with a size T-15 Torx tip (items 1 and 2) and a
Pozidriv screwdriver (item 5).
1. Set the oscilloscope so its bottom is down, and its front is facing you.
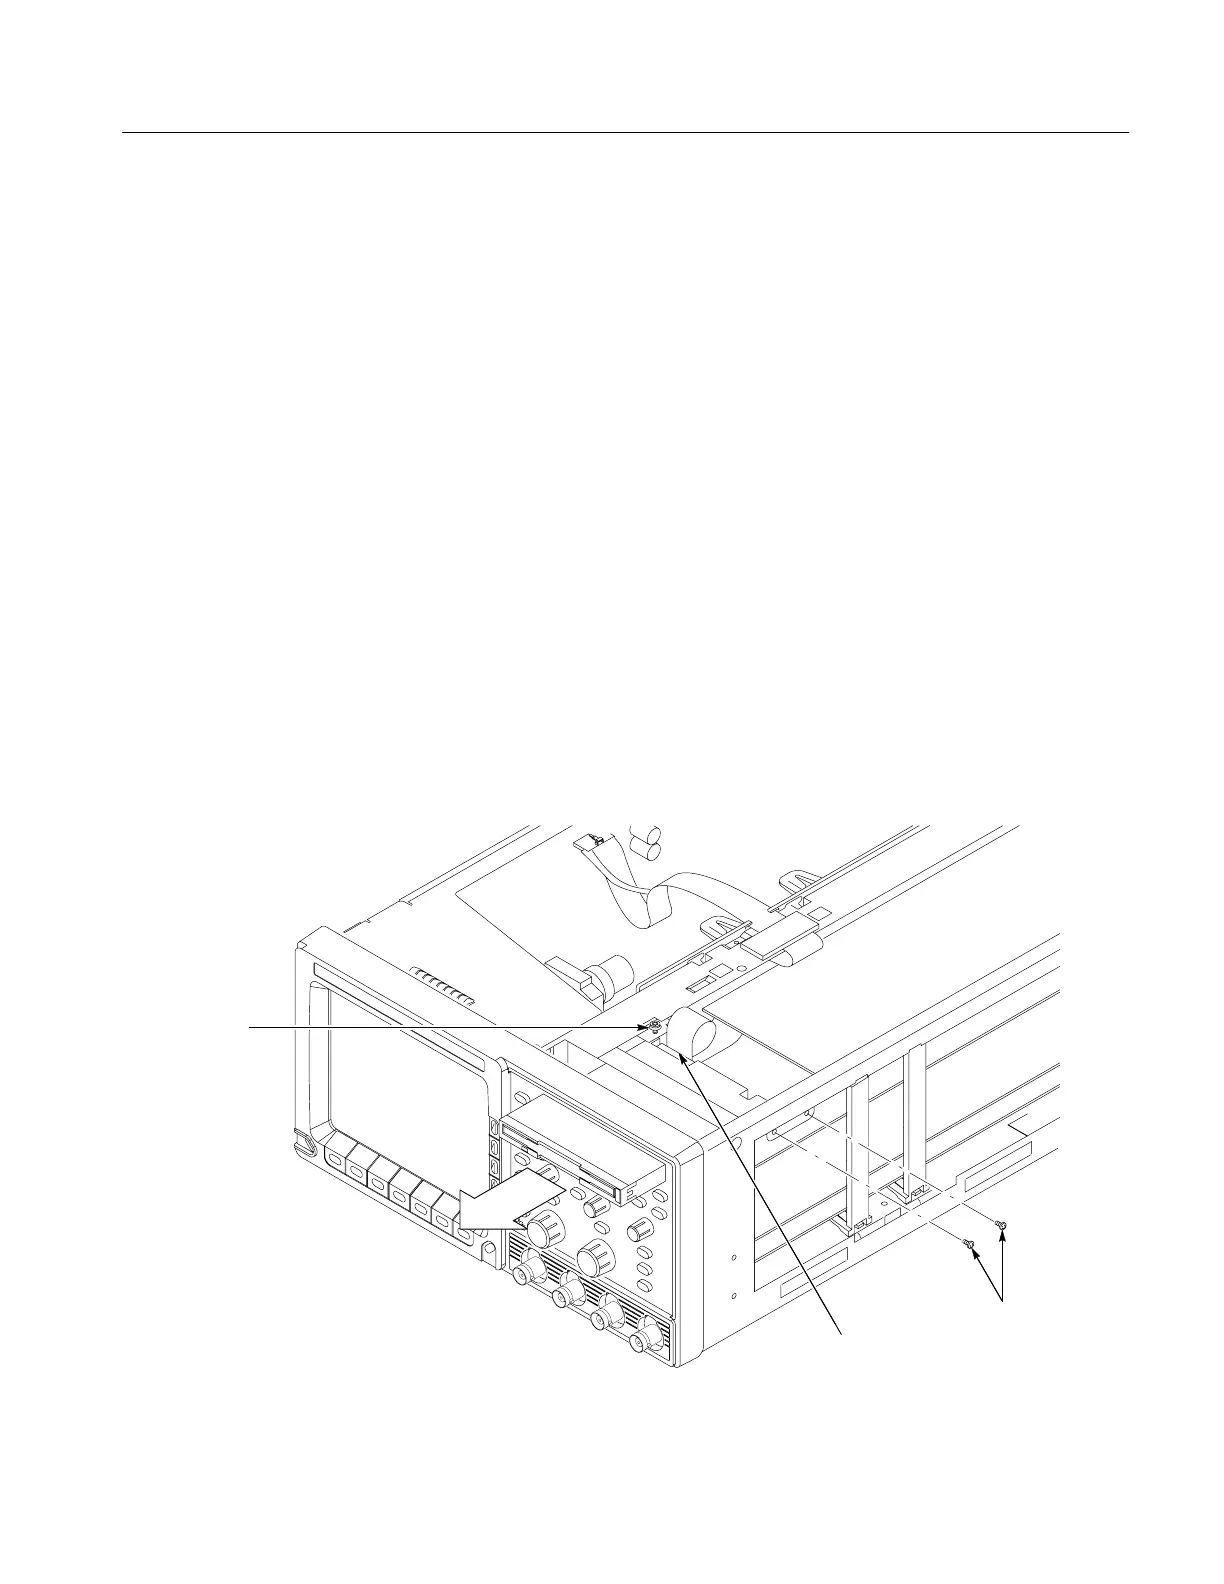
2. To remove the disk drive, perform the following steps using Figure 6–6 as a
guide:
a. Lift up on the two locking tabs on J1 of the disk drive.
b. Remove cable J1 from the drive.
c. If present, remove the T-15 Torx-drive screw that clamps the drive in the
chassis. When replacing the drive, do not reinstall this screw.
d. Remove the one or two screws securing the drive to the chassis. When
replacing a drive without a spacer, use one 4.0 mm screw.
e. Push the drive from the back until it extends one to two inches beyond
the front panel. Then grasp the drive by its front edges and pull it out of
the front panel to complete its removal.
f. If present, remove the screw securing the spacer to the drive, and lift the
spacer away from the drive to complete the removal.
3. To reinstall the disk drive, perform steps 2a-2f in reverse order.
Remove T-15
Torx-drive screw
(see text)
J1
Remove
securing screws.
Figure 6–6: Removing the disk drive
 Loading...