7.TopAccess
[Administration] Tab Page 67
TopAccess
Save as file settings
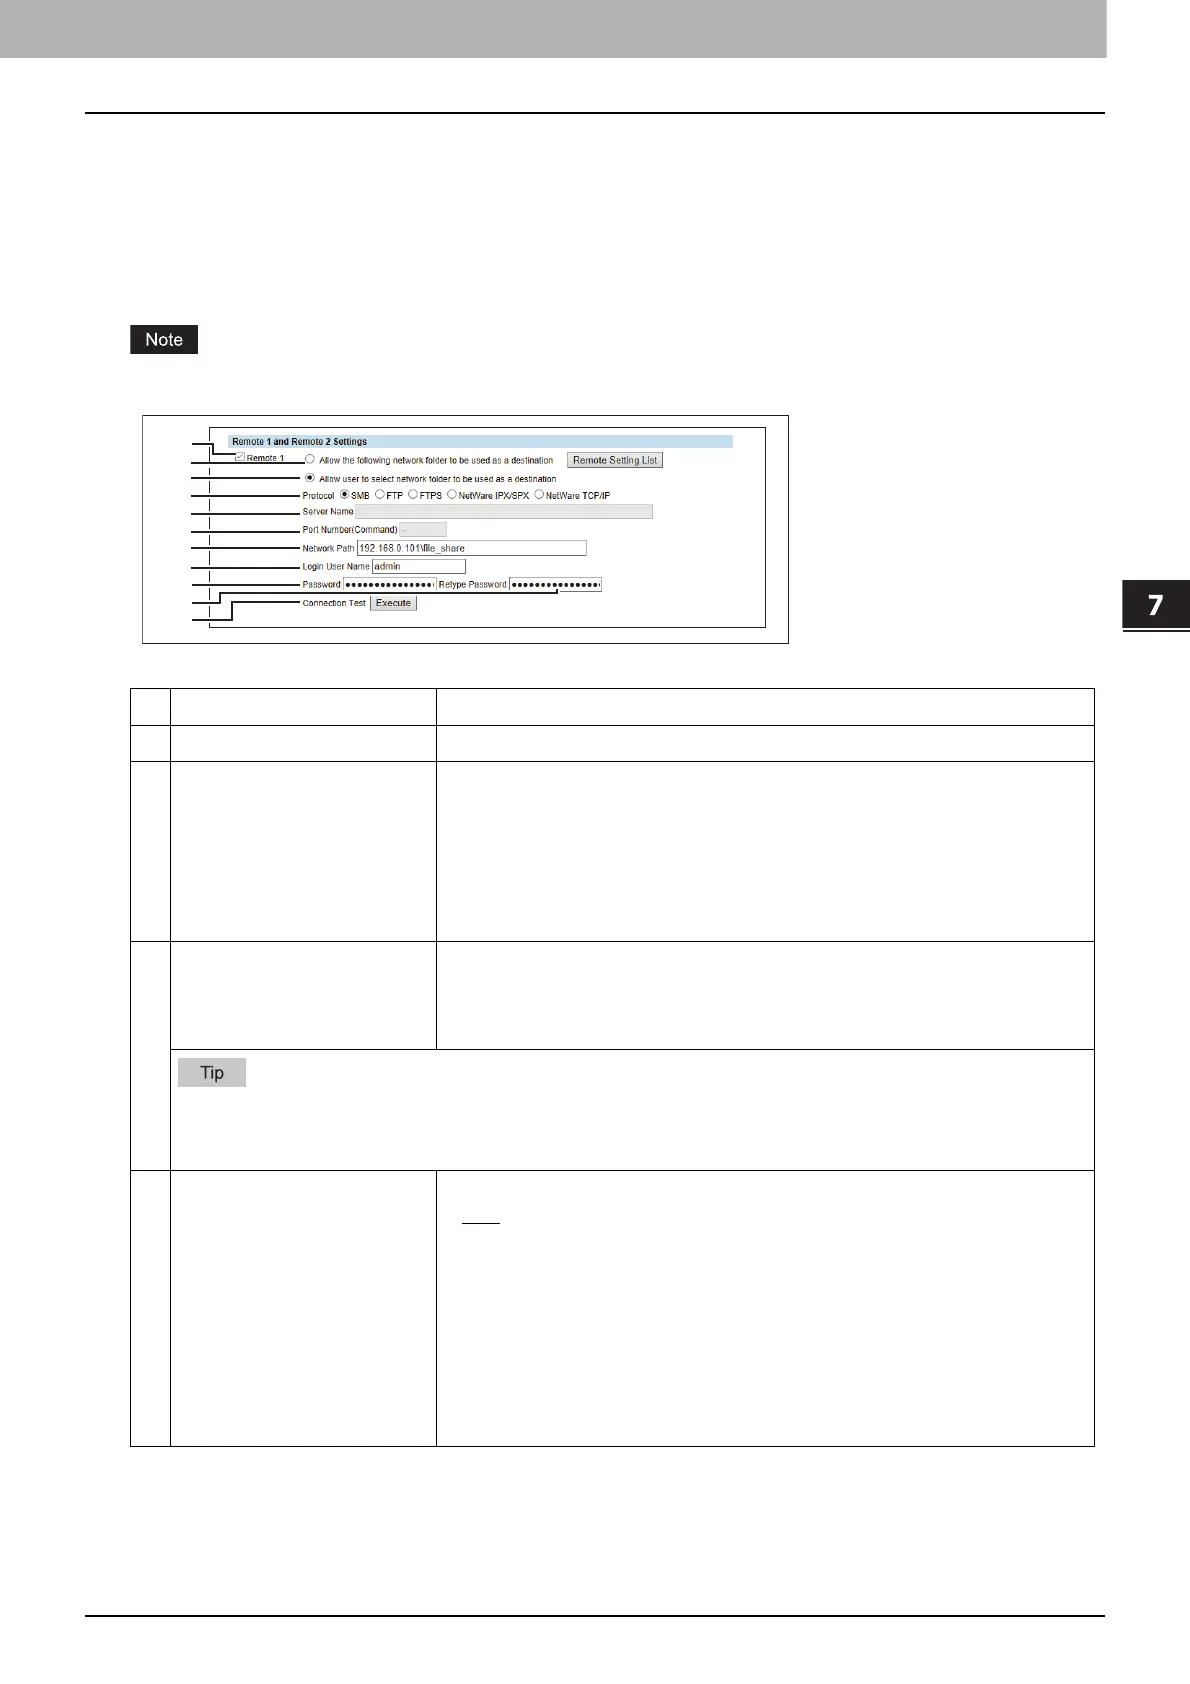
Setting up Remote 1 and Remote 2 Settings
In Remote 1 and Remote 2, you can specify how users can select the network folders for Save as file destination when
you select [Use Network Folder Destination] in the Destination setting. You can specify two network folders; Remote 1
and Remote 2. The setting items are the same for both Remote 1 and Remote 2.
The network folder as a destination must be set to be shared by all users.
Item name Description
1 [Remote 1]/[Remote 2] Select the remote network folder you want to use.
2 Allow the following network
folder to be used as a
destination
Select this to restrict users to select only the network folder that you have
specified. Otherwise, select [Allow user to select network folder to be used as
a destination].
[Remote Setting List] button — Sets a list of network folders for Save as file
destination, which can be selected from Remote 1 and Remote 2. To select
the specified setting list from the touch panel, you must select [Allow user to
select network folder to be used as a destination].
3 Allow user to select network
folder to be used as a
destination
Select this to allow users to specify a network folder as a destination. When
the list of Save as file destinations has been set in [Remote Setting List], you
can select a network folder from the list. Otherwise, select [Allow the
following network folder to be used as a destination].
If you want to allow users to specify either Remote 1 or Remote 2, select the one that is not set for the network
folder as a destination and select [Allow user to select network folder to be used as a destination] of the
selected folder.
4 Protocol Select the protocol to be used for uploading a file to the network folder.
SMB — Select this to send a file to the network folder using the SMB
protocol.
FTP — Select this to send a file to the FTP server.
FTPS — Select this to send a file to the FTP server using FTP over SSL/TLS.
NetWare IPX/SPX — Select this to send a scanned file to the NetWare file
server using the IPX/SPX protocol.
NetWare TCP/IP — Select this to send a scanned file to the NetWare file
server using the TCP/IP protocol.
 Loading...