EasyManuals Logo
Home>Toshiba>All in One Printer>e-STUDIO6550C Series

Toshiba e-STUDIO6550C Series Management Guide

Toshiba e-STUDIO6550C Series
282 pages
To Next Page IconTo Next Page
To Previous Page IconTo Previous Page
Page #238 background imageLoading...
Page #238 background image
3 MANAGING COUNTERS (COUNTER MENU)
236 Managing Department Codes
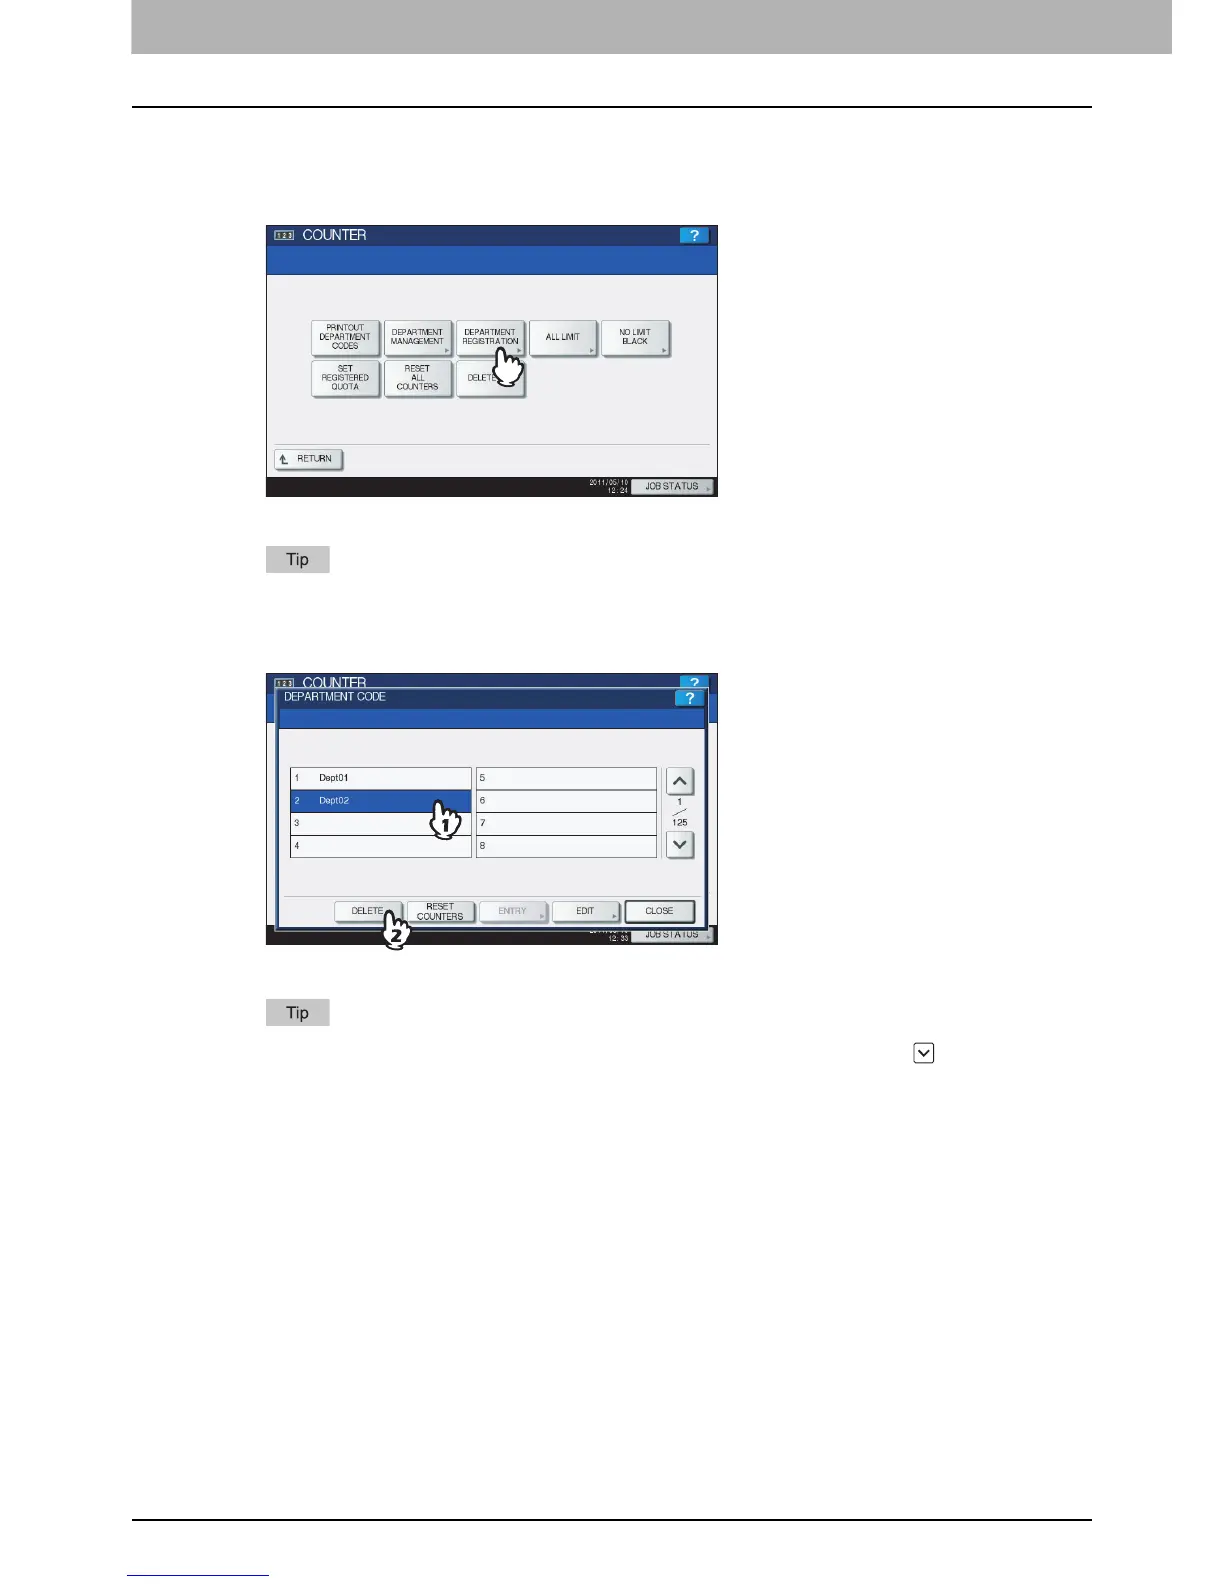
Deleting department codes
This function allows you to delete an existing department code.
1
In the DEPT. MANAGEMENT menu, press [DEPARTMENT REGISTRATION].
The DEPARTMENT CODE screen is displayed.
For instructions on how to display the screen above, see the following page:
P.226 “Logging on as administrator”
2
Press the department button that you want to delete and press [DELETE].
The message “Delete OK?” is displayed in the CONFIRMATION screen.
If the touch panel does not display the department code that you want to delete, press to display the next
screen.

Table of Contents

Other manuals for Toshiba e-STUDIO6550C Series

Questions and Answers:

Question and Answer IconNeed help?

Do you have a question about the Toshiba e-STUDIO6550C Series and is the answer not in the manual?

Toshiba e-STUDIO6550C Series Specifications

General IconGeneral
BrandToshiba
Modele-STUDIO6550C Series
CategoryAll in One Printer
LanguageEnglish

Related product manuals