Printing
WorkCentre 5300 Series Multifunction Printer
User Guide
59
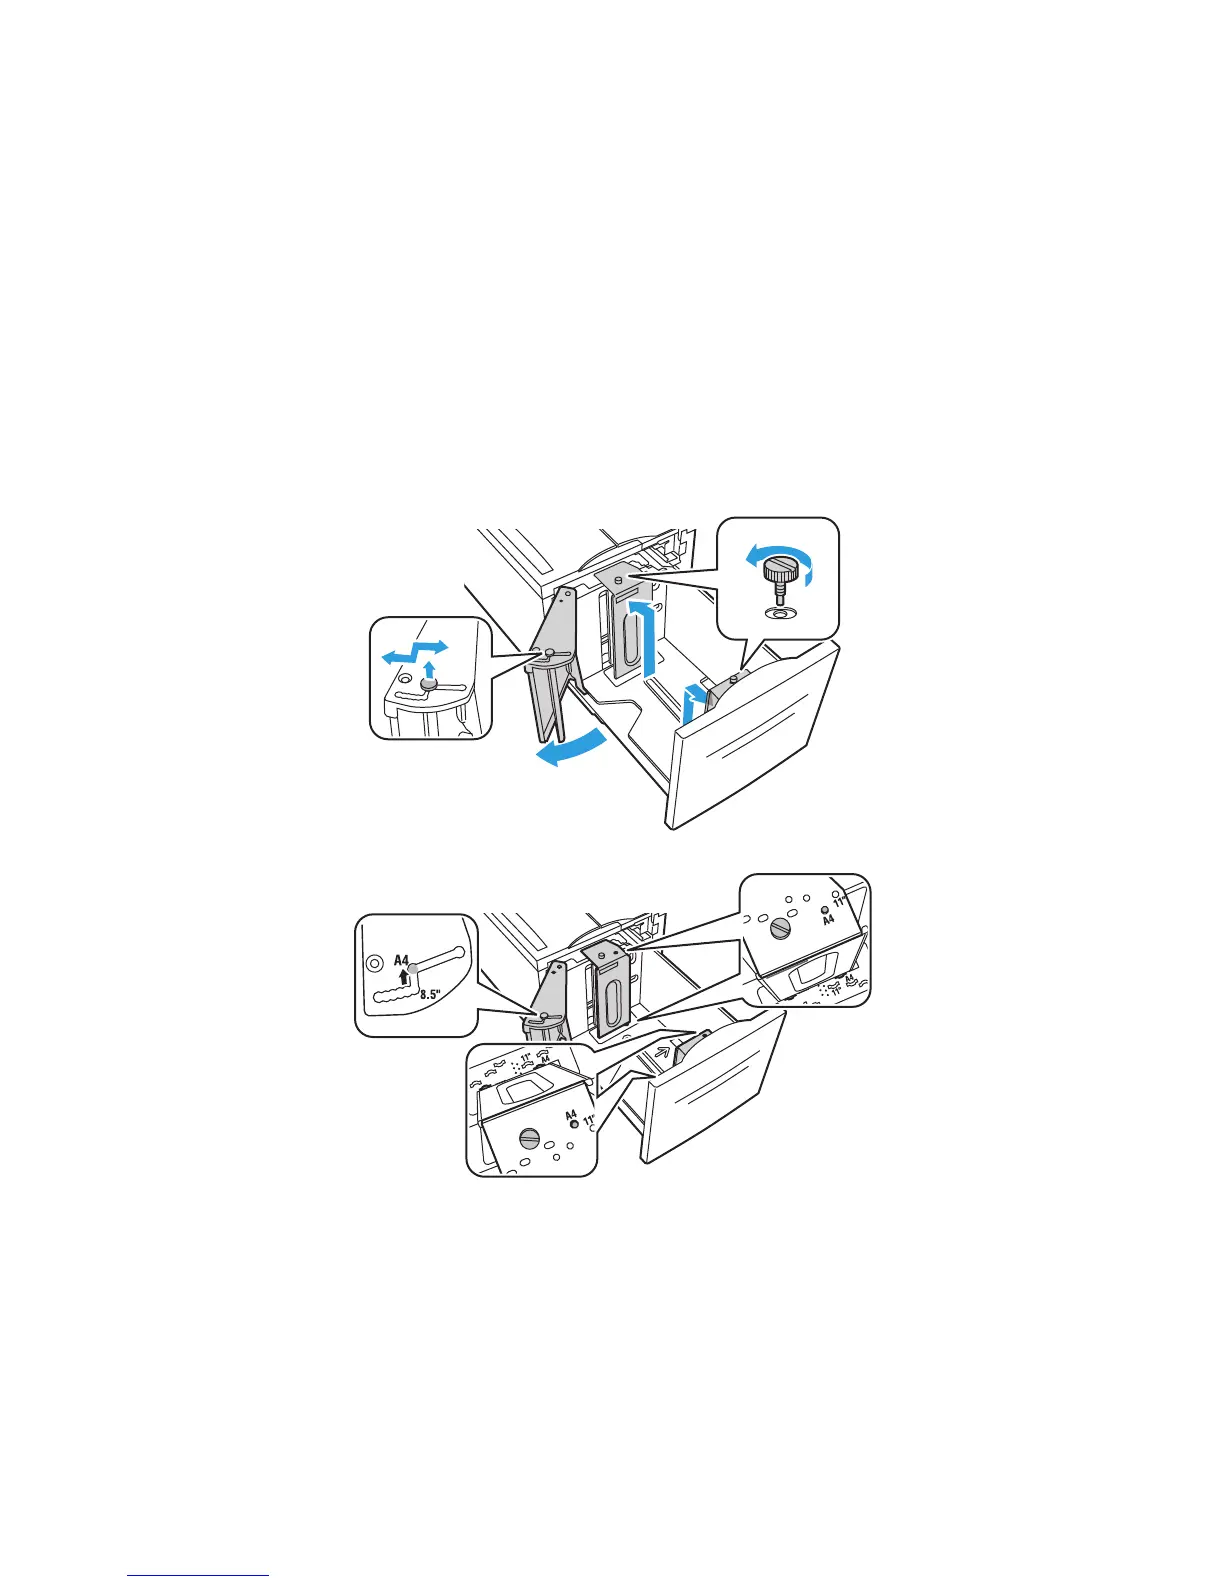
1. Remove the screw that holds the spacer plate at the back of the tray.
2. Lit the spacer plate to remove it.
3. Place the tabs at the bottom of the plate into the slots in the bottom of the drawer that
correspond with the paper size.
4. Slide the top of the spacer plate to engage the peg on the back of the tray into the matching hole
in the plate.
5. Install the screw to secure the spacer plate.
6. Repeat steps 1-5 for the spacer plate at the front of Tray 6.
7. Locate the pin at the top of the side gate.
8. Lift the pin and guide it to the desired paper size in the slot on the top of the side gate.
9. Release the pin to lock it into place.
wc53xx-112

 Loading...


