CAMSHAFTS
5-13
Damage/wear → Replace the defective
part(s).
EAS23970
CHECKING THE TIMING CHAIN TEN-
SIONER
1. Check:
• Timing chain tensioner
Cracks/damage → Replace.
2. Check:
• One-way cam
Rough movement → Replace the timing
chain tensioner assembly.
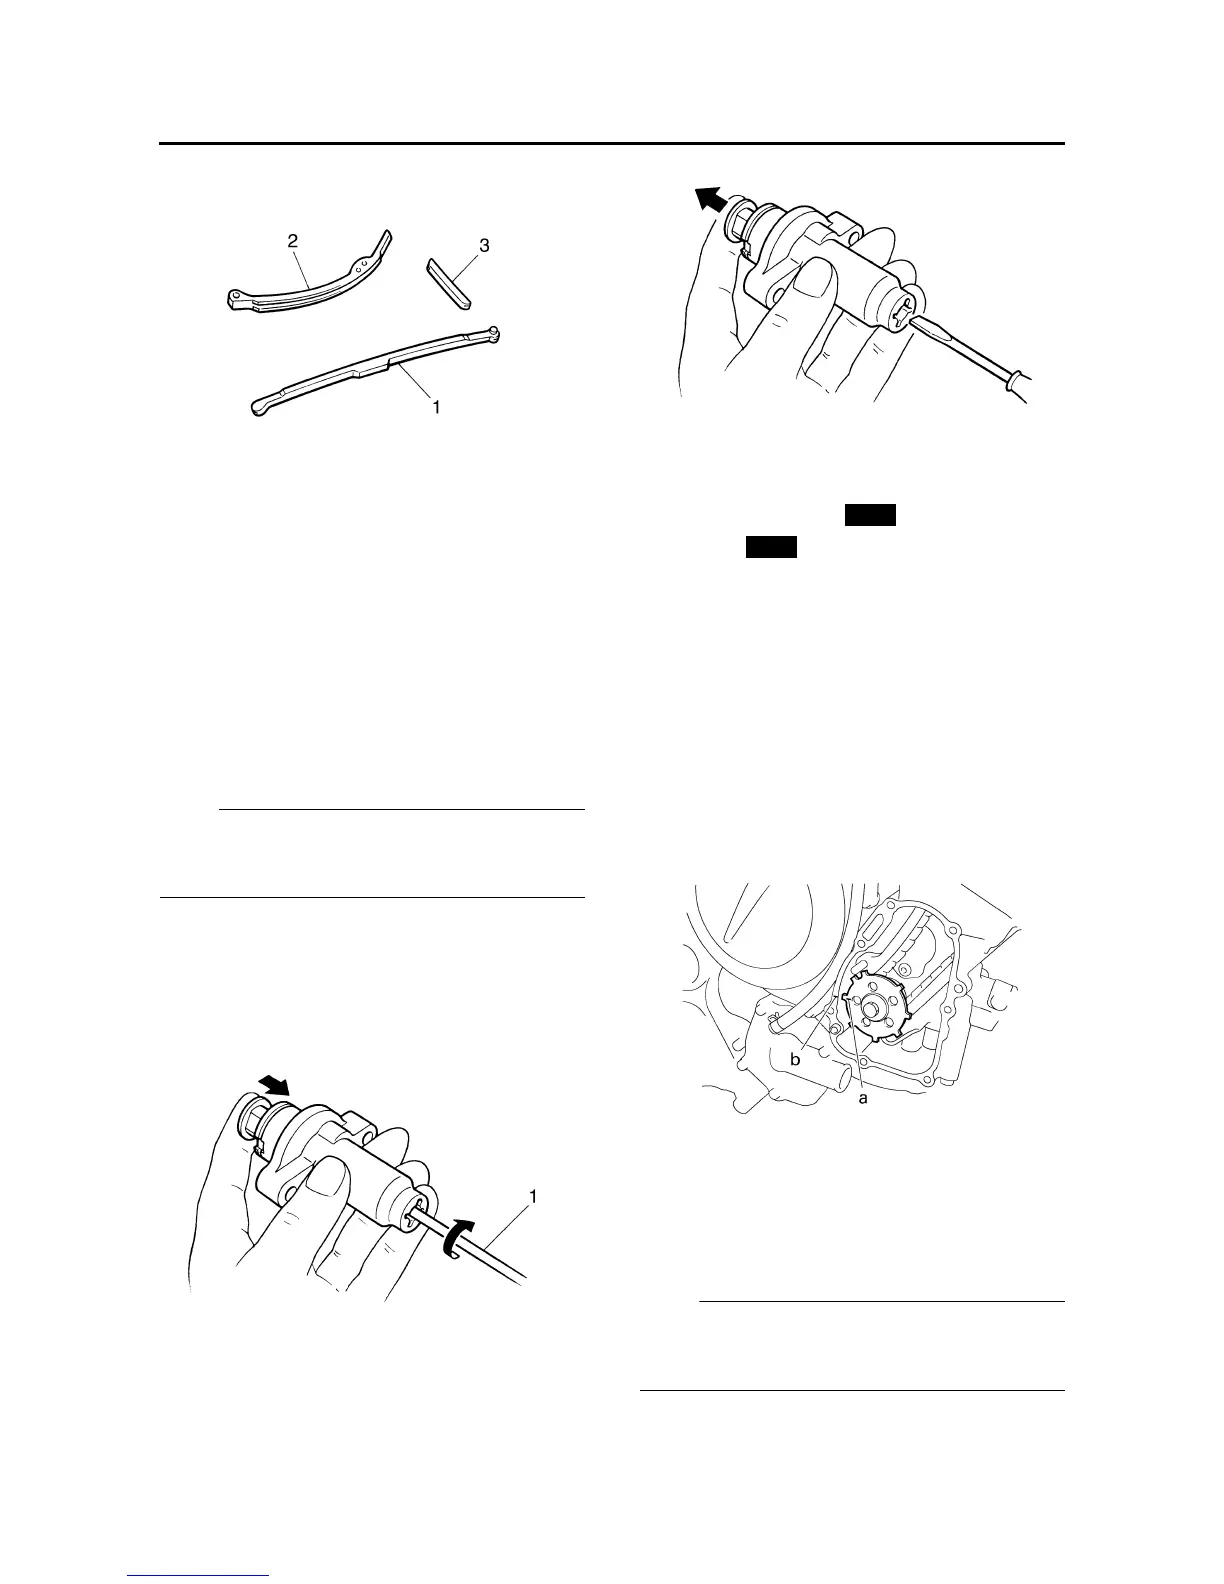
▼▼▼▼▼▼▼▼▼▼▼▼▼▼▼▼▼▼▼▼▼▼▼▼▼▼▼▼▼▼
a. Lightly press the timing chain tensioner rod
into the timing chain tensioner housing by
hand.
NOTE:
While pressing the timing chain tensioner rod,
wind it clockwise with a thin screwdriver “1”
until it stops.
b. Remove the screwdriver and slowly release
the timing chain tensioner rod.
c. Make sure that the timing chain tensioner
rod comes out of the timing chain tensioner
housing smoothly. If there is rough move-
ment, replace the timing chain tensioner.
▲▲▲▲▲▲▲▲▲▲▲▲▲▲▲▲▲▲▲▲▲▲▲▲▲▲▲▲▲▲
3. Check:
• Timing chain tensioner cap bolt
• Aluminum washer
•Gasket
Damage/wear → Replace the defective
part(s).
EAS24010
INSTALLING THE CAMSHAFTS
1. Align:
• “T” mark “a” on the pickup rotor
(with the crankcase mating surface “b”)
▼▼▼▼▼▼▼▼▼▼▼▼▼▼▼▼▼▼▼▼▼▼▼▼▼▼▼▼▼▼
a. Turn the crankshaft clockwise.
b. When piston #1 is at TDC, align the “T”
mark “a” with the crankcase mating surface
“b”.
▲▲▲▲▲▲▲▲▲▲▲▲▲▲▲▲▲▲▲▲▲▲▲▲▲▲▲▲▲▲
2. Install:
• Exhaust camshaft “1”
• Intake camshaft “2”
(with the camshaft sprockets temporarily
tightened)
NOTE:
Make sure the match mark “a” on the camshaft
sprockets is aligned with the cylinder head
edge “b”.
New
New

 Loading...