CRANKSHAFT
5-68
EAS26190
INSTALLING THE CONNECTING ROD AND
PISTON
The following procedure applies to all of the
connecting rods and pistons.
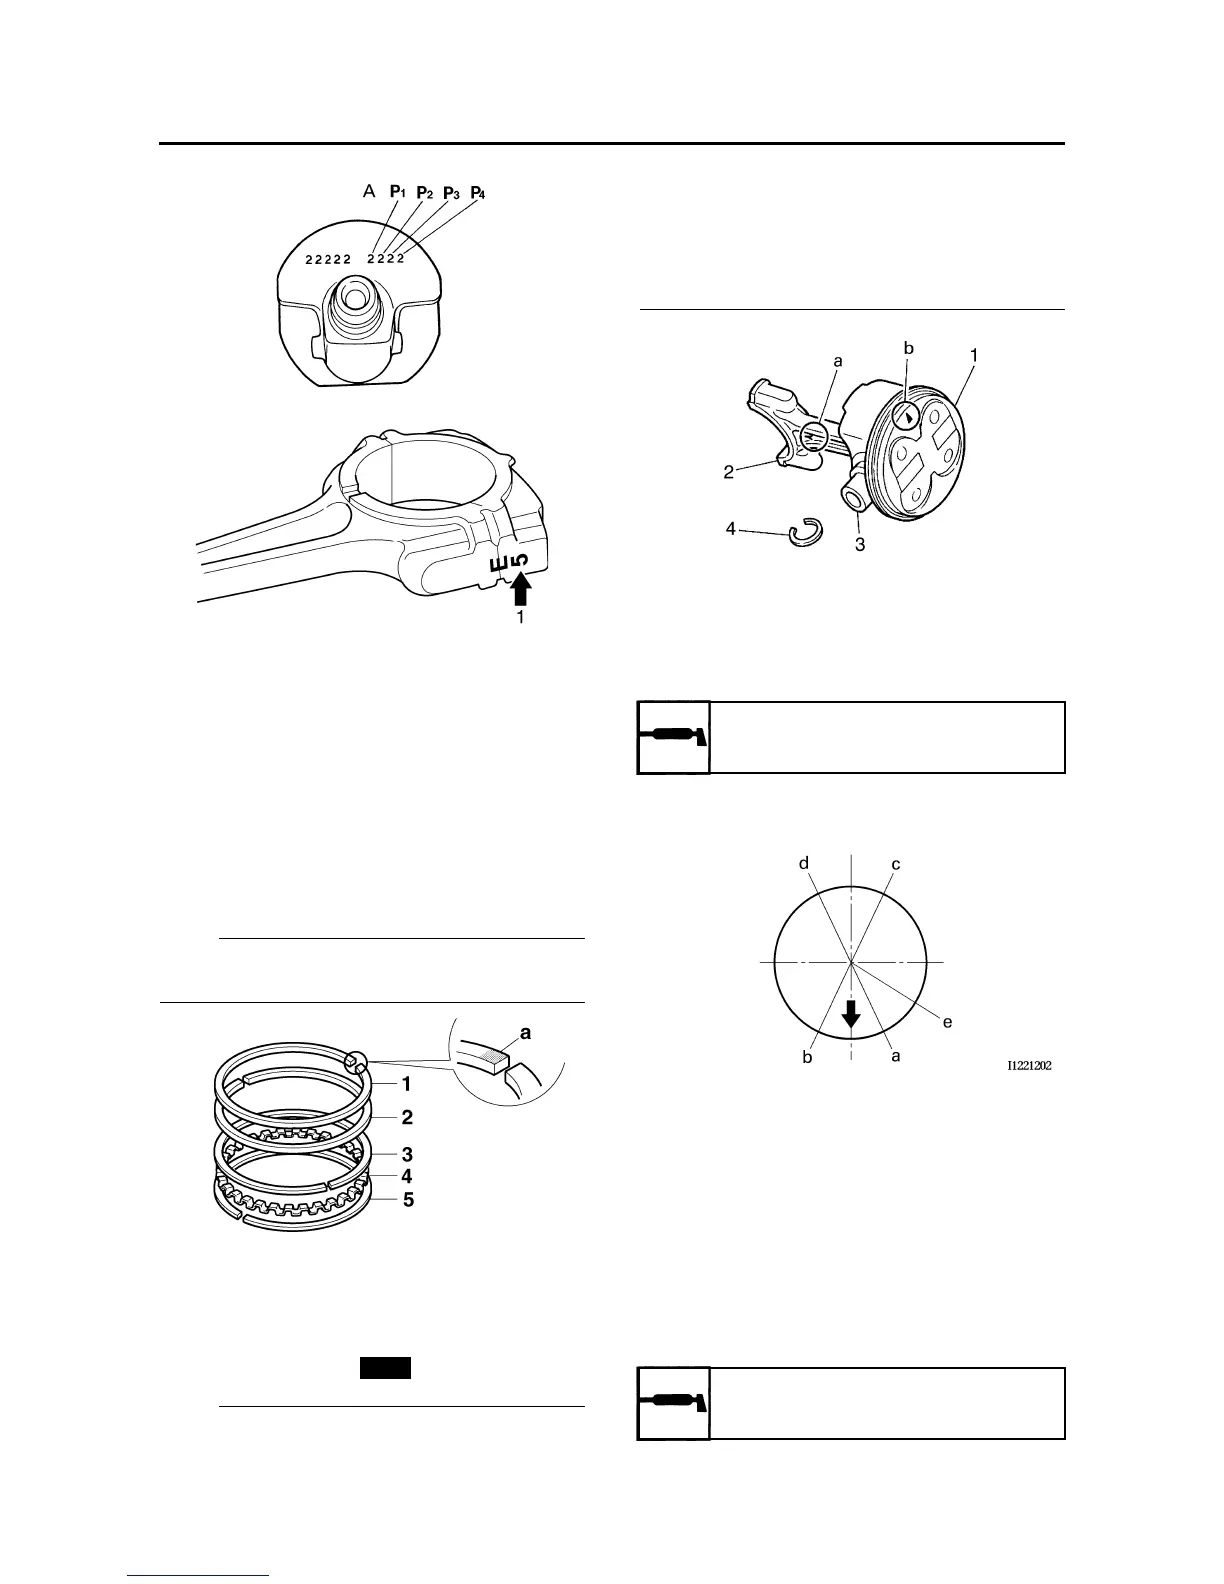
1. Install:
• Top ring “1”
• 2nd ring “2”
• Upper oil ring rail “3”
• Oil ring expander “4”
• Lower oil ring rail “5”
NOTE:
Be sure to install the piston rings so that the
manufacturer’s marks or numbers “a” face up.
2. Install:
•Piston “1”
(onto the respective connecting rod “2”)
• Piston pin “3”
• Piston pin clip “4”
NOTE:
• Apply engine oil onto the piston pin.
• Make sure that the “Y” mark “a” on the con-
necting rod faces left when the arrow mark
“b” on the piston is pointing up as shown.
• Reinstall each piston into its original cylinder
(numbering order starting from the left: #1 to
#4).
3. Lubricate:
•Piston
• Piston rings
• Cylinder
(with the recommended lubricant)
4. Offset:
• Piston ring end gaps
5. Lubricate:
• Crankshaft pins
• Big end bearings
• Connecting rod big end inner surface
(with the recommended lubricant)
New
Recommended lubricant
Engine oil
a. Top ring
b. Lower oil ring rail
c. Upper oil ring rail
d. 2nd ring
e. Oil ring expander
Recommended lubricant
Engine oil