Crankcase, connecting rod, and piston
5-82
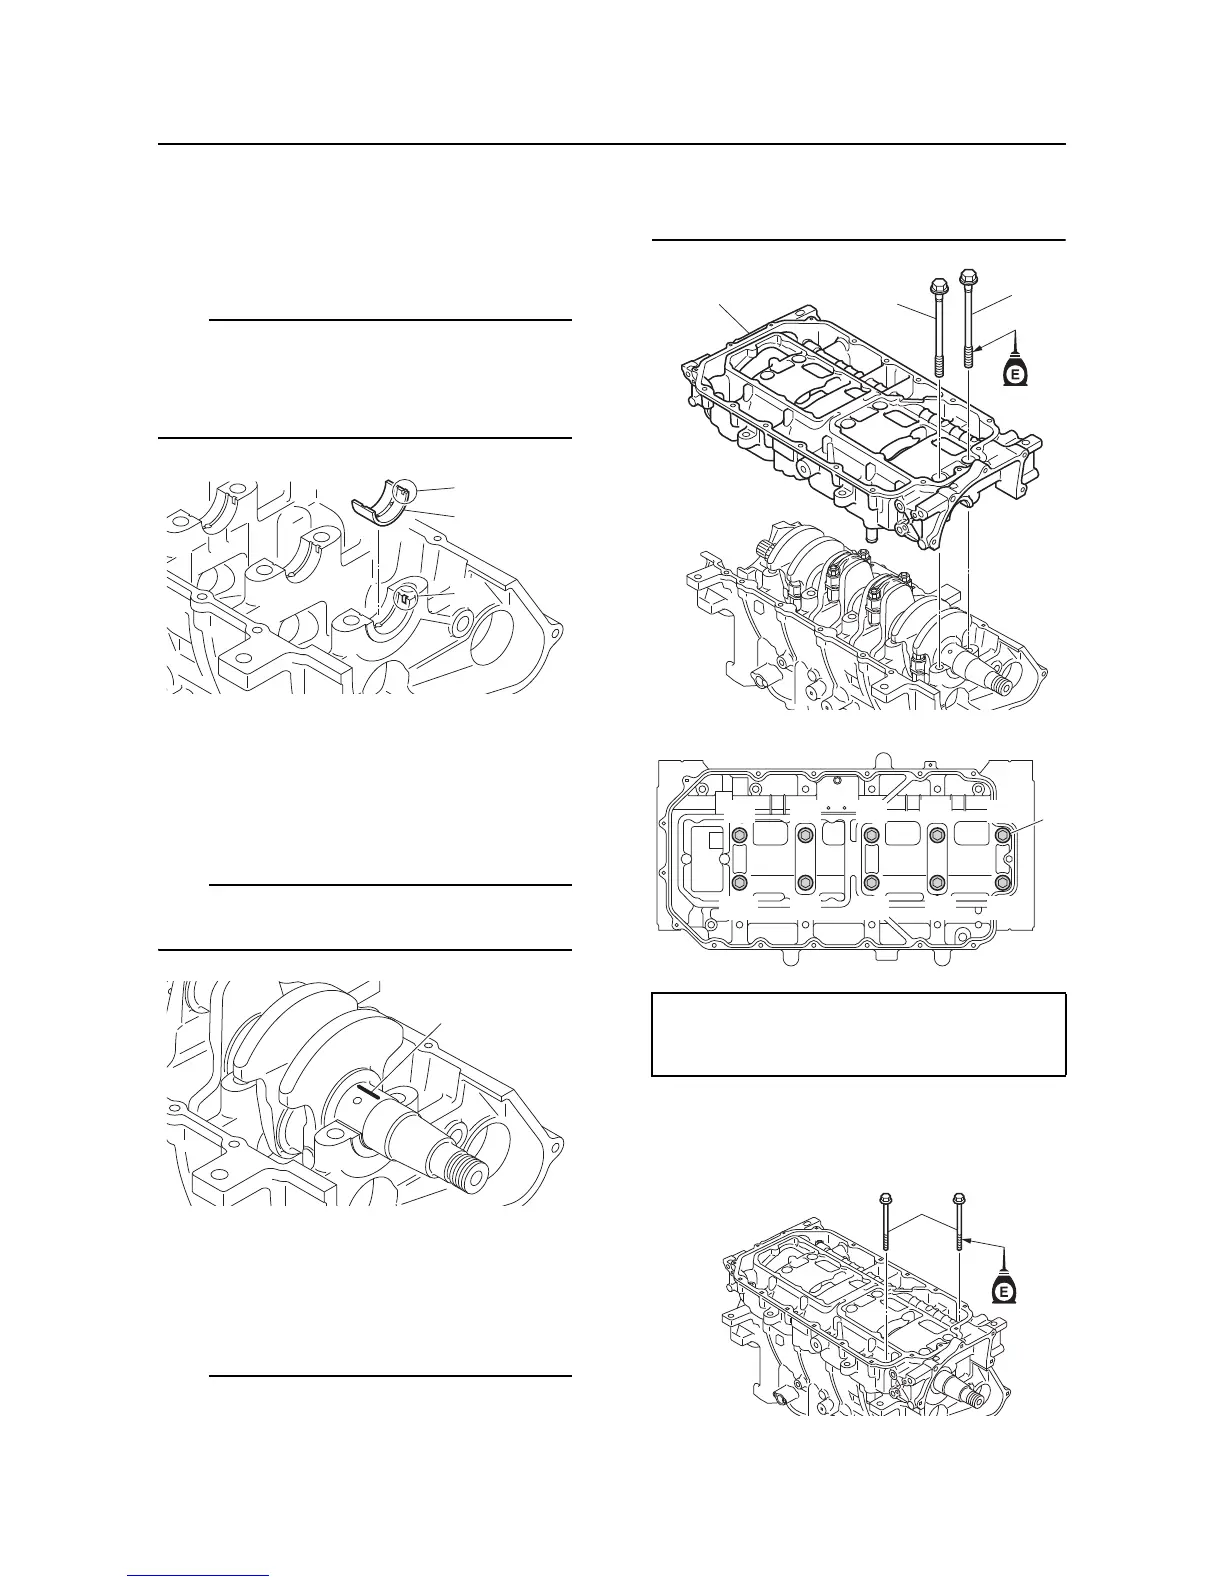
2. Place the cylinder block upside down on a
bench.
3. Install the crankshaft bearings “1” into the
cylinder block and crankcase.
• Install the crankshaft bearings “1” in their
original positions.
• Fit the protrusion “a” on each bearing into the
slots “b” in the cylinder block and crankcase.
4. Install the crankshaft.
5. Put a piece of Plastigauge “1” on each
crankshaft journal, parallel to the crank-
shaft.
Do not put the Plastigauge “1” over the oil hole
in the main journals of the crankshaft.
6. Install the crankcase “1” and crankcase
bolts “2”, and then tighten the crankcase
bolts “2” to the specified torques in 2 stag-
es and in the order [1], [2], and so on.
• When checking the journal oil clearance, re-
use the removed crankcase bolts “2”.
• Do not turn the crankshaft until the journal oil
clearance measurement has been complet-
ed.
7. Install the crankcase bolts “1”, and then
tighten them to the specified torque in the
order [1], [2], and so on.
Crankcase bolt “2”
1st: 30 Nm (3.0 kgf·m, 22.1 ft·lb)
2nd: 90°
2
[7] [5] [1] [
3]
[9]
[8][6][2][4]
[10]
 Loading...