AO2000-LS25 LASER ANALYZERS | OI/AO2000-LS25-EN REV. D 47
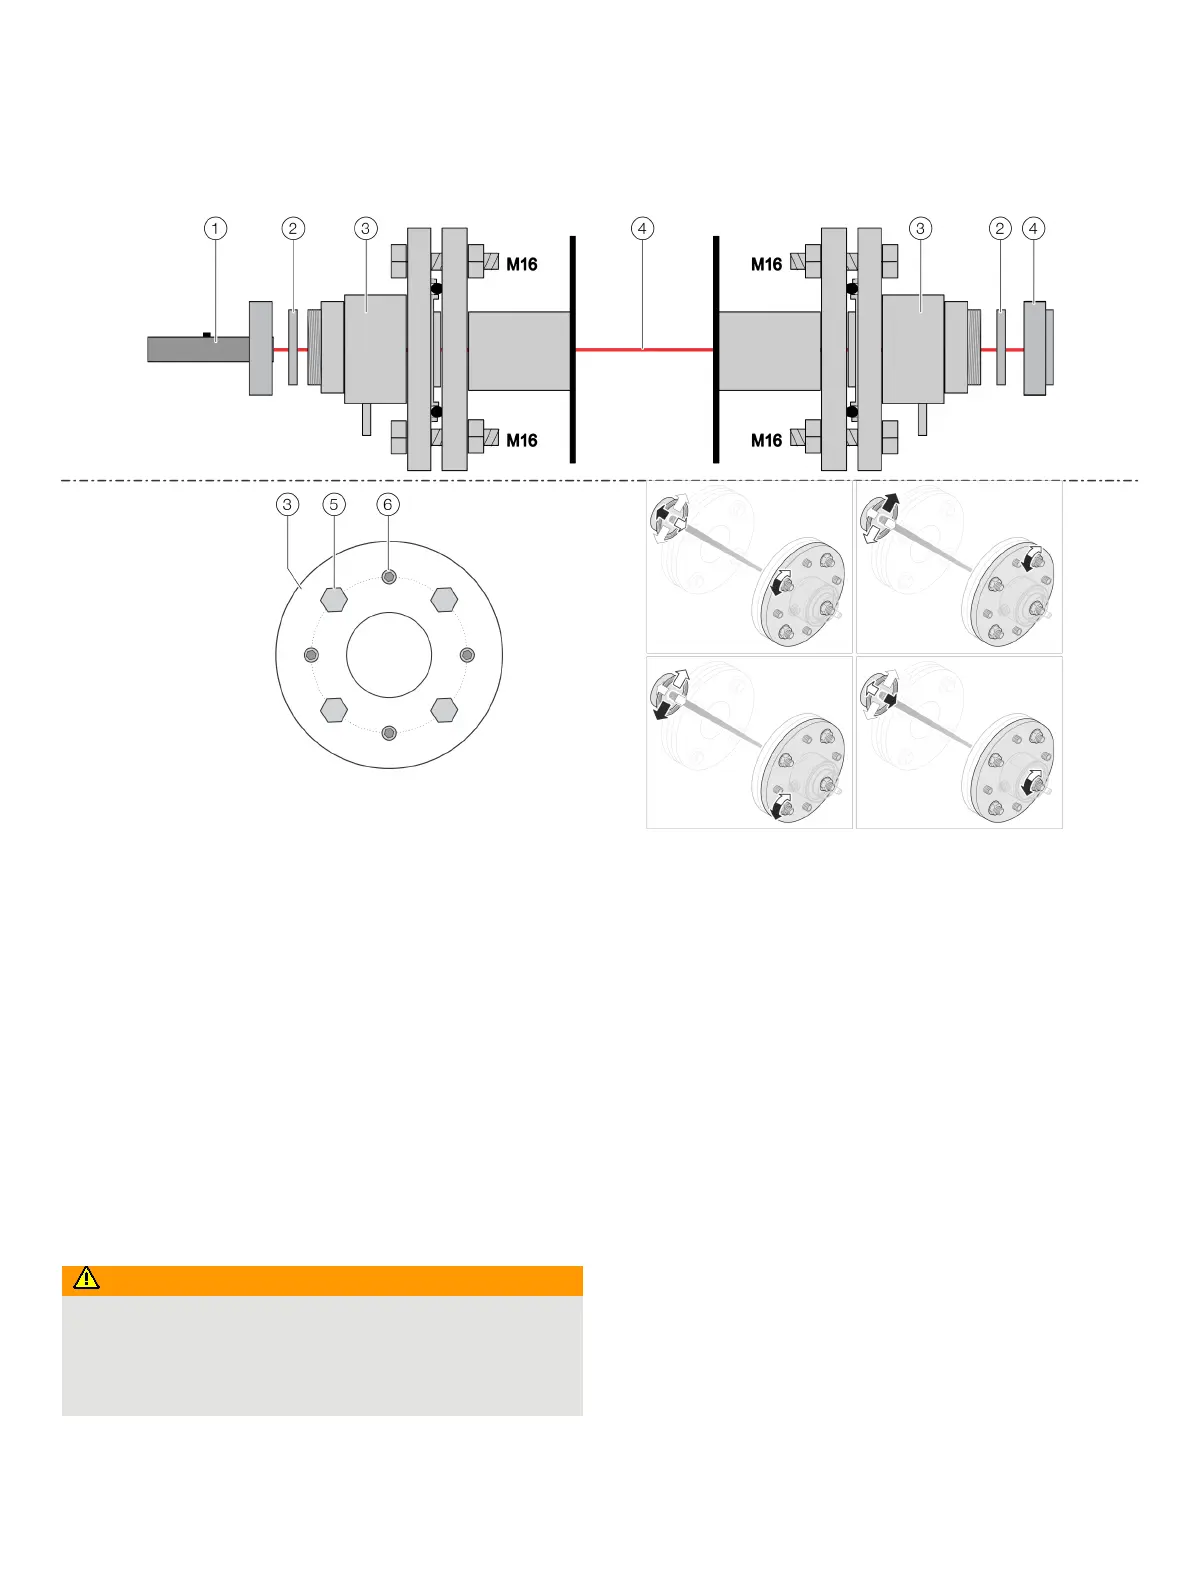
Align analyzer with laser alignment device
Laser pointer
Adapter ring
Purging flange
Focusing screen
Fixing screws M16 (adjusting screws)
Stud screws (locking screws)
Figure 32: Installing the laser alignment tool and aligning the flanges
Principle of rough pre-alignment
During pre-alignment, the purging flanges installed opposite to
one another are aligned coaxially to one another using the laser
alignment aid.
Necessary tools and other equipment for the adjustment
procedure:
• 1 × laser alignment device (laser pointer and focusing
screen)
• 2 × spanners to adjust the flanges with (M 16)
• 1 × Allen key (5 mm) for the stud screws
Risk of injury
Eye injury due to invisible laser radiation.
The device contains class 1 and 1M diode lasers.
• Do not open when energized.
• Do not look into the optical path with optical instruments.
Mounting the adjustment device
1. Leave the device switched on and disassemble transmitter
and receiver units from the relevant purging flange.
2. Remove the adapter ring (item
2 in Figure 32) from the
purging flange.
3. Fix the laser pointer to the transmitter-side purging flange
with the union nut.
4. Fasten the focusing screen to the receiver-side purging
flange with the union nut.

 Loading...