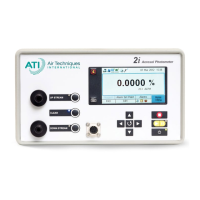
Aerosol Photometer
Aerosol Photometer - 2i 23
2. Plug the power cord into a matching power outlet.
!
Warning
Before connecting the power cord to the power outlet,
make sure the cord has not been cut or otherwise damaged
during shipment.
!
Caution
To prevent damage to the Aerosol Photometer, make sure
the voltage listed on the back panel matches the power
outlet where you plug it in.
Connecting the Scanning Probe
If using the Aerosol Photometer 2i with the Scanning
Probe, you should first connect the iProbe to the
umbilical. To do so, connect the umbilical’s electrical
connector to the 7-pin connector on the end of the
probe. Connect the aerosol sampling line quick-
connect fitting to the quick-connect connector on the
butt of the probe (see “Scanning Probe Overview”
page 28 for the probe description).
i
Note
The two pneumatic quick-connect fittings are different; the
smaller one must be connected to the iProbe, while the
bigger one must be connected to the 2i base.
Once the umbilical is connected to the scanning
probe, connect the other end to the main unit.
Connect the umbilical’s electrical connector to the 7-
pin connector on the front panel of the 2i. Connect the
aerosol sampling line quick-connect fitting to the
quick-connect port of the photometer marked
“DOWNSTREAM” (see “Front Panel General
Overview” page 26 for the front panel component
description).
Note
 Loading...