EMBROIDERING SETTINGS
97
4
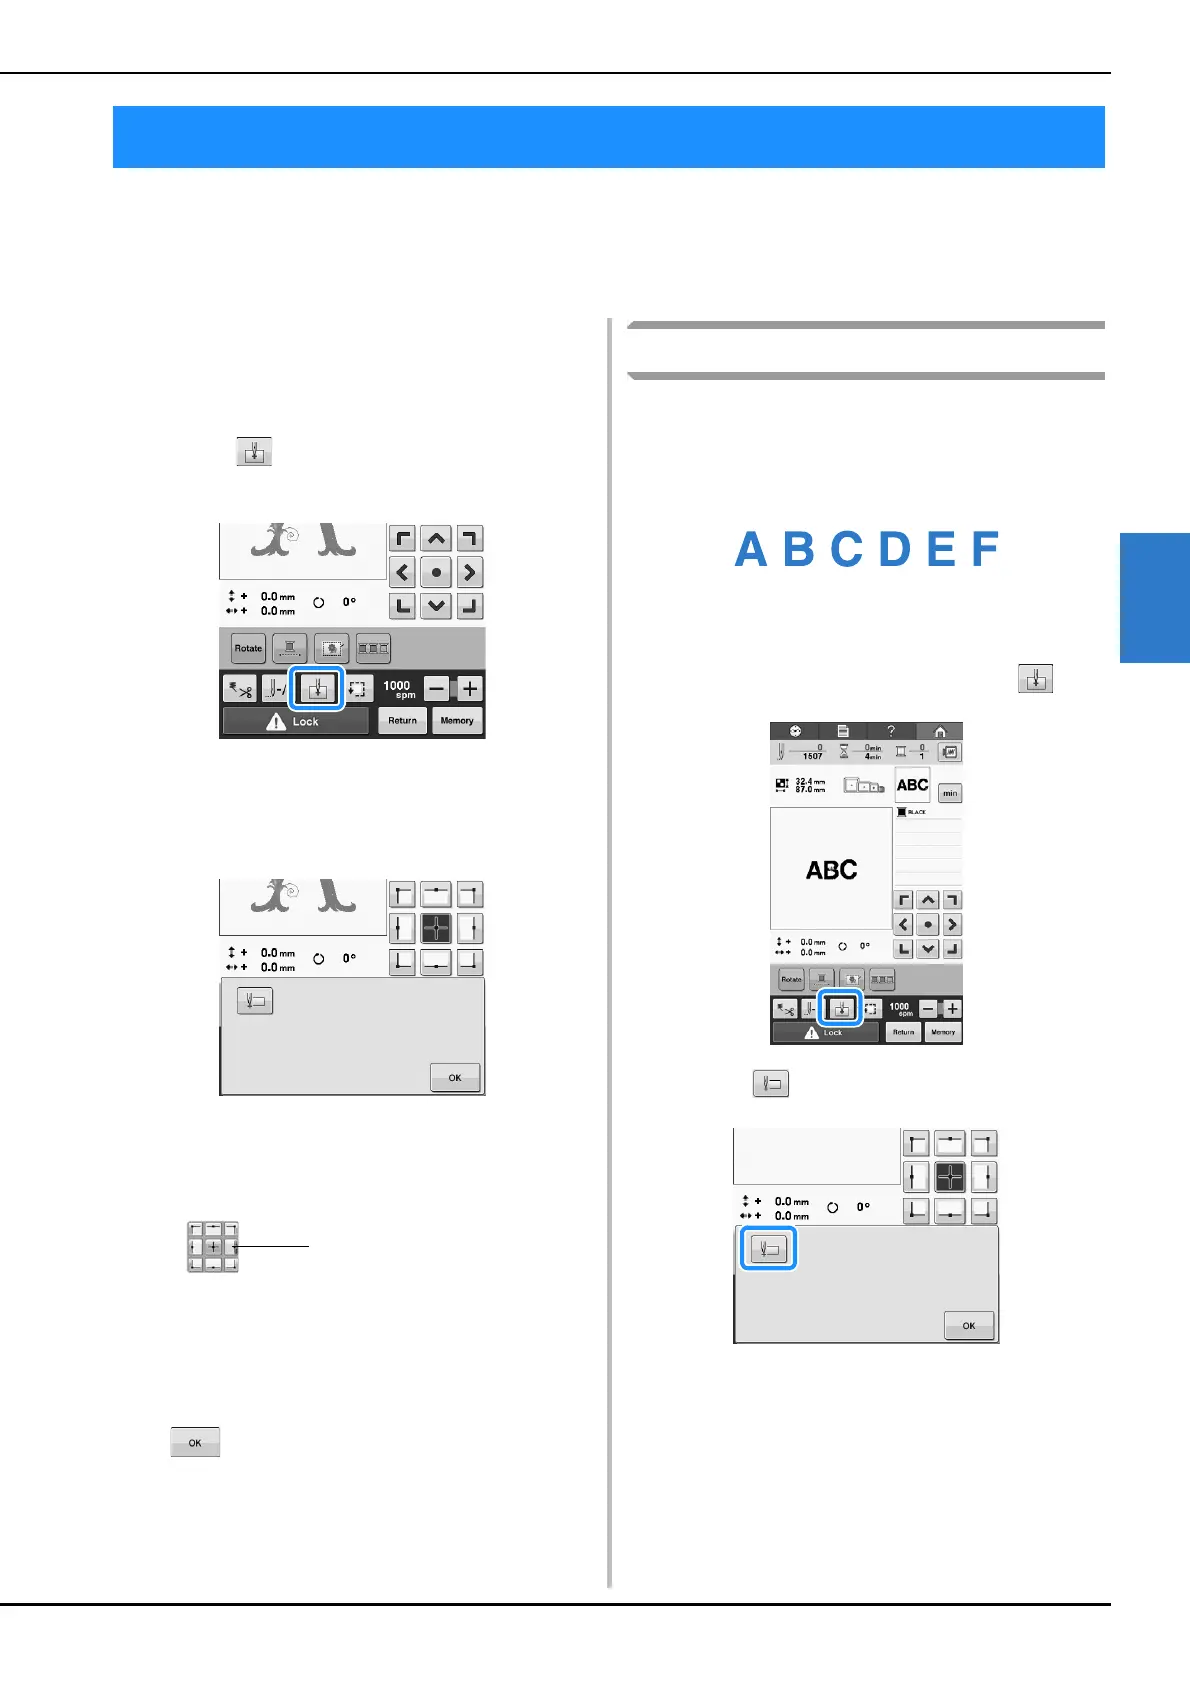
The machine can set the start point from the 9 points of the pattern. Those are upper-left corner, upper-
center, upper-right corner, center-left, center-center, center-right, lower-left corner, lower-center and
lower-right corner.
These settings can be used to repeatedly embroider a pattern along a diagonal.
The starting position settings are specified from the
embroidering settings screen.
When the embroidery machine is purchased, the
starting position is set to the center of the pattern.
a
Touch .
→ The starting position settings screen appears.
b
Touch the key for the desired starting
position setting.
→ The highlighted key shows the currently selected
setting.
Example
→ When a starting position is selected, the ending
position is automatically set to the same position.
→ The embroidery frame moves to the starting
position.
c
After selecting the desired settings, touch
.
→ The embroidering screen appears again.
Embroidering linked characters
Follow the procedure described below to
embroider linked characters in a single row when
the pattern extends beyond the embroidery frame.
Example: Linking “DEF” to the characters “ABC”
a
Select the character patterns for “ABC”.
b
In the embroidering screen, touch .
c
Touch .
→ The needle bar is positioned in the lower-left corner
of the pattern. The embroidery frame moves so that
the needle is positioned correctly.
Starting Position Settings
This key is selected.