100
Embroidering appliqué patterns
Some of the built-in embroidery patterns can be used for
embroidering appliqués. Follow the procedures described
below to embroider appliqués using the patterns with
[APPLIQUE MATERIAL], [APPLIQUE POSITION] or
[APPLIQUE] in the region display at the top of the thread
color sequence display.
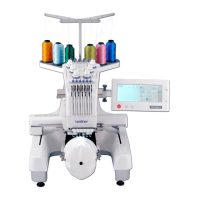
[APPLIQUE MATERIAL], [APPLIQUE POSITION] and
[APPLIQUE] are assigned to a specific needle bar number.
*Depending on the thread color display setting, the display
may appear as (Appliqué Material),
(Appliqué Position) or (Appliqué).
1 appears in the screen at places where the machine
is stopped.
■ Procedure for embroidering appliqués
a
Place stabilizer on the back of the appliqué fabric/
material.
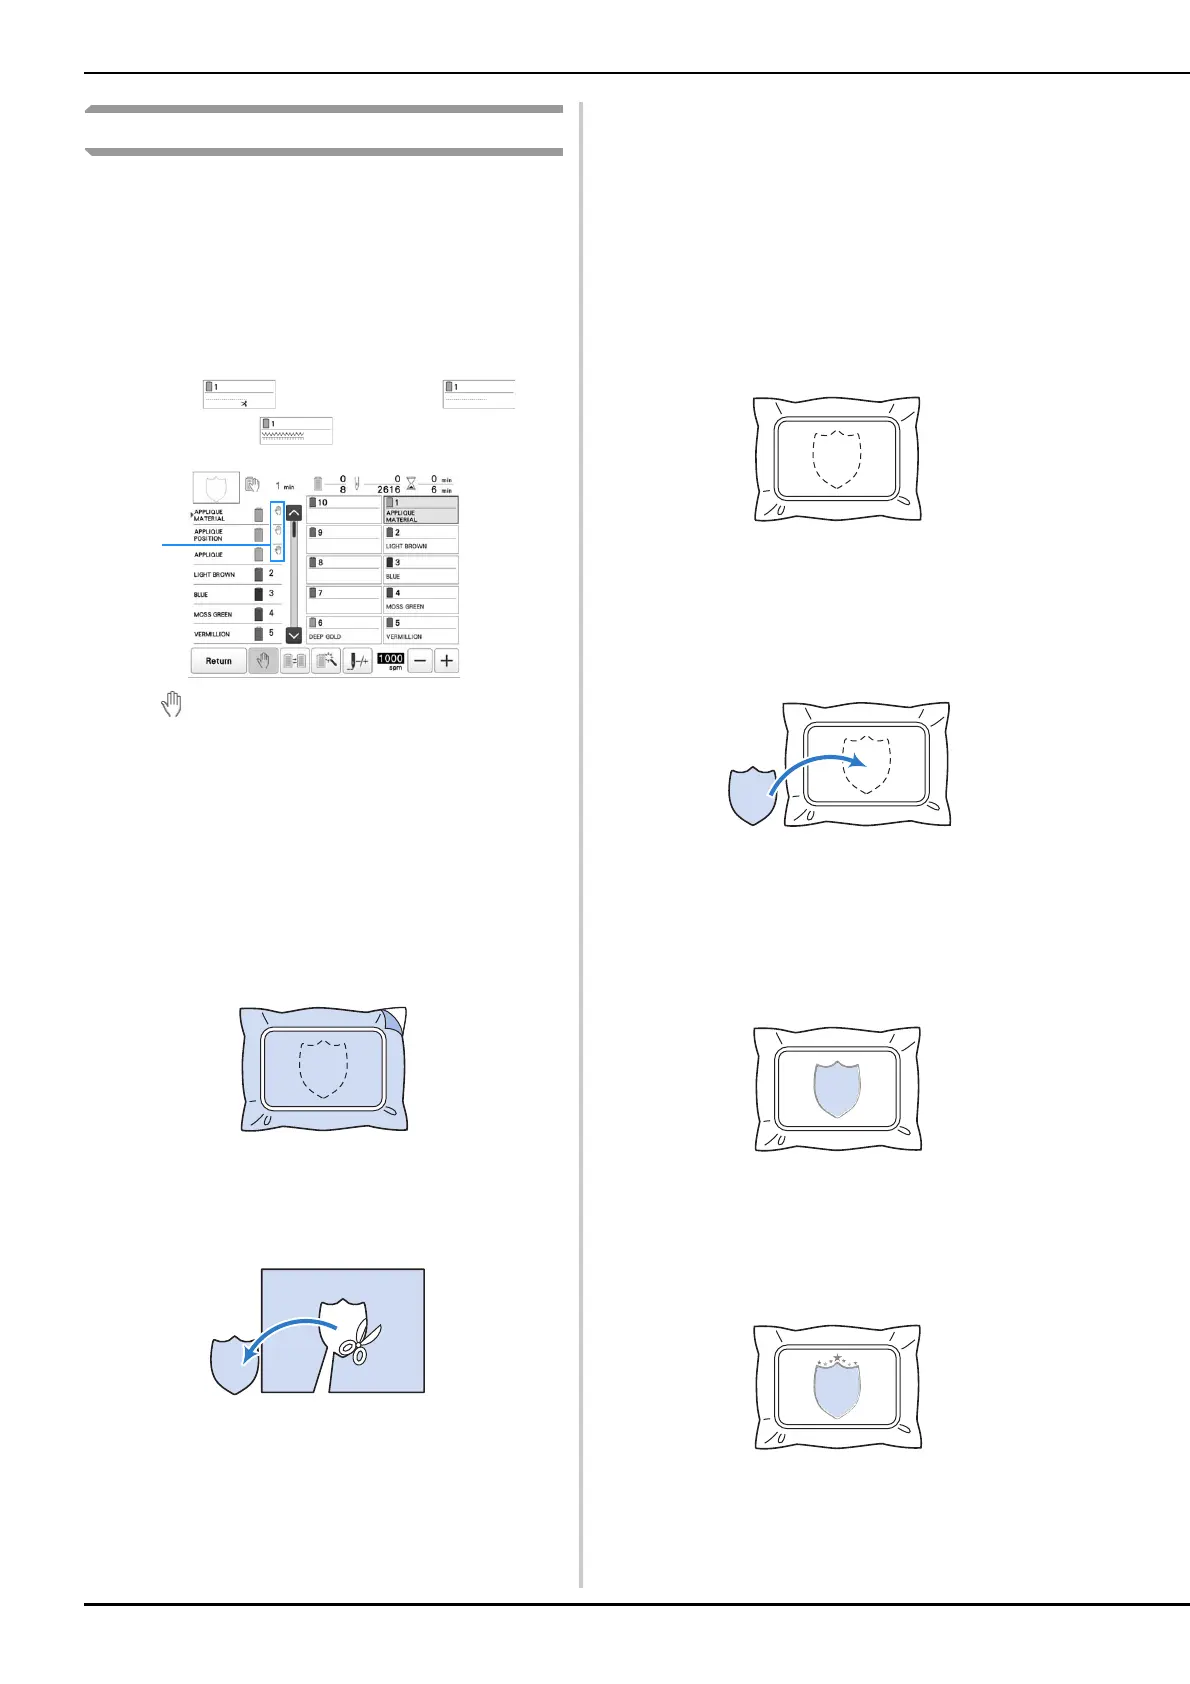
b
Frame the fabric for the appliqué (from step a) in the
embroidery frame, and then embroider an [APPLIQUE
MATERIAL] pattern. The line that indicates where the
appliqué will be cut out is embroidered, and then the
machine stops.
c
Remove the appliqué fabric from the embroidery
frame, and then carefully cut along the embroidered
cut line.
• If the appliqué is cut out along the inside of the
embroidered cut line, the appliqué may not be
correctly attached to the fabric. Therefore, carefully
cut out the appliqué along the embroidered cut line. If
this step is not performed carefully, the appliqué will
not be cleanly finished. In addition, carefully remove
any excess threads.
d
Frame the base fabric or garment in the embroidery
frame, and then embroider an “APPLIQUE POSITION”
pattern. The appliqué position is embroidered, and
then the machine stops.
e
Lightly apply fabric glue or spray adhesive to the back
of the appliqué piece that was cut out, and then attach
the appliqué piece to the base fabric at the position
embroidered using the [APPLIQUE POSITION] pattern
in step
d.
• If an iron-on stabilizer is used to attach the appliqué
piece to the base fabric, iron the pieces together
without removing the base fabric from the embroidery
frame.
f
After attaching the appliqué piece, embroider an
[APPLIQUE] pattern. The appliqué is finished.
• Depending on the pattern, an [APPLIQUE] pattern
may not be available. In this case, embroider the
appliqué using thread in the color of a part of the
embroidery.
g
Finish stitching the embroidery.

 Loading...