118
Adjusting the tension of the upper thread
When embroidering, the thread tension should be set so that
the upper thread can be seen slightly on the wrong side of the
fabric.
a
Turn the thread tension knobs.
1 Thread tension knobs
2 Tighter
3 Looser
4 Mark
If the thread tension is not still correctly adjusted,
turn the upper thread guide pretension knob.
1 Upper thread guide pretension knob
2 Tighter
3 Looser
■ Correct Thread Tension
The pattern can be seen from the wrong side of the fabric.
If the thread tension is not set correctly, the pattern will
not finish well. The fabric may pucker or the thread may
break.
Follow the operations described below to adjust thread
tension according to the situation.
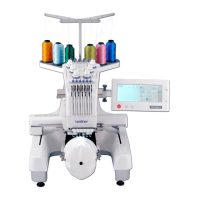
■ Upper thread is too tight
The tension of the upper thread is too tight, resulting in the
bobbin thread being visible from the right side of the
fabric.
Turn the knob in the direction of the arrow to decrease the
tension of the upper thread.
1 Red line
If the red line is visible, the thread tension cannot be
decreased any further. Increase the tension of the bobbin
thread. (page 116)
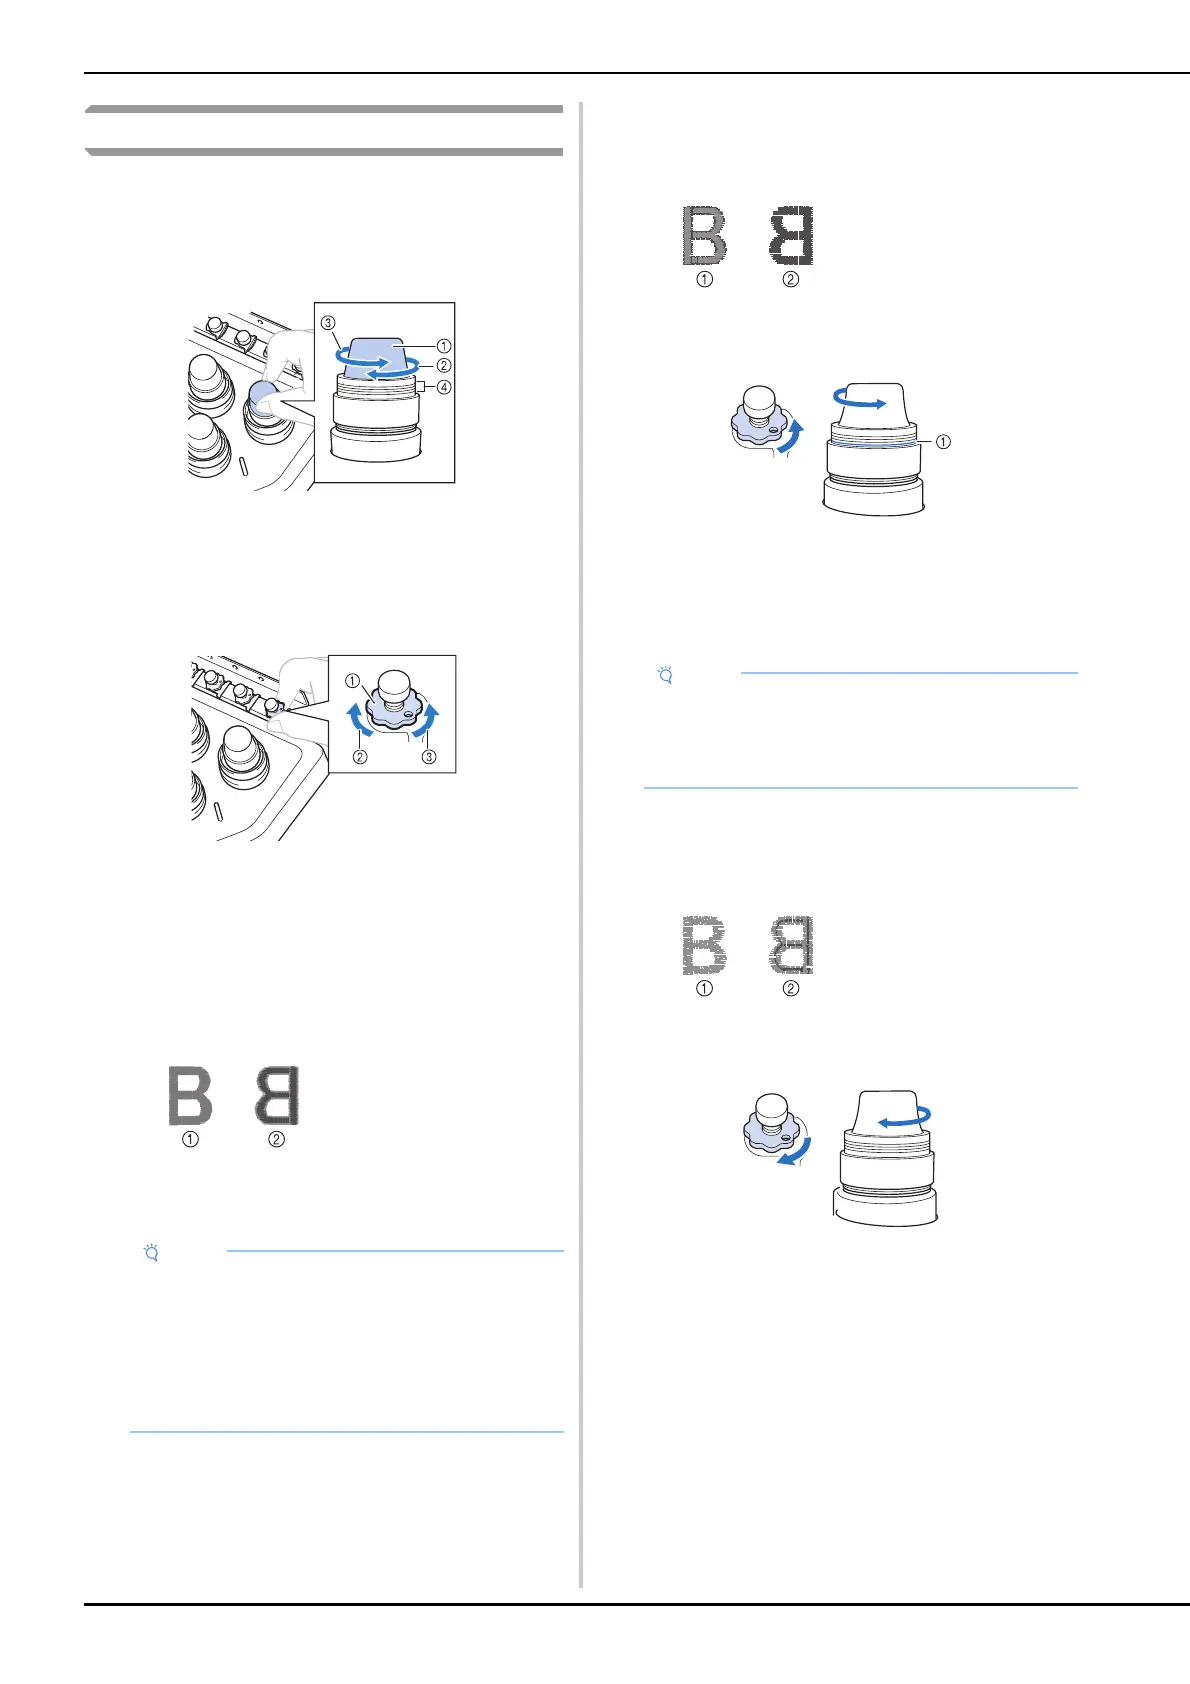
■ Upper thread is too loose
The tension of the upper thread is too loose, resulting in a
loose upper thread, loose thread locks or loops appearing
on the right side of the fabric.
Turn the knob in the direction of the arrow to increase the
tension of the upper thread.
1 Right side
2 Wrong side
• If you decrease the thread tension further than the
red line, the tension knob may be disassembled.
This is not a sign of a malfunction. Increase the
thread tension slightly, and begin embroidering
again.
• If necessary, refer to page 176 for reassembling the
tension unit.
1 Right side
2 Wrong side
• If you decrease the thread tension further than the
red line, the tension knob may be disassembled.
• If necessary, refer to page 176 for reassembling the
tension unit.
1 Right side
2 Wrong side

 Loading...