ADVANCED EMBROIDERY
105
3
By rehooping the fabric to embroider connecting patterns,
a quilting border of 3 m × 3 m (approx. 118 inches × 118
inches) can be created.
■ Using the camera
When embroidering a quilting border, use the built-in
camera to display a camera image of the fabric in order to
align the pattern.
Specify the appropriate image settings in advance.
(page 73)
• Better camera image results can be achieved with the
appropriate settings.
■ Creating quilting border data
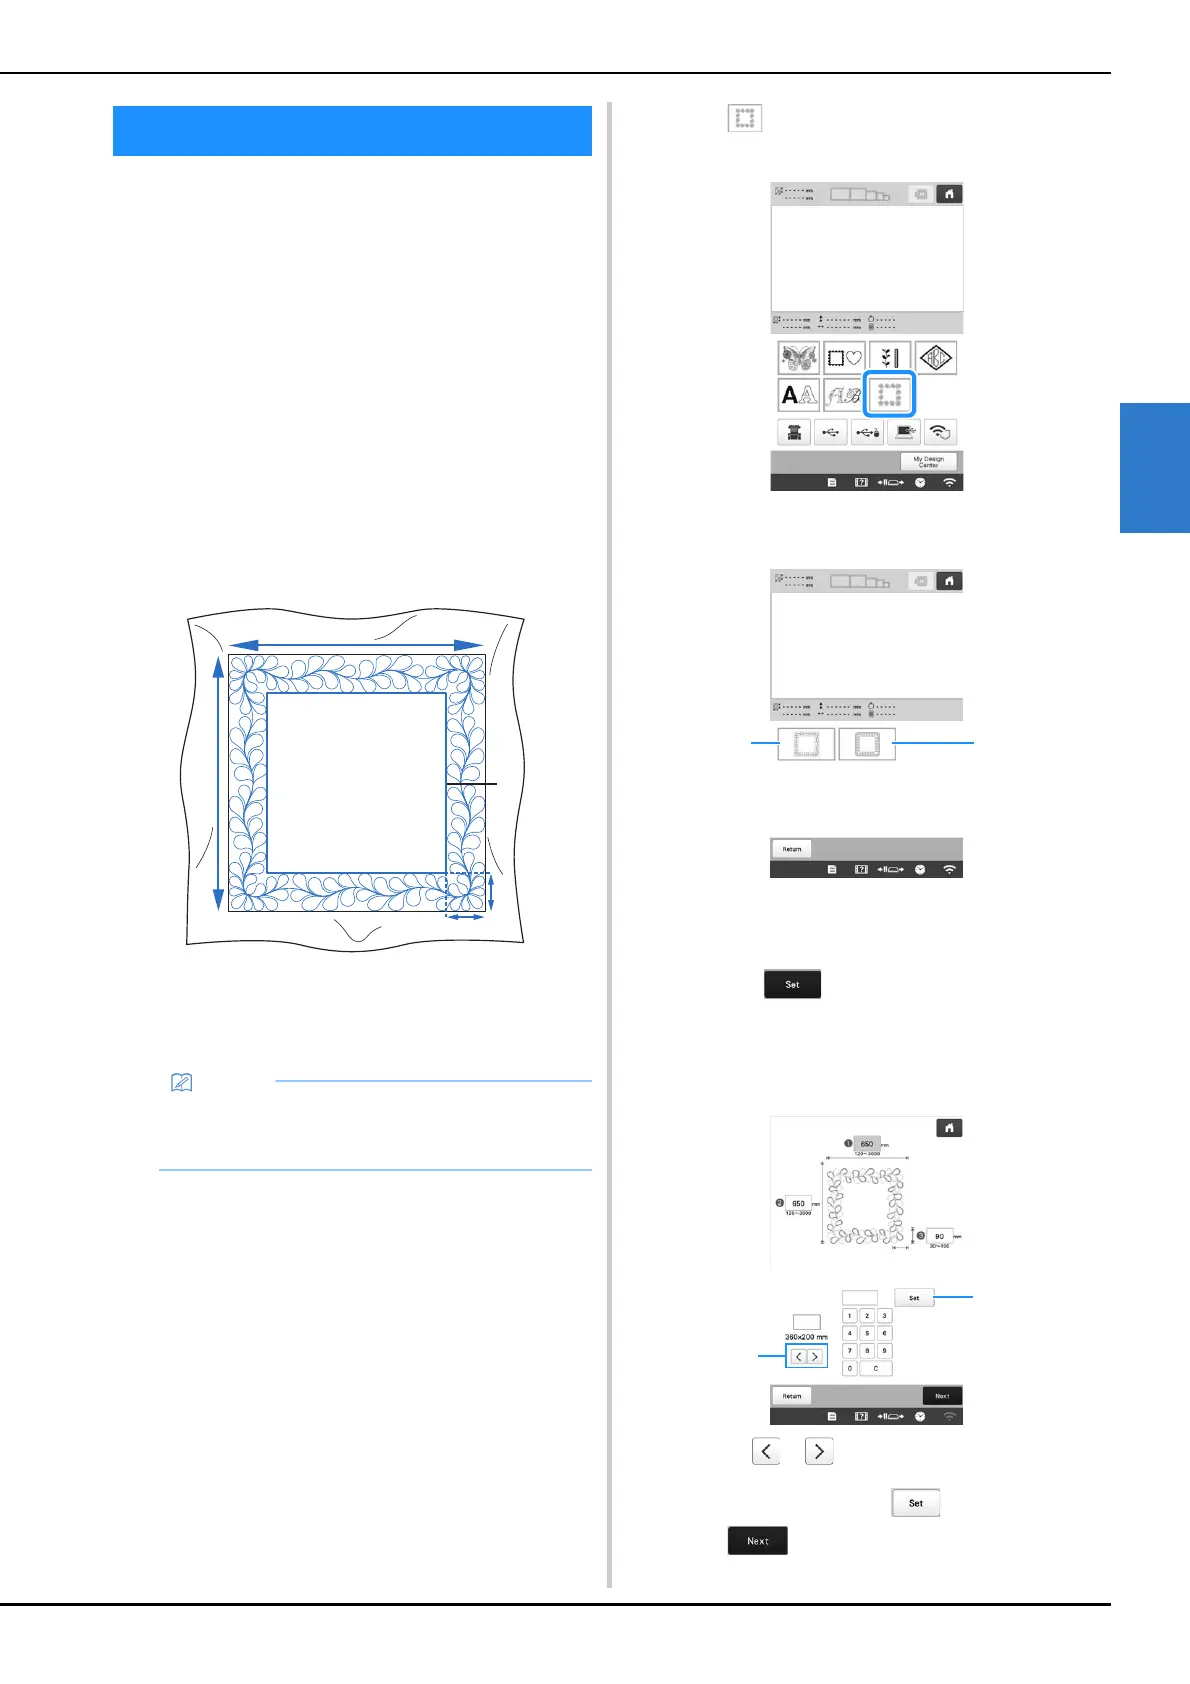
a
With a chalk pencil, mark the fabric with the inner
outline of the quilting border to be embroidered.
Measure the size of the quilting border.
1 Inner outline (used for positioning)
2 Width
3 Height
4 Width of quilting border
b
Touch .
c
Select the category for the number of thread colors.
1 Single color pattern
2 Multi-color pattern
d
Select the pattern that you want to embroider, and
then touch .
e
Specify the size of embroidery frame to be used and
the size of the quilting border.
1 Touch or to select the embroidery frame size.
2 Specify the width (1), height (2) and quilting border
width (3), and then touch after each entry.
f
Touch .
QUILTING BORDERS
• Be sure to cut the fabric with an excess of about 10
cm (4 inches) so that its edges extend from the
embroidery frame.

 Loading...