86
Distance from Ceiling to Lens Center (ℓ)
RS-CL15 When RS-CL08 is used When RS-CL09 is used
24.6 cm / 0.8’ 59.6 cm / 2.0’ to 79.6 cm / 2.6’ 79.6 cm / 2.6’ to 119.6 cm / 3.9’
For more detailed information on the screen sizes and the projection distance, see “Relationship
Between Image Size and Projecting Distance” on page 96.
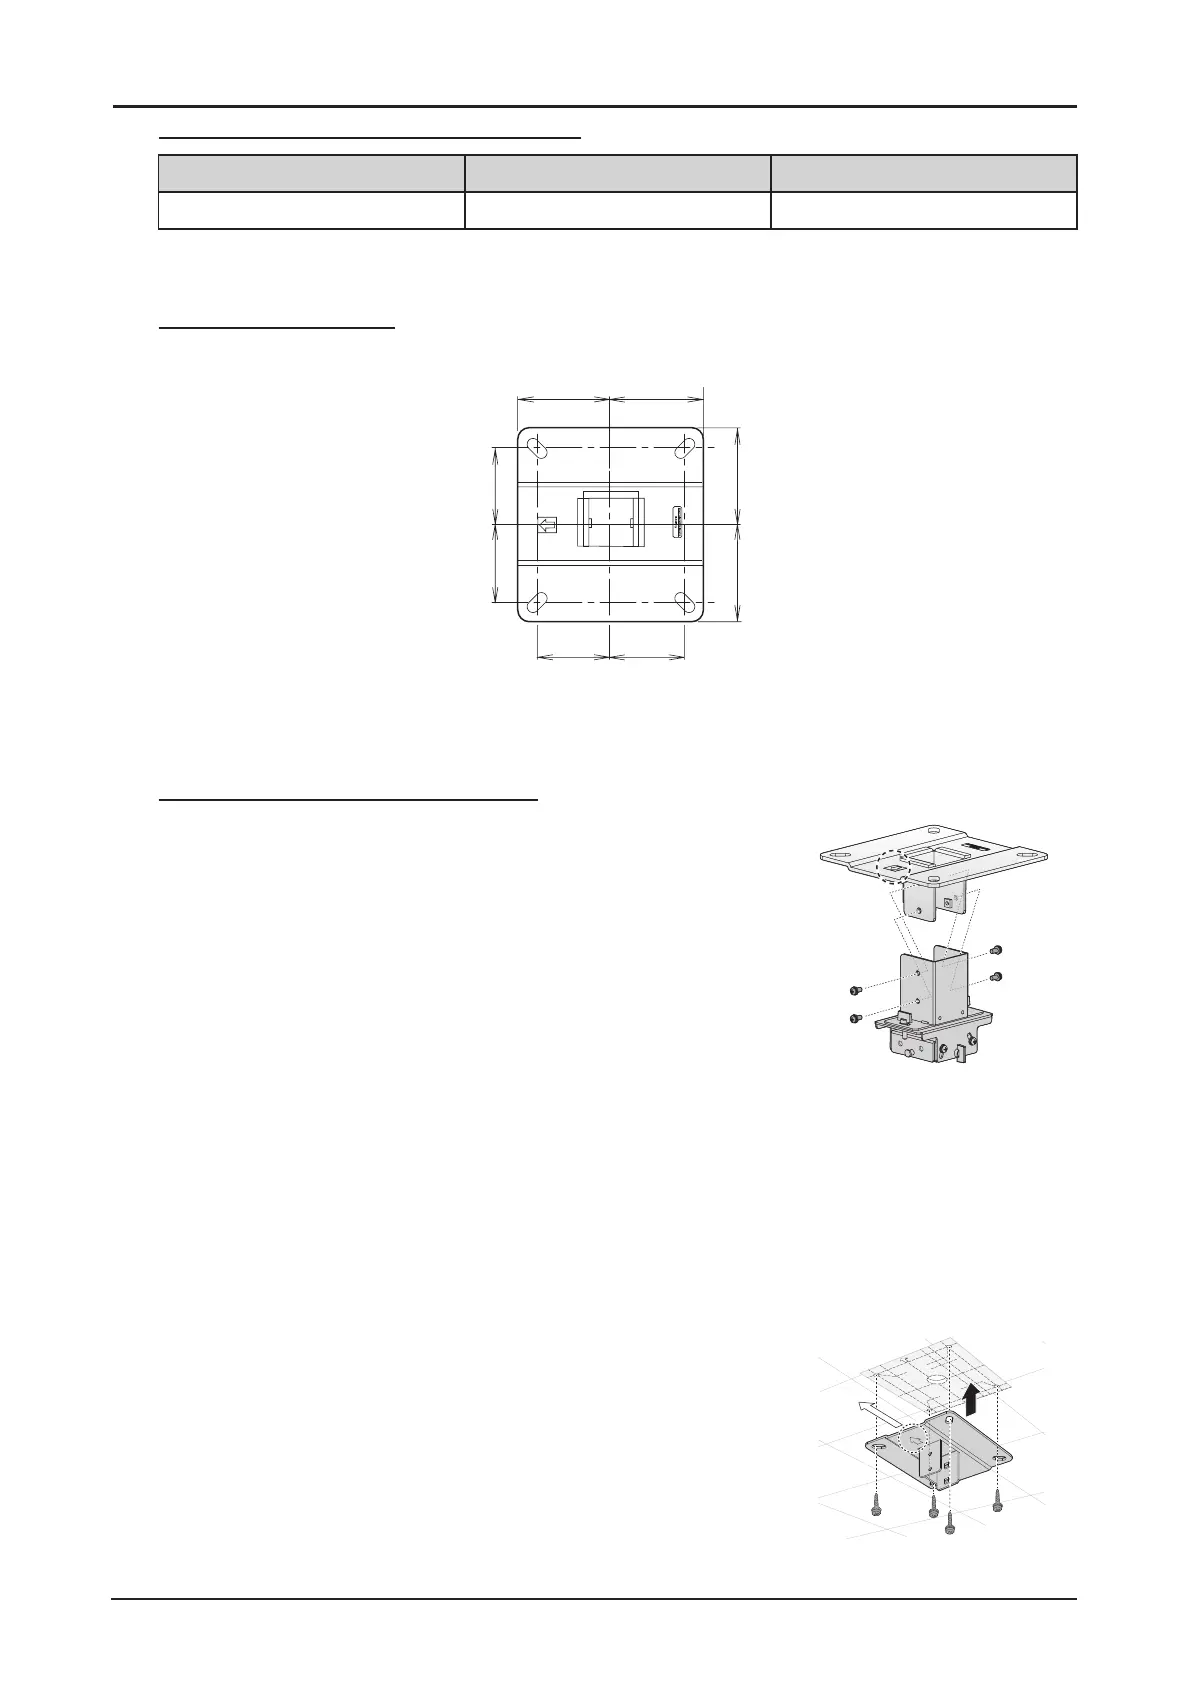
Ceiling-mount Bracket
100 mm
/ 3.9"
100 mm
/ 3.9"
80 mm
/ 3.1"
80 mm
/ 3.1"
100 mm
/ 3.9"
100 mm
/ 3.9"
80 mm
/ 3.1"
80 mm
/ 3.1"
Assembly and Installation
Installation to Flat and Level Ceiling
Preparation:
Remove four M5 screws to separate joint tting from the
ceiling-mount bracket.
Direction to the
screen
1. Make a hole in the ceiling to install the ceiling-mount
bracket and cables.
Caution:
■ Mounting position varies on the projector used. Make
sure that the template sheet (A) corresponding to the
projector is used.
■ When determining the hole position, use the supplied
template sheet (A).
■ The direction to the screen is indicated on the template
sheet (A).
2. Use four M13 screws, to secure the ceiling-mount
bracket to the ceiling with the arrow facing toward the
screen.
■ Before securing the ceiling-mount bracket, be sure
to remove the template sheet (A).
■ The M13 screws are not included in the supplied
parts. Prepare the M13 screws suitable for the
ceiling structure.
Direction to the
screen
 Loading...