To add SNMP targets follow these steps:
Step 1 Select Management > SNMP Settings > SNMPv3 Targets.
Step 2 Click ✚ to add a new row to the SNMPv3 Targets table.
Step 3 Check the check box in the new row and configure the following parameters:
• IP Address — Enter the IPv4 or IPv6 address of the remote SNMP manager to receive the target.
• UDP Port — Enter the UDP port to use for sending SNMPv3 targets. The classical port number is 161.
• Users — Enter the name of the SNMP user to associate with the target. To configure SNMP users, see the SNMPv3
Users, on page 36 page.
Step 4 Click Apply. The user is added to the SNMPv3 Targets list and your changes are saved to the Startup Configuration.
To remove a SMMP target, select the user in the list and click Delete. To edit a SMMP target, select the user
in the list and click Edit.
Note
Plug and Play (PnP)
Cisco Open Plug-n-Play (PnP) agent is a software application running on a Cisco SMB device. When a device
is powered on, the Open Plug-n-Play agent discovery process, which is embedded in the device, attempts to
discover the address of the Open Plug-n-Play server which helps automate the process of deploying and
provisioning new devices into the network. This helps to apply configuration and install the required image
without manual intervention. The Open Plug-n-Play agent uses methods like DHCP, Domain Name System
(DNS), and Cisco cloud service discovery to acquire the desired IP address of the Open Plug-n-Play server.
Simplified deployment process of SMB device automates the following deployment related operational tasks
Step 1 Select Management > PnP Settings.
Step 2 Click Enable, and choose PnP Transport mode. Enter the following information.
DescriptionOption
PnP Transport • Auto: Select this mode to download the image automatically from the PnP server
through the AP.
• Static: Select and specify values in the IP/FQDN and Port fields. Select the required
certificate from the CA Certificate drop-down list. The default port number is 443.
Step 3 Click Apply.
To use a self-signed SSL certificate or in the absence of your certificate in the pre-installed CA list, select User
Specified and click Upload a certificate to upload the certificate you want.
Note
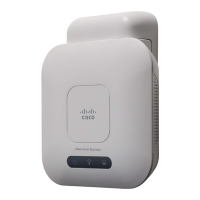
Cisco WAP150 Wireless-AC/N Dual Radio Access Point with PoE / Cisco WAP361 Wireless-AC/N Dual Radio Wall Plate Access Point with PoE
38
System Configuration
Plug and Play (PnP)

 Loading...