MNL-00008 [5] Proprietary and Confidential Page 22 of 55
• 3 Series NeoLux 305 (Broad Band UVB)
• 3 Series NeoLux 305/350 (Broad Band UVB +UVA)
• 3 Series NeoLux 311 (Narrow Band UVB)
• 3 Series NeoLux 311/350 (Narrow Band UVB + UVA)
Note: For setup, installation, electrical specifications and all maintenance and service questions,
please refer to the Installation and Service manual.
Note: This unit comes equipped with a USB connection to be used to transfer and backup patient
data and to grant access to service menus with service USB key.
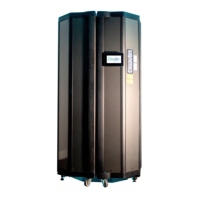
17.2 How to Position the Patient
Enter the unit and close the doors. The patient should be centered within the unit. The torso
should not be closer to any one panel than to another. Standing close to one of the sides will
cause localized streaking or redness.
17.3 Patient Control Buttons
For the patient’s comfort and convenience, there is a lamp start/stop and a fan control button
located within the unit.
• The Yellow lamp button is indicated with the Light icon and is used to start and
pause/stop the treatment.
• The Blue fan button is indicated with a fan icon and is used to turn the fan on or off, as
desired.
17.4 3 Series NeoLux Lamp Removal and Replacement
Lamps may need to be replaced due to burnout or because their energy output has decreased to
the point that you may no longer be receiving an effective treatment.
DO NOT REPLACE LAMPS INDIVIDUALLY. ALL LAMPS SHOULD BE REPLACED
AT THE SAME TIME TO AVOID UNEVEN TREATMENTS OR ERYTHEMA.
PLEASE CONTACT THE DAAVLIN SERVICE DEPARTMENT PRIOR TO
REPLACING YOUR LAMPS TO OBTAIN IMPORTANT INFORMATION ON HOW
THE OUTPUT OF YOUR UNIT WILL BE AFFECTED BY THE CHANGE.
Because of differences between brands, replace lamps with the same brand as originally
installed.
1. Flip the circuit breaker on the device to the OFF position. Then, using a ¼” hex
driver/socket, remove the screw from the bottom of the grid that is in front of the lamp(s)
you want to remove.
2. Lift the grid out of the holes in the bottom lamp plate, pull the bottom of the grid toward
you, then lower the grid out of the holes in the top of the unit and set it aside.
 Loading...