MNL-00008 [5] Proprietary and Confidential Page 25 of 55
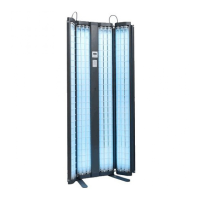
Note: The UV Series sits on top of several castors. If there are no stairs involved, it may
be easier to remove the unit from its box at the earliest opportunity so that you can simply
roll it into position.
2. To unpack the unit, use metal cutters to cut the banding that encircles the package. Use
extreme caution as these bands are under tension and can snap outward when the tension
is released.
3. Next, remove the front cardboard cover. The front cardboard cover will be secured by
several shipping staples. Use a heavy-duty screwdriver to remove each staple.
Note: Exercise caution when removing the staples as they are sharp and can cause injury.
4. Once the front cardboard cover has been removed, carefully pull the device forward on
its castors until it has cleared the box. Take care not to discard the accessory package
which contains important items such as your protective eyewear, user manual, time chart,
and calibration output certificate.
5. Once the unit is in position, remove the shipping bars. A ¾” end wrench will be required
to loosen and remove the bolts that hold the shipping bars in place. There is no further
assembly required other than to plug the unit into the appropriate electrical outlet. If your
device is equipped with an optional platform, place the platform inside the machine once
it has been moved to its final location.
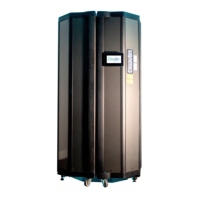
18.5 How to Position the Patient
Enter the unit and close the doors. In order to receive even and effective treatments it is
important to center the patient within the unit. The patient’s torso should not be closer to any
one panel than to another. Standing closer to one of the sides increases the likelihood of localized
streaking and redness.
18.6 UV Series Lamp Removal and Replacement
Lamps may need to be replaced due to burnout or because their energy output has decreased to
the point that you may no longer be receiving an effective treatment.
DO NOT REPLACE LAMPS INDIVIDUALLY. ALL LAMPS SHOULD BE REPLACED
AT THE SAME TIME TO AVOID UNEVEN TREATMENTS OR ERYTHEMA.
PLEASE CONTACT THE DAAVLIN SERVICE DEPARTMENT PRIOR TO
REPLACING YOUR LAMPS TO OBTAIN IMPORTANT INFORMATION ON HOW
THE OUTPUT OF YOUR UNIT WILL BE AFFECTED BY THE CHANGE.
Because of differences between brands, replace lamps with the same brand as originally
installed.
1. Flip the circuit breaker on the device to the OFF position. Then, using a ¼” hex
driver/socket, remove the screw from the bottom of the grid that is in front of the lamp(s)
you want to remove.
2. Lift the grid out of the holes in the bottom lamp plate, pull the bottom of the grid toward
you, then lower the grid out of the holes in the top of the unit and set it aside.
3. Grasp the lamp to be removed with both hands and press down until it clears the top
socket, then remove the lamp. Reverse the process to install lamps and grid.
 Loading...