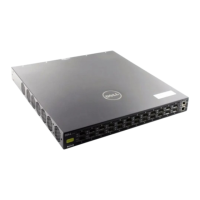
3. Align one of the inner rails to the mounting position on the management switch.
4. Attach the inner rail to the management switch with the three flat head Philips
screws.
5. Repeat previous two steps to attach the inner rail to other side of the
management switch.
6. Check to ensure that the fan module is oriented with the blue label on left side
of fan visible. If not, perform the following:
a. While squeezing the fan module handle, pull the fan module out of the
switch.
b. Rotate the fan module 180°.
c. Insert the fan module back into the switch so that blue label on left side of
fan visible.
7. Lift the management switch to the rack and insert the inner rails into the slide
rails.
8. Slide the management switch on the rails inward until the rail flanges are flush
with the cabinet.
9. Secure the management switch to the front of the cabinet with two screws
(one on each side).
10. Repeat this procedure if required to install an additional management switch.
Configure the management switch
This procedure is used to configure the management switch(es).
Procedure
1. Copy the configuration filename from the USB flash drive using the following
command: enable.
2. Then, copy usb1:<configuration file>startup-config.
Example:
l
localhost> enable
l
locathot> copy usbl
3. Type reload to activate the new configuration.
This causes the switch to reboot.
4. When prompted, System configuration has been modified. Save?,
type no.
5. When prompted, Proceed with reload?, press enter.
6. The switch reboots and you will see a set of reboot messages. It takes about
one minute for the switch to reboot. It returns to the login: prompt if
successful.
7. Check the group of four LEDs on the front of the switch. All four of the LEDS
should be solid green.
Now we will configure a Mgmt IP for each switch.
2U1N Configuration Equipment Installation
Configure the management switch 27
 Loading...