EasyManua.ls Logo

Dell 100 Series User Manual

Dell 100 Series
116 pages
To Next Page IconTo Next Page
To Previous Page IconTo Previous Page
Page #47 background imageLoading...
Page #47 background image
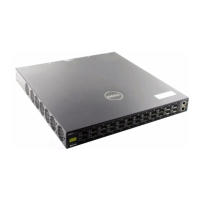
Configure the data switch
This procedure is used to configure the data switch.
Procedure
1. Copy the configuration filename from the USB flash drive using the following
command: enable.
2. Then, copy usb1:<configuration file>startup-config.
Example:
l
localhost> enable
l
locathot> copy usbl
3. Type reload to activate the new configuration.
This causes the switch to reboot.
4. When prompted, System configuration has been modified. Save?,
type no.
5. When prompted, Proceed with reload?, press enter.
6. The switch reboots and you will see a set of reboot messages. It takes about
one minute for the switch to reboot. It returns to the login: prompt if
successful.
7. Check the group of four LEDs on the front of the switch. All four of the LEDS
should be solid green.
Note
Now we will configure a Mgmt IP for each switch.
8. Login to the switch again , this time the password is Scaleio123
9. Type enable and click enter.
10. Type configure terminal (or config) to enter global configuration mode.
11. Type interface management 0 to enter interface configuration mode for the
virtual interface which accesses management port 1 on the currently active
supervisor.
12. Type ip address, followed by the desired address, to assign a virtual IP
address for access to the active management port.
Example, this command assigns the IP address 10.0.2.5 to management port 0:
l
switch(config-if-Ma0)#ip address 10.0.2.5/24
13. Type end twice at the interface configuration and global configuration prompts
to return to Privileged EXEC mode.
14. Type write (or copy running-config startup-config) to save the new
configuration to the startup-config file.
15. Disconnect the service laptop from the console port IOIO.
2U4N Configuration Equipment Installation
Configure the data switch 47

Table of Contents

Question and Answer IconNeed help?

Do you have a question about the Dell 100 Series and is the answer not in the manual?

Dell 100 Series Specifications

General IconGeneral
ProcessorIntel Xeon E3-1200 series
Hard DrivesUp to 2 x 3.5" SATA HDD
StorageSATA
Expansion Slots1 x PCIe x16
NetworkingDual Gigabit Ethernet

Summary

Chapter 1: Before You Begin

Site Requirements

Outlines the essential environmental and facility prerequisites for installation.

Hardware Acclimation Times

Specifies the necessary time for hardware to acclimate to the operating environment.

Installing a 2U1N Configuration in a 40U Cabinet

Details the procedure for physically installing a 2U1N server configuration in a 40U cabinet.

Installing a 2U4N Configuration in a 40U Cabinet

Details the procedure for physically installing a 2U4N server configuration in a 40U cabinet.

Chapter 2: 2U1N Configuration Equipment Installation

2U1N Configuration Installation Guidelines

General guidelines for installing 2U1N components, including minimum and maximum configurations.

Install the 2U1N Server in the Cabinet

Step-by-step instructions for physically installing the 2U1N server into a rack.

Chapter 3: 2U4N Configuration Equipment Installation

Install the 2U4N Server in the Cabinet

Step-by-step instructions for physically installing the 2U4N server into a rack.

Install the Management Server in the Cabinet

Procedure for installing the management server, including verifying mounting kit parts.

Install the Management Switch in the Cabinet

Steps to install the management switch into the server rack cabinet.

Chapter 7: Update the Install Database

Update the Install Database

Procedure for updating the system's installation database after all work is completed.

Related product manuals