30
This section describes how to make prints using the basic functions.
○○○○○○○○○○○○○○○○○○○○○○○○○○○○○○○○○○○○○○○○○○○○○○○○○○○○○○○○○○
Tur
n ON the power. (
aa
aa
a See page 23, “Turning Power ON/OFF”)
• If the power is already ON, press
(ALL CLEAR) key.
○○○○○○○○○○○○○○○○○○○○○○○○○○○○○○○○○○○○○○○○○○○○○○○○○○○○○○○○○○
Load paper. (
a
a
aa
a See page 32, “Loading and Replacing Paper.”)
○○○○○○○○○○○○○○○○○○○○○○○○○○○○○○○○○
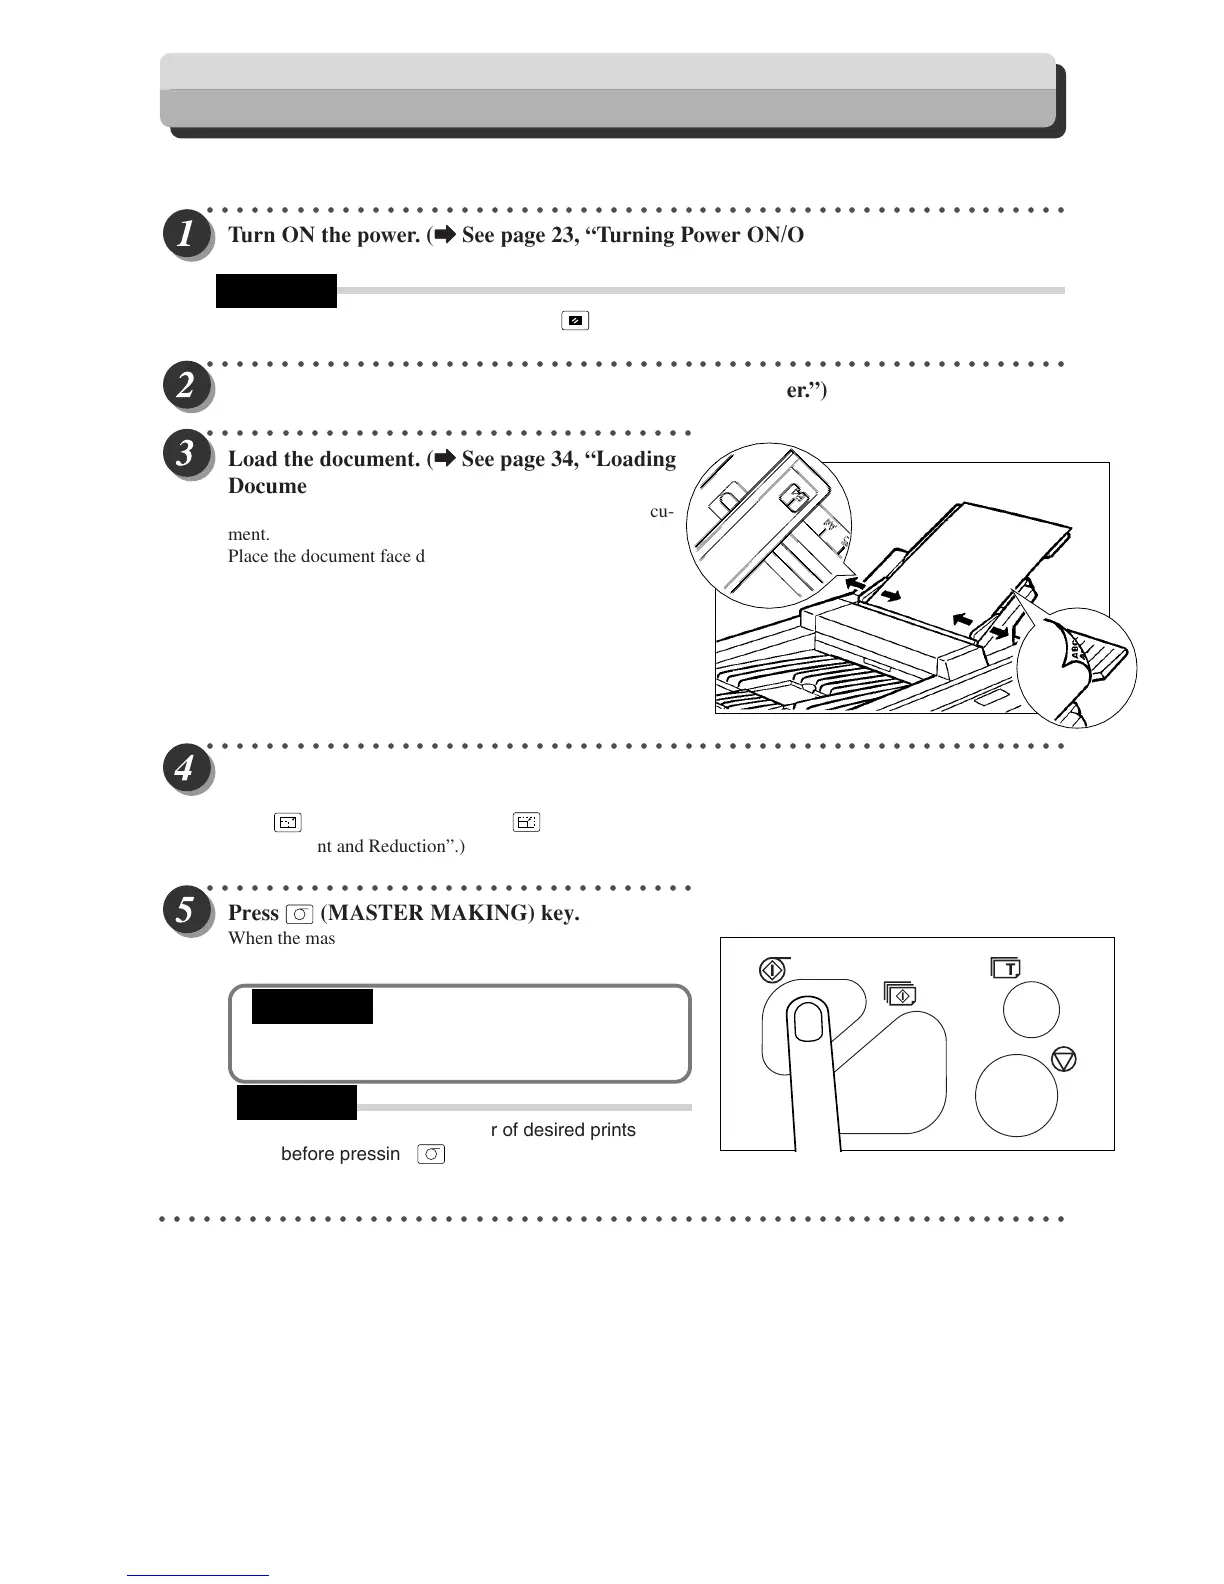
Load the document. (
aa
aa
a See page 34, “Loading
Documents”)
Adjust the slide guide to the marks for the size of the docu-
ment.
Place the document face down in the document tray.
○○○○○○○○○○○○○○○○○○○○○○○○○○○○○○○○○○○○○○○○○○○○○○○○○○○○○○○○○○
Select the zoom ratio.
The zoom ratio is set to 100%.
Press
(ENLARGEMENT)key or
(REDUCTION)key to set a desired zoom ratio. (a See page 36,
“Enlargement and Reduction”.)
○○○○○○○○○○○○○○○○○○○○○○○○○○○○○○○○○
Press
(MASTER MAKING) ke
y.
When the master has been made, one test print is automatically
made.
• The test print is for verification purposes only
and may be fainter than the final print.
• You can enter the number of desired prints
before pressing
(MASTER MAKING) key to
immediately print the required number of copies.
○○○○○○○○○○○○○○○○○○○○○○○○○○○○○○○○○○○○○○○○○○○○○○○○○○○○○○○○○○○○○
Basic Printmaking
IMPORTANT
REFERENCE
REFERENCE
 Loading...