Loading Paper
45
Paper and Other Media
2
7
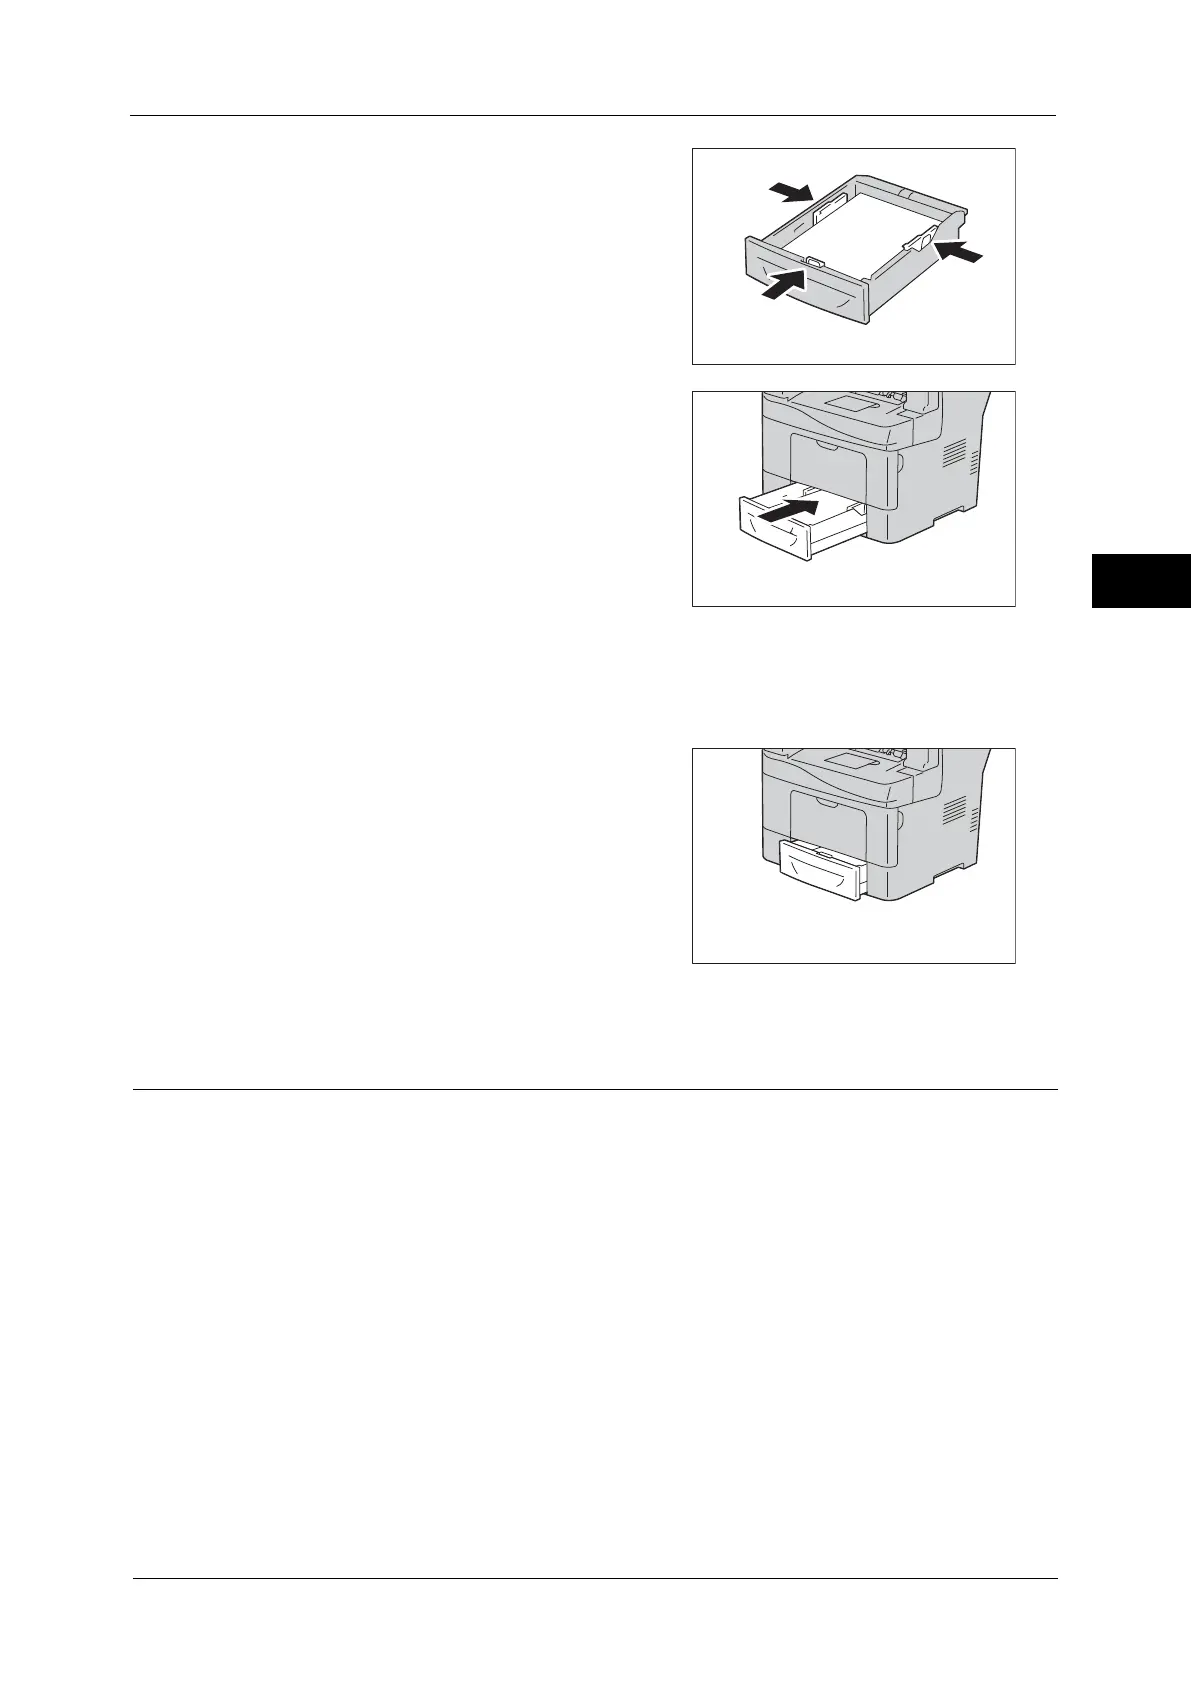
Align the width guides and length guide
against the edges of the paper.
8
After confirming that the guides are securely
adjusted, insert the tray into the machine.
Note • The type of paper in Trays 1 to 4 is normally
set to plain paper. When changing to a
different paper type, change the paper
quality settings to match the type of paper to
be loaded so that you can maintain high
quality printing.
For more information on paper type settings,
refer to "Changing the Paper Settings" (P.50).
• Non-standard size paper can be loaded in
Tray 5 (bypass tray) . When loading non-
standard size paper, you must register the paper size. For information on registering paper sizes,
refer to "Paper Size" (P.120).
Important • When inserting the tray, push it gently. Forcibly pushing the tray in may cause machine malfunction
• If the front side of the tray is extended, the
tray protrudes when it is inserted into the
machine.
Loading Paper in Tray 5 (Bypass Tray)
When printing or copying on a size or type of paper that cannot be set in Trays 1 to 4, use
Tray 5 (bypass tray). The following describes the procedures to load paper in Tray 5. To use
Tray 5 when printing, select Tray 5 and specify the paper type on the [Tray/Output] tab of
the print driver. Also specify the type of paper to be loaded.
Important • To prevent paper jams and erroneous detection of paper loaded in the tray by the machine, do not
take out paper of a package until the tray runs out of paper.
Note • Carefully fan paper before loading it in a tray. Otherwise, the paper may stick together, resulting in
paper jams, or multiple sheets being fed to the machine simultaneously.
 Loading...