Chapter 3: Programming
Concord 4 Installation Manual 65
Sensors menu
Learn sensors
Shortcut: 080
Default: None
The panel comes with factory programmed onboard hardwired zones.
Install 2 kohm, end-of-line (EOL) resistors on all factory programmed
hardwired zones. If you don’t want to install EOL resistors, delete any
unused zones from memory. Sensors must be placed in a partition or sensor
group. To change the sensor group or partition assignment after adding a
sensor or zone, use the Edit sensors menu.
To add (learn) sensors into panel memory:
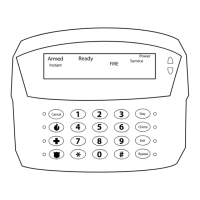
1. With the display showing SENSORS, press # and the display shows
LEARN SENSORS.
2. Press # and the display shows SENSOR PTN 1.
3. Press # to select partition 1 or press 2, 3, 4, 5, or 6, # to select the desired
partition. The display should show SENSOR GROUP 0.
4. Enter the sensor group and press #. (See
Table 24 on page 124 for a
description of all sensor group characteristics.) The display shows TRIP
SENSOR nn, where nn is the displayed (next available) sensor number.
5. To change the displayed sensor number, enter the desired sensor number
and press #. The desired sensor number is displayed.
6. With the desired sensor number displayed, use the guidelines in
Table 12
on page 68 to force the sensor or zone you are adding (learning) into the
panel memory to send a signal to the panel.
7. To add another sensor to the same sensor group and partition, repeat the
process.
8. To add sensors to another sensor group or partition, press * twice and
repeat the process.
The factory default zone inputs and group number are:
Zone input 1 – Group 10 (entry/exit)
Zone input 2 – Group 17 (instant interior follower)
Zone input 3 to Zone input 8 – Group 13 (instant perimeter)
If the panel memory is cleared, all onboard zone factory programming will
be erased.
 Loading...
