GE COMPANY
DIRECTION 5472001-1EN, REVISION 6OPTIMA CT680 SERIES AND OPTIMA CT670 INSTALLATION MANUAL
Chapter 4 - System Covers: Installation & Alignment Page 147
4 - Continuity Checks
1.7 Scan Windows
1.7.1 Installation
Note: The front and rear covers must be installed before installing the scan window.
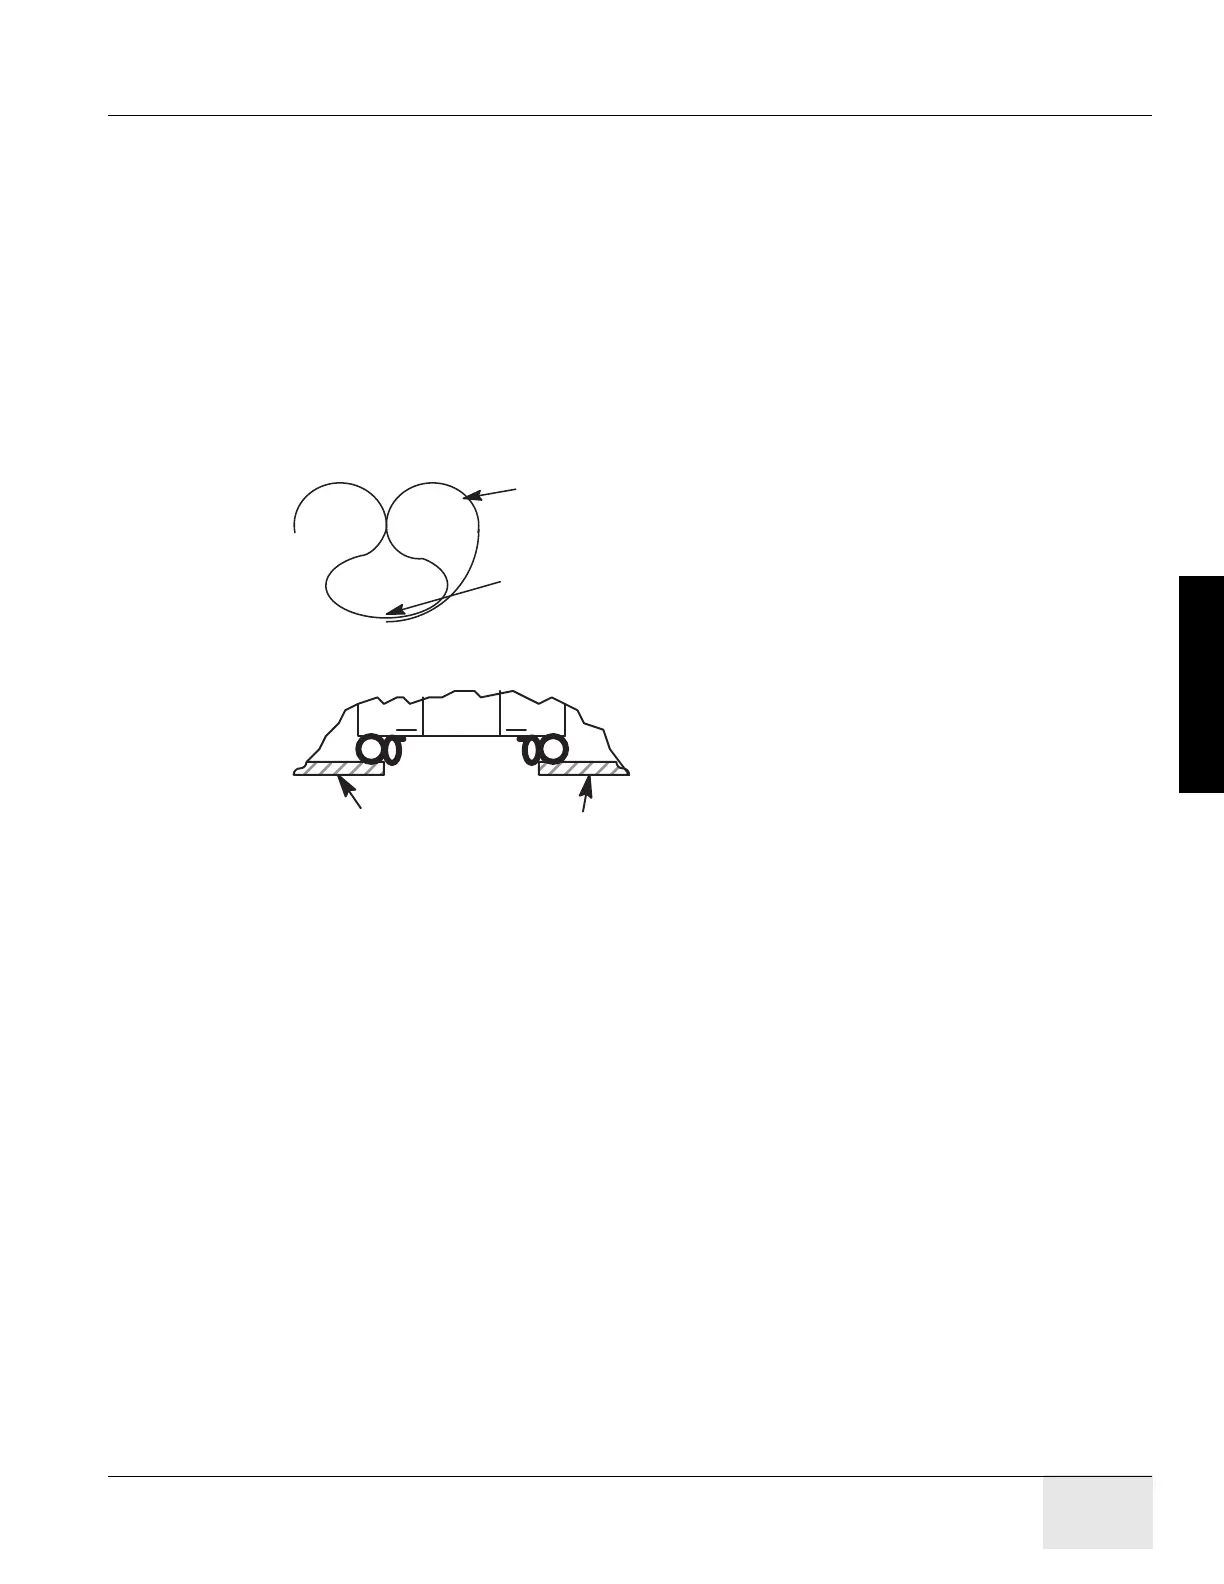
1.) Shape the scan window as shown in Figure 4-6, and nest the scan window at the bottom of
the opening between the front and rear covers, (Figure 4-7) with the rivets in the 6 o’clock
position. Remember the rivets must be in the 12 o’clock position when the mylar window is fully
installed.
2.) After you complete the initial seating of scan window, let the window slowly unfold, and work
both sides of the window into position, starting at the bottom and finishing at the top.
3.) Make sure you position the window with the rivets at the 12 o’clock position, and the mylar
window slit at either the 3 or 9 o’clock position.
Figure 4-6 Install Scan Window
Figure 4-7 Scan Window Nested Between Front and Rear Cover
Scan Window Prior
To Installation
Fold scan window with rivets at
6 o'clock position, so rivets rise
to 12 o'clock when unfolded.